
Attention! The bulbs of the lamps remain hot for about 20 minutes after switching off the lighting fixtures. Make sure the components are completely cool before starting work.
Front direction/side lights
1. Remove the plastic push-buttons and pull back the wheel arch locker panel to access the rear turn signal/parking light assembly.
Note. Turn the front wheels in the appropriate direction to ensure proper working space.
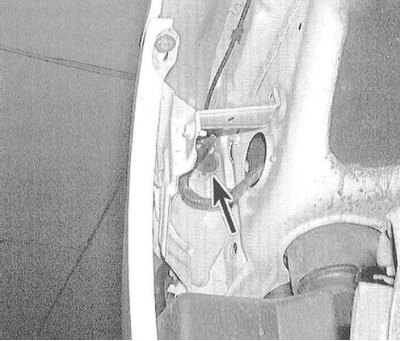
2. Turn the lamp socket counterclockwise and remove it from the lamp assembly housing.
3. Pull the bulb out of the socket.
4. Installation is carried out in the reverse order.
Front parking lights
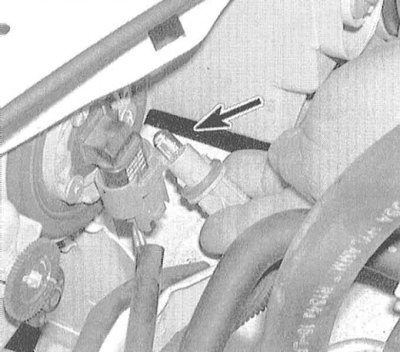
1. Open the hood and turn the front parking light bulb socket 1/4 turn counterclockwise to remove it from the light assembly.
2. Pull the bulb out of the socket.
3. Installation is carried out in the reverse order.
Rear direction indicators and brake/position lights (rear combination lamp body section)
Note. On the models under consideration, the rear combination lamps consist of two sections, one of which is installed on the body, the second - on the trunk lid. The body section includes direction indicators and brake/tail lights. The section mounted on the luggage compartment lid consists of reversing lights and, again, rear dimensions.
1. Open the trunk lid, release the latches and fold back the luggage compartment carpet to expose the rear combination lamp bodywork lamps.
2. Turn the appropriate lamp socket 1/8 turn counterclockwise and remove it from the lamp assembly housing. Pull to release the bulb from the socket. Installation is in the reverse order.
Reversing lights and taillights (tailgate-mounted rear combination lamp section)
1. Open the luggage compartment lid. Turn the appropriate bulb holder 1/8 turn counterclockwise and remove it from the lamp assembly.
2. Pull to release the bulb from the socket.
3. Installation is carried out in the reverse order.
Upper level stop lights
1. Open the trunk lid. The high-level stop lamp socket is tucked into the rear shelf from below.
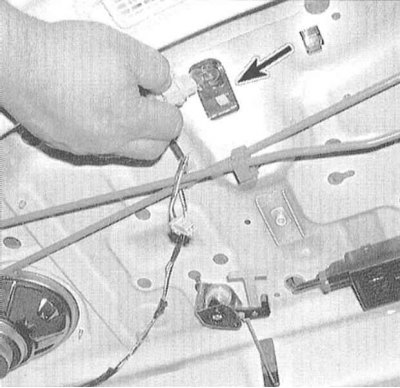
2. Turn the cartridge counterclockwise and remove it from the shelf panel. Pull to release the bulb from the socket.
3. Installation is carried out in the reverse order.
License plate light
1. Release the license plate light assembly from the body panel.
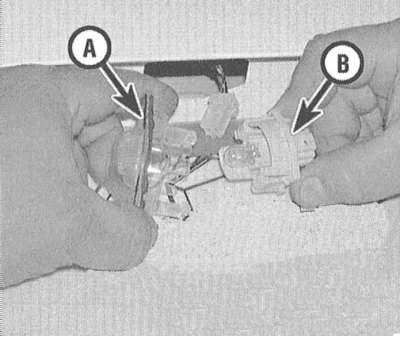
2. After releasing the clips, separate the lamp lens from the lamp socket assembly.
3. Pull to release the bulb from the socket.
4. Installation is carried out in the reverse order.
Instrument lighting
1. Remove the instrument cluster (see Section Removal and installation of a combination of devices).
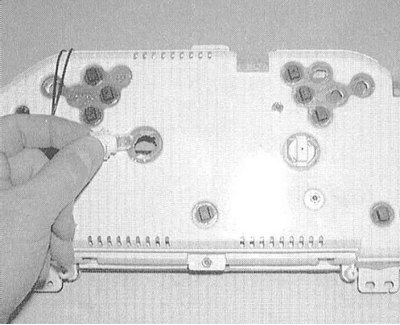
2. Turn the bulb holder counterclockwise and remove it from the instrument cluster assembly.
3. Pull to release the bulb from the socket.
4. Installation is carried out in the reverse order.
Note. Make sure that replacement lamps match the performance of the failed ones. Meter illumination lamps have a higher power rating than indicator lamps.
Indoor lights (saloon, luggage compartment)
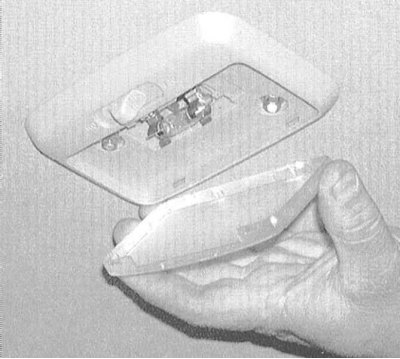
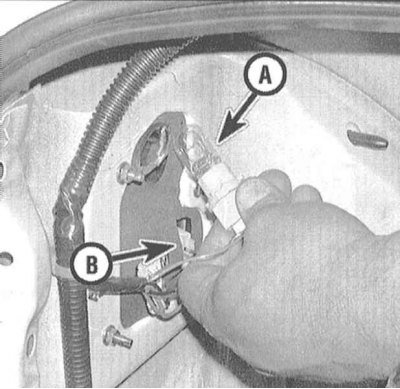
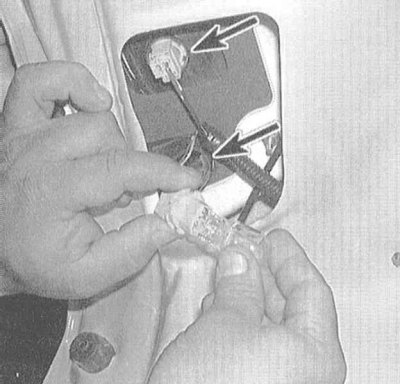
1. Bulb replacement of all interior lights is done in the same manner. First of all, you should remove the assembly cover by gently prying it with a sting of a small screwdriver pasted over with adhesive tape (see accompanying illustration).
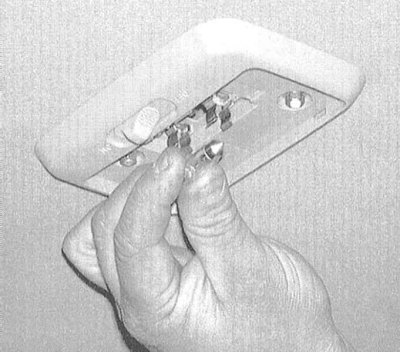
2. Release the lamp from the socket spring terminals (see accompanying illustration). If it becomes necessary to pry off the lamp, move the lever only under the edges of the lamp bases to avoid damage to the bulb.
3. Installation is carried out in the reverse order.