Attention:
- Before replacing the lamp, make sure the light switches are turned off.
- To avoid burns, replace lamps only after they have cooled down.
- Halogen lamps require special care. Do not touch the glass part of the lamp with your hands, hold the lamp only by the plastic or metal housing.
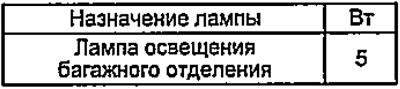
- Use only lamps of the specified wattages (see table).
- Hold the lamp only by its plastic or metal body. Do not touch the glass part of the lamp with bare hands, dirty gloves, etc. If the glass surface of the lamp is dirty, it must be cleaned with alcohol, dried thoroughly, and only then installed.
- Installing a lamp with a power higher than the rated power will damage the diffuser.
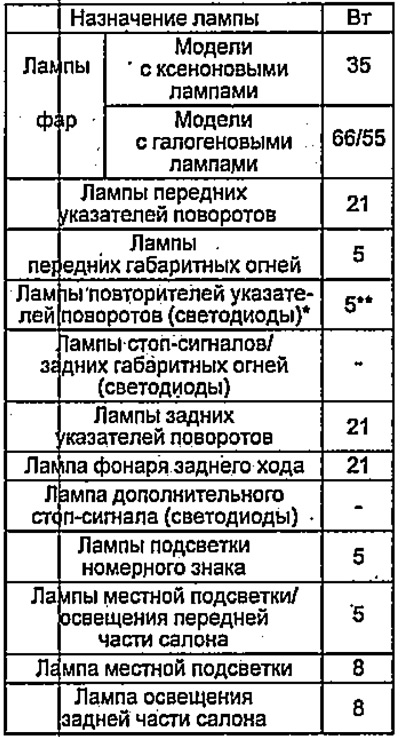
Table. Fuses in the engine compartment block of the car.
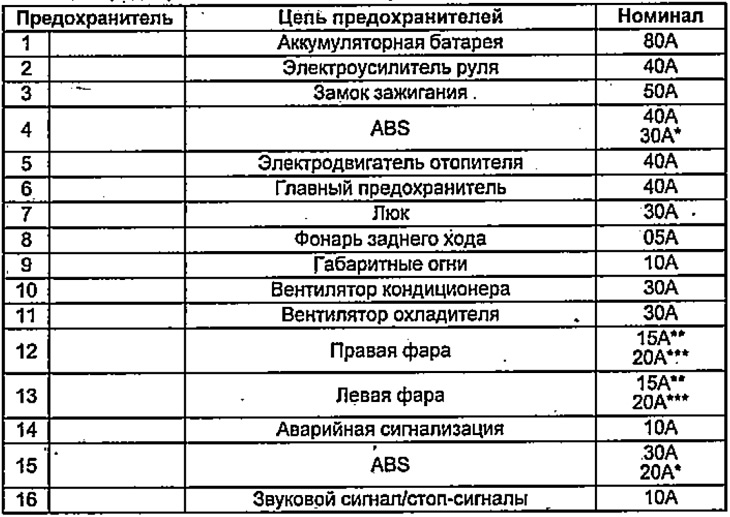
* Equipment 1.5S, 1.3S.
**models with xenon lamps.
*** models with halogen lamps.
* - models with side rear-view mirrors with built-in turn signal repeaters.
** - models with side rear-view mirrors without built-in turn signal repeaters.
1. Headlight bulbs.
a) Turn the steering wheel all the way to the left if you are changing the right headlight bulbs, or to the right if you are changing the left headlight bulbs.
b) Remove the rivet and slide the fender liner.
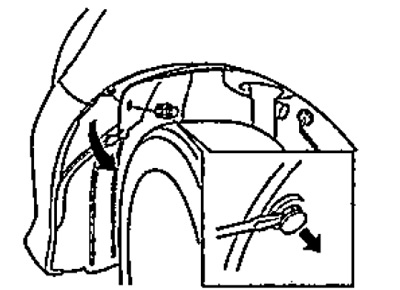
c) Disconnect the connector and remove the rubber seal.
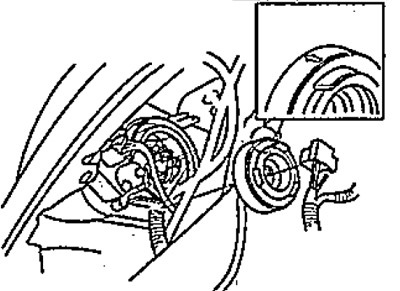
d) Disconnect the retaining spring and remove the lamp.
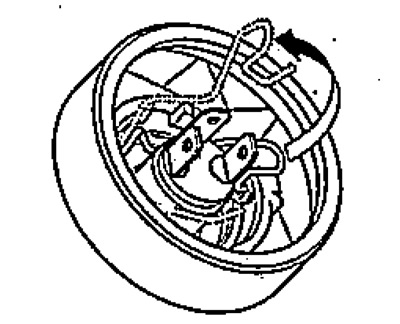
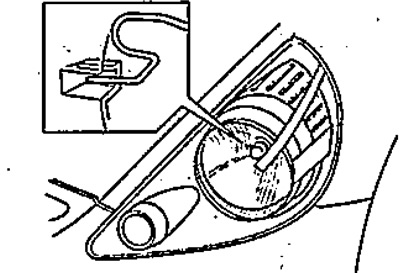
d) Replace the bulb. The fixation of the bulb with the spring can be checked from the outside of the headlight.
2. Replacing the front turn signal bulbs.
(Left side)
a) Remove the two rivets and remove the protective cover.
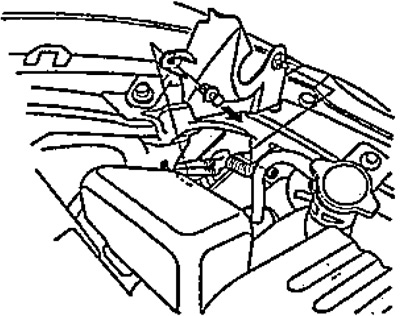
b) Turn the connector together with the lamp to the left and pull it towards you.
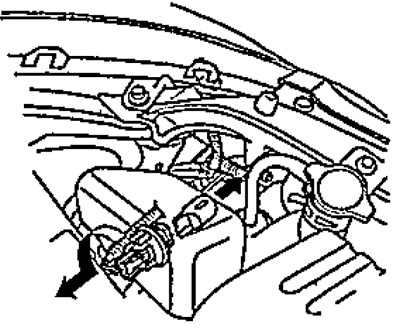
c) Replace the lamp.
(Right side)
a) Remove the rivet and remove the washer reservoir neck.
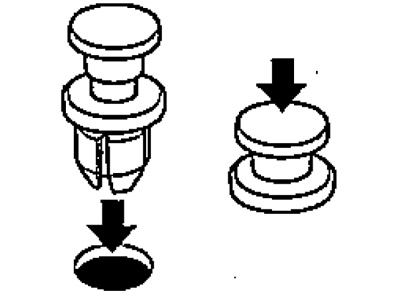
b) Turn the connector together with the lamp to the left and pull it towards you.
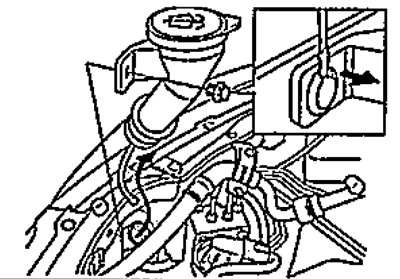
c) Replace the lamp.
3. Replacing the front parking light bulbs.
a) Turn the steering wheel all the way to the left if you are changing the right headlight bulbs, or to the right if you are changing the left headlight bulbs.
b) Remove the rivet and slide the fender liner.
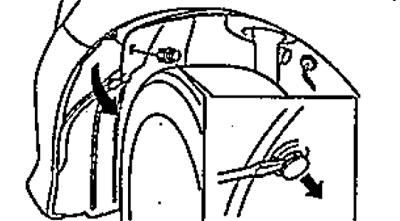
c) Turn the connector together with the lamp to the left and pull it towards you.
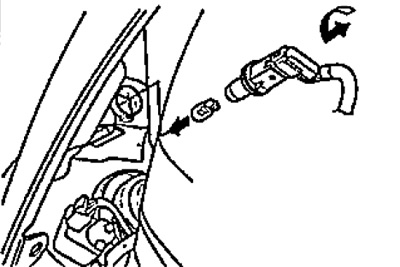
Table. Fuses in the passenger compartment block on the driver's side.
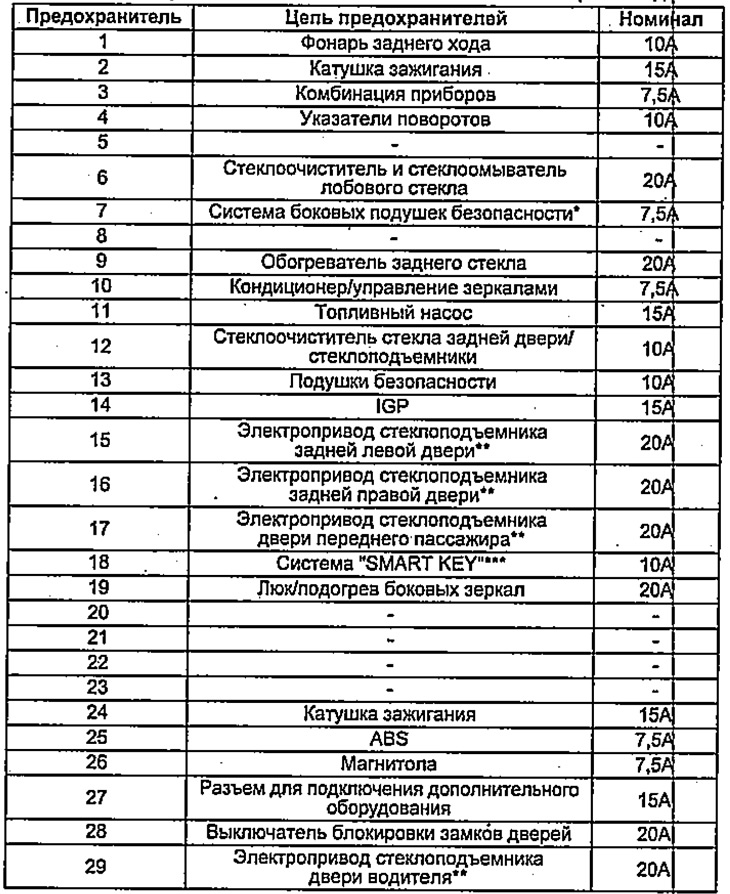
* - models with side airbags.
** - models with electric windows.
*** - models with the "SMARTKEY" system.
d) Replace the lamp.
4. Replacing the turn signal repeater bulbs.
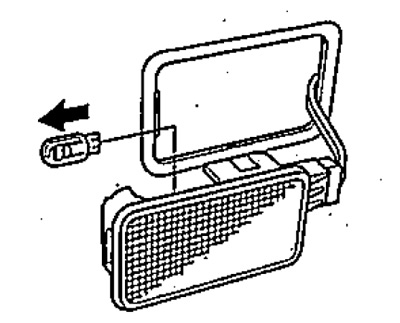
a) Remove the repeater as shown in the figure.
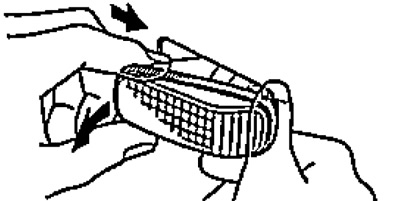
b) Turn the lamp together with the connector counterclockwise.
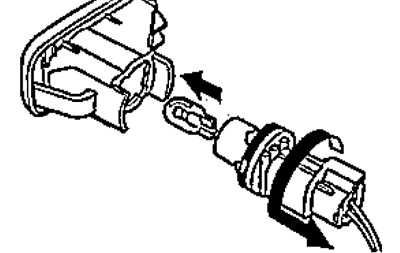
c) Remove the lamp from the socket and replace it.
5. Replacing the rear side light and rear turn signal bulbs.
a) Open the cover in the luggage compartment trim.
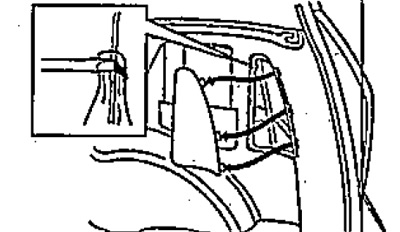
b) Turn the lamp together with the connector counterclockwise.
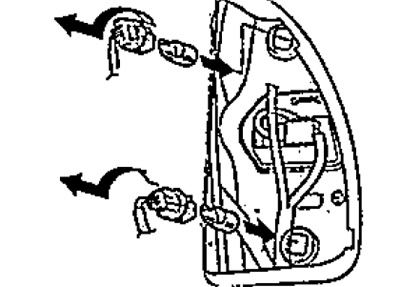
c) Remove the lamp from the socket and replace it.
6. Replacing license plate light bulbs
a) Remove the diffuser as shown in the figure.
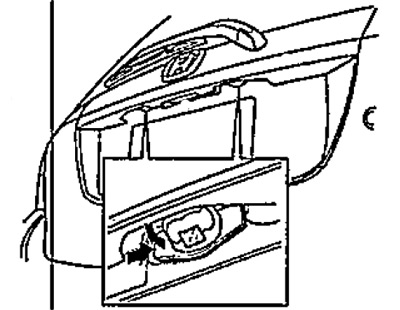
b) Turn the lamp together with the connector counterclockwise.
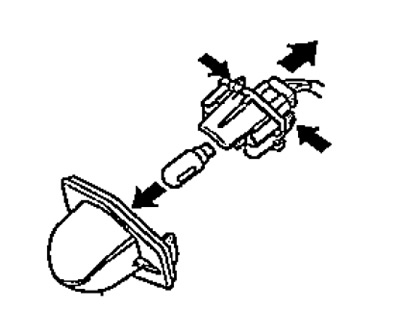
c) Remove the lamp from the socket and replace it.
7. Replacement of front passenger compartment lighting lamps and local lighting.
a) Using a flat-head screwdriver, remove the diffuser as shown in the figure.
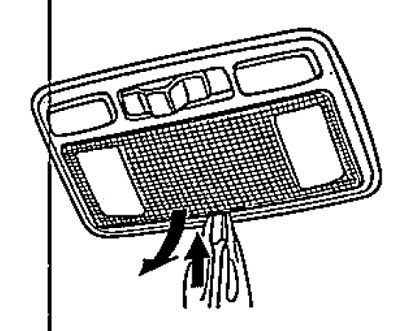
b) Replace the lamp.
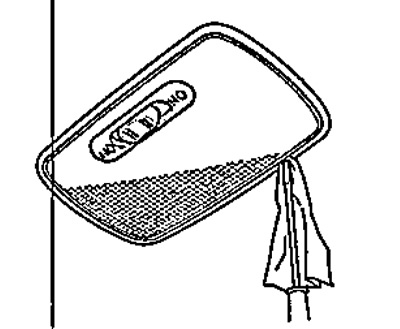
8. Replacing the rear interior lighting bulbs.
a) Using a flat-head screwdriver, remove the diffuser as shown in the figure.
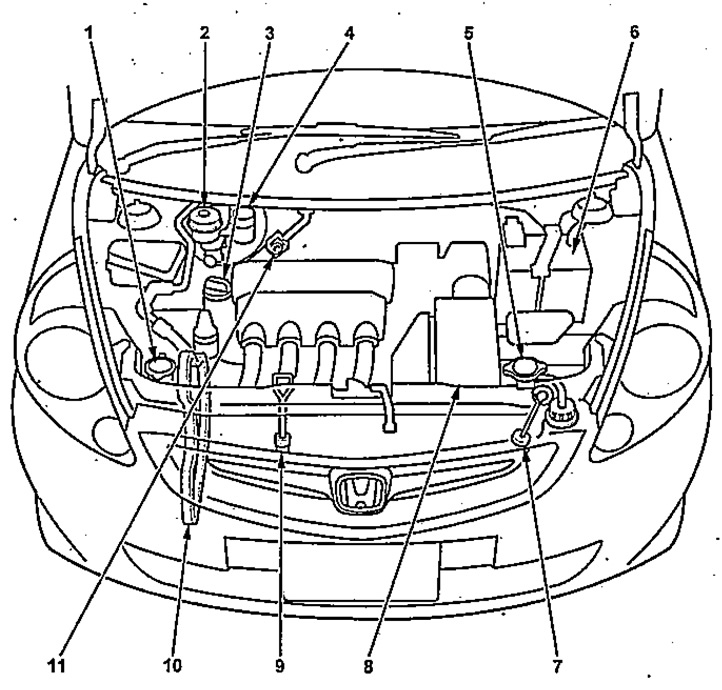
Location of components in the engine compartment.
1 - washer reservoir,
2 - brake system reservoir,
3 - oil filler neck,
4 - clutch release hydraulic fluid reservoir (models with manual transmission),
5 - radiator cap,
6 - battery,
7 - automatic transmission fluid level dipstick (models with automatic transmission),
8 - air filter,
9 - engine oil level dipstick,
10 - timing belt cover,
11 - inspection window of the air conditioning system.
b) Replace the lamp.
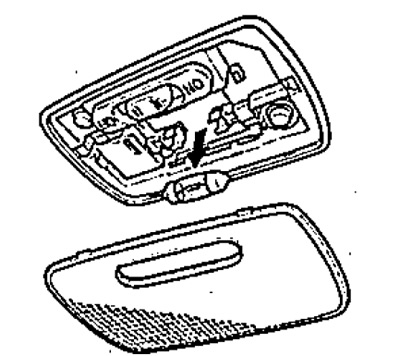
9. Replacing the luggage compartment light bulb.
a) Using a flat-head screwdriver, remove the diffuser as shown in the figure.
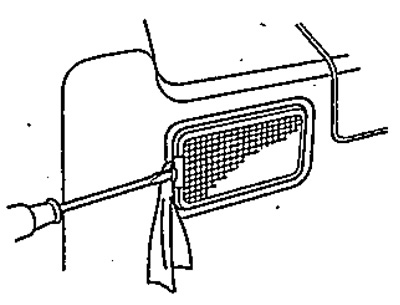
b) Replace the lamp.