
1. Disconnect the cable from the negative pole of the battery.
2. Carefully drain the refrigerant.
3. Disconnect the line and hose from the evaporator joints on the heat shield in the engine compartment. Hold the joints with a second wrench. Cover the joints immediately to prevent dirt from entering.
4. Remove the glove box and frame.
5. On the evaporator, loosen and remove the two sealing strips.
6. Disconnect the thermostat wire.
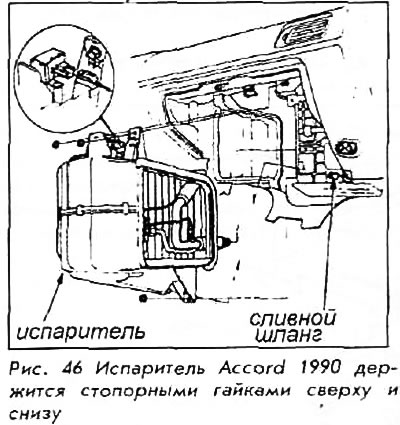
7. Remove the drain hose. Loosen the lock nuts and remove the evaporator.
8. Remove the evaporator sensor from the plates.
9. Loosen the screws and remove the clips holding the shroud.
10. Carefully separate the shroud halves and remove the covers.
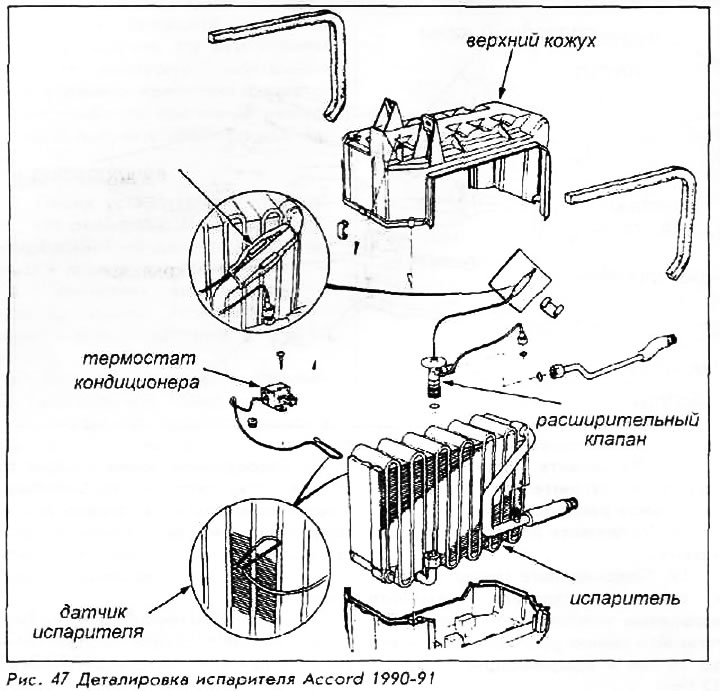
11. Remove the expansion valve if necessary.
For installation:
12. Assemble casing components as needed. Install the capillary tube in its original location. Assemble the top and bottom halves of the casing, making sure there are no gaps in the casing.
13. Install the evaporator assembly and tighten the lock nuts. Remember to connect the evaporator drain hose and route it outside the vehicle.
14. Connect the thermostat wire.
15. Install sealing strips.
16. Install the glove box and frame.
17. Connect the receiver line and suction pipe. Use new 'O' rings before assembly. Tighten the receiver-drier line to 17 Nm and the suction line to 32 Nm.
18. Fill with coolant and bleed air from the system. Start the system and check for leaks.