
1. Disconnect the cable from the negative pole of the battery.
2. Carefully drain coolant.
3. Disconnect the line and hose from the evaporator joints on the heat-insulating partition in the engine compartment. Support the joints with a second wrench. Cover joints immediately to prevent dirt from entering
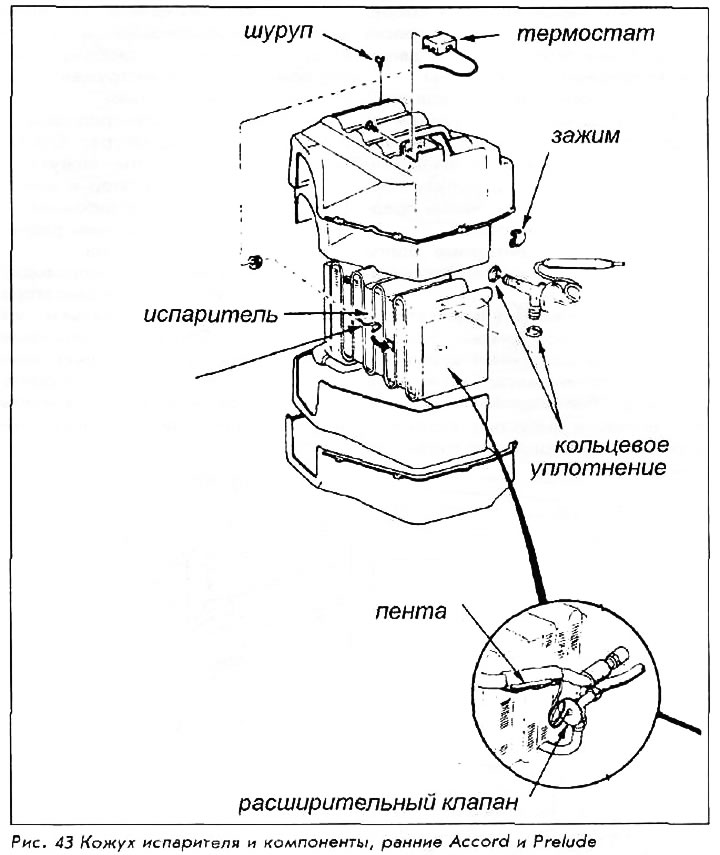
4. Remove the sealing rings from the thermal barrier.
5. Remove the glove box and its frame.
6. In the evaporator, loosen the right sealing strip; move it to the left.
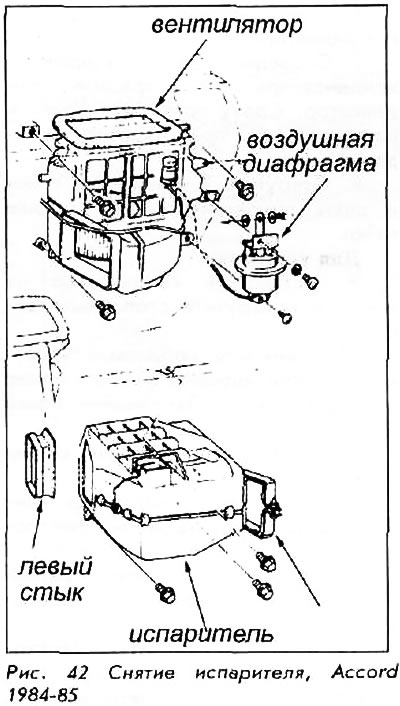
7. Remove the screw from the air diaphragm. Leave the diaphragm attached to the handle. Loosen the fan mounting bolts and remove the fan assembly.
8. Remove the left sealing strip and disconnect the electrical wiring. Unscrew 3 bolts and remove the evaporator.
9. To disassemble the shroud, unscrew the screw and remove the clips from the shroud.
10. Gently slide the compartment halves apart to access the capillary tube. Remove the thermostat tube from the evaporator plates.
11. Separate the casing halves. Remove the cover.
12. Remove expansion valve if necessary.
For installation:
13. Assemble casing components as needed. Install the capillary tube in its original location. Assemble the top and bottom halves of the casing, making sure there are no gaps in the casing.
14. Install the evaporator assembly and tighten the mounting bolts. Remember to connect the evaporator drain hose and route it outside the vehicle.
15. Install the left sealing strip. Connect electrical wiring.
16. Install the fan assembly.
17. Install the air diaphragm and tighten the screw.
18. Install the right sealing strip and tighten it. Double check each strip; they should be even and well tightened.
19. Install glove box and frame.
20. Install sealing rings. Lubricate contact surfaces before installation.
21. Attach the line and hose to the evaporator joints. Replace O-rings with new ones. Tighten the dryer line to 16 Nm and the suction hose to 30 Nm.
22. Fill with coolant and bleed air from the system. Start the system and check for leaks.