
Attention.
- If you clamp the steering gear in a vice to perform the work, place wooden blocks underneath. If you squeeze the hollow central part of the steering gear too hard, it may become deformed.
- Store removed components away from dust.
1. Cut the cover clamp at the place shown in the figure and remove it.
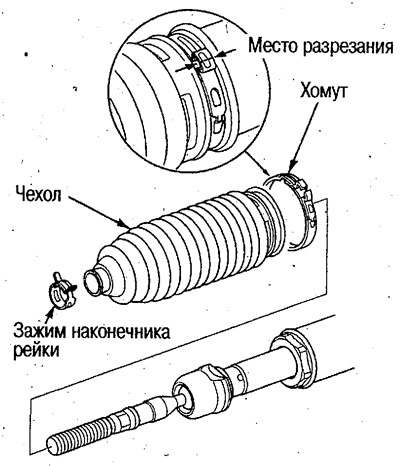
2. Remove the rack tip clamp and remove the cover (from the left and right sides).
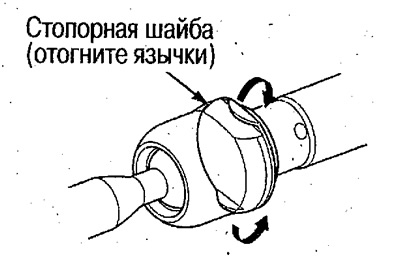
3. Bend back the tabs of the lock washer.
4. Remove the tips from the rack.
To loosen the tip, hold the rack with a key by the edges on the end of the rack (on the right side only).
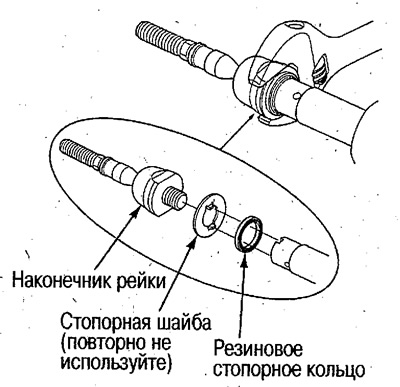
Caution: When unscrewing the tip with keys, do not scratch the rubbing surfaces of the rack.
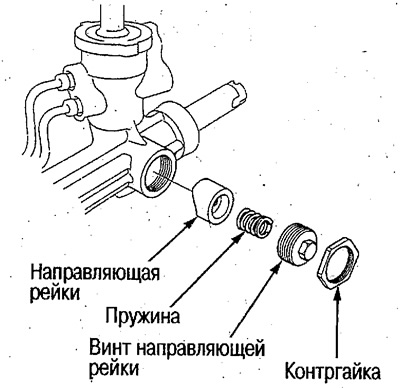
5. Loosen the lock nut and unscrew the guide rack screw.
6. Disconnect the cylinder tubes A and B.
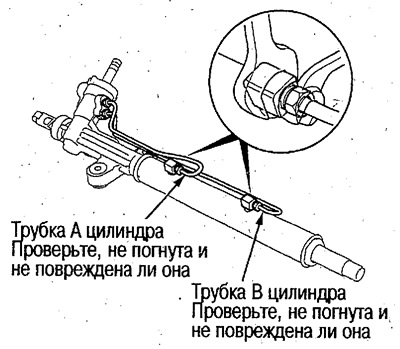
Caution: When loosening the union nuts on the cylinder side, hold the cylinder nipple with a wrench.
7. Remove fluid from the steering gear through the tube fittings by slowly moving the rack.
8. Clamp the steering gear in a vice and use a special tool to loosen the upper valve plug.
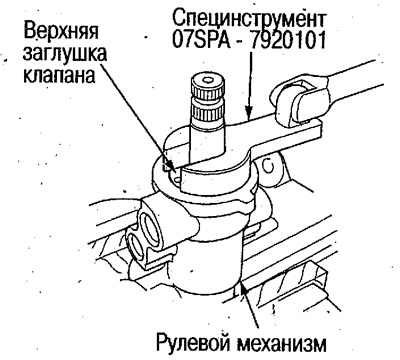
9. Unscrew the top valve plug.
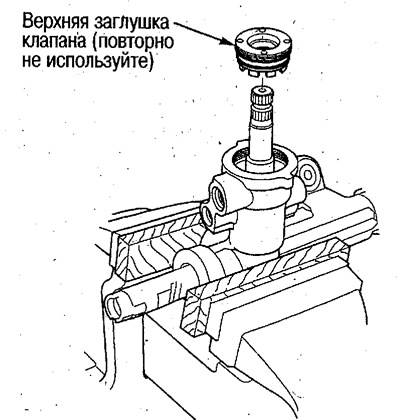
10. Remove the pinion/clutch shaft.
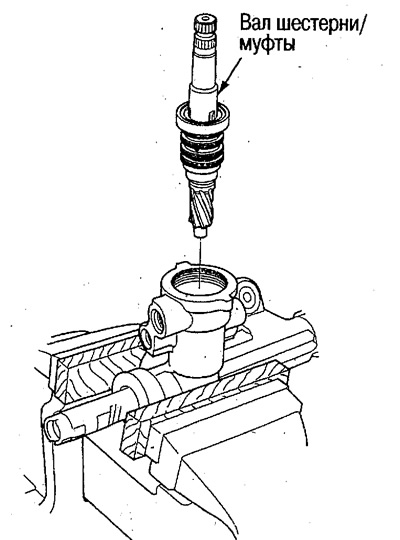
11. Check the coupling sealing ring for delamination and replace the ring if necessary.
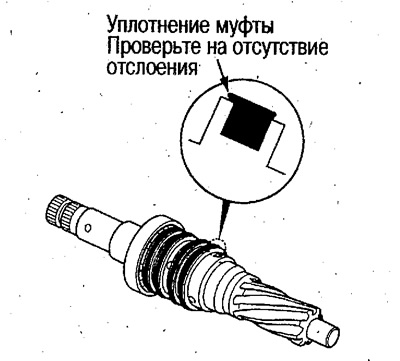
12. Check the outer surface of the coupling for damage and replace the pinion/coupling shaft if necessary.
The coupling is not removable from the shaft. If any component is damaged, replace the pinion shaft/coupling assembly.
13. Cut the coupling sealing rings with a knife and remove them.
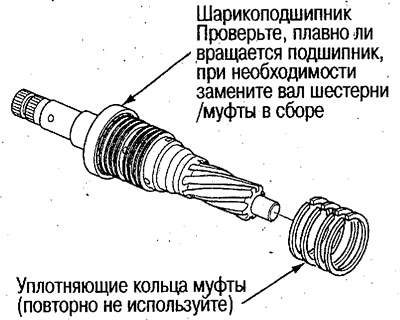
Caution: Do not damage the outer surface of the coupling and grooves.
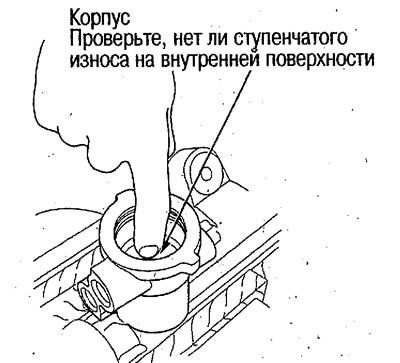
14. If you feel stepped wear inside the housing with your finger, replace the steering gear housing.
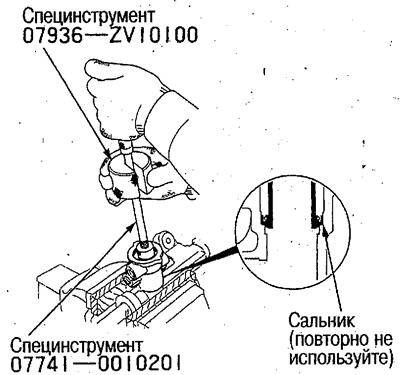
15. Using a special tool, remove the oil seal.
16. Using a drill, drill a hole 3 mm in diameter and 2.5-3.0 mm deep at the punching location.
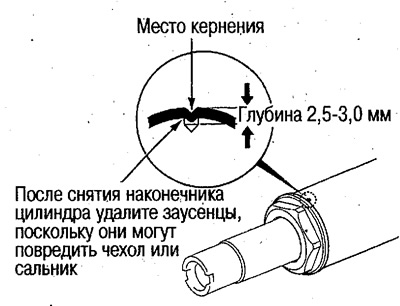
Be careful not to let any chips get into the steering mechanism.
After removing the tip, remove any burrs left by drilling as they may damage the seal and boot during installation.
17. Secure the steering gear housing to the workbench, loosen and unscrew the cylinder tip.
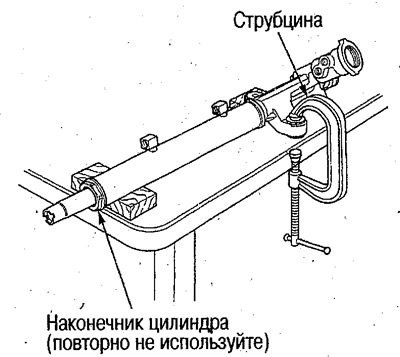
18. Using a suitable bearing puller, install the steering gear onto the press.
19. Lower the steering rack completely and insert the extension (length 350 mm) with a socket wrench, the outer diameter of which is approximately equal to the diameter of the rack, into the steering gear.
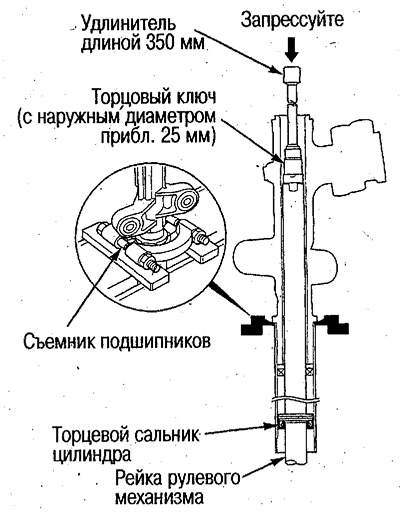
Caution: Since a lot of force will be applied to the rack, make sure of the following before pressing it out:
- Is the extension cord tilted?;
- Are the press adapter and extension centres offset?;
- Is the steering gear securely fastened with a puller?.
20. Press the rail through the extension with a press and push it down.
When the cylinder end seal comes out, the rack will fall down, so hold it.
21. Remove the steering gear from the press and remove the rack with the end bearing.
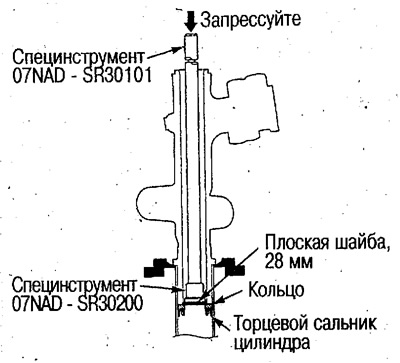
22. Insert a 28mm diameter flat washer (Part # 94103-10400) into the steering gear and place it on the backup ring.
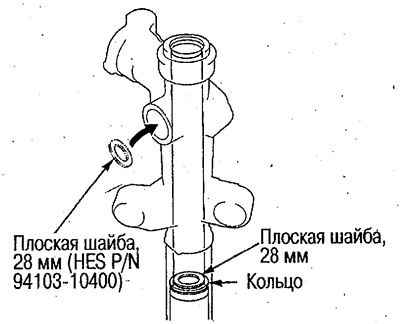
23. Insert the special tool into the steering gear and install it on the press in the same way as in step 18.
24. Press the flat washer (using a special tool) and press out the backup ring together with the cylinder end seal.
Attention:
- If the special tool is tilted, the inner wall of the cylinder may be scratched, so adjust the position of the special tool if necessary.
- Be sure to use a press to remove it. If you hit the special tool, the backup ring may burst and it will be impossible to remove the end seal.
25. Cut the seal ring and piston O-ring with a knife and remove them.
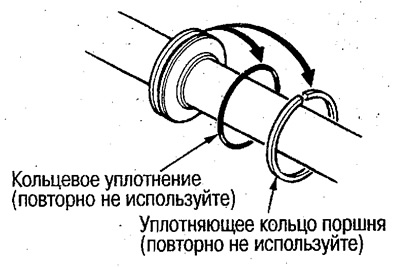
Caution: Do not damage the piston surface or ring grooves.
[Original article on the website: HondaBook.ru]