
2. Place the sealing ring and O-ring on the conical section of the special tool and slide them to the end of the special tool.
- To ensure that the sealing ring stretches evenly, apply pressure evenly around the entire circumference.
- Do not stretch the sealing ring more than necessary.
3. Align the end of the special tool with the groove and push the O-ring into the groove.
4. Push the sealing ring and install it onto the O-ring.
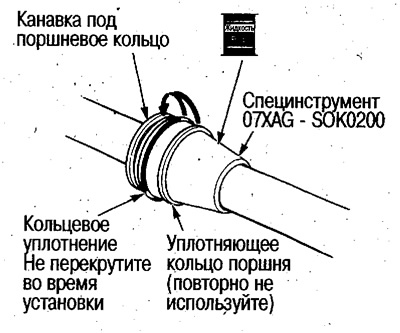
After installation, press the sealing ring evenly with your hand.
5. Apply power steering fluid to the inside surface of the special tool.
6. By shaking the special tool in different directions, evenly compress the sealing ring with the conical section of the special tool.
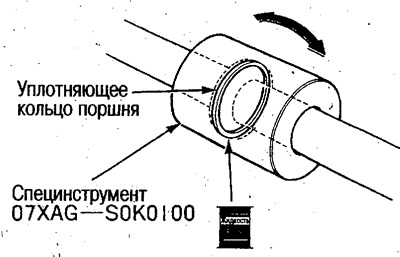
Do not damage the sealing ring with a special tool.
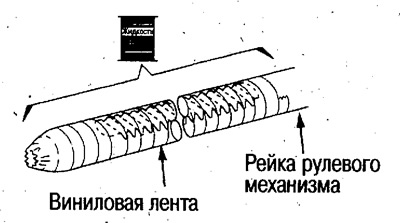
7. Wrap the toothed section of the rack with vinyl tape in two or three layers and apply steering fluid on top.
8. Apply power steering fluid to the inner surface of the end ring and install the seal together with the backup ring onto the rack.
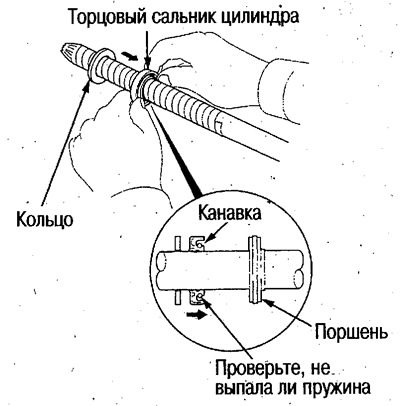
Direct the side of the seal with the groove towards the piston.
Do not damage the seal with the rack teeth.
To prevent components from falling, apply grease to the backup ring on the seal side and press it against the seal.
9. Remove the vinyl tape from the rail.
10. Before installing the rack into the steering gear housing, mark the extension with size A.
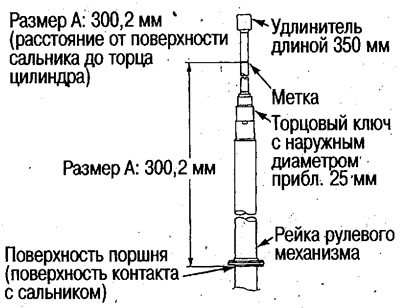
To press in the seal, use an extension bar approximately 350 mm long and a socket wrench with an outside diameter approximately equal to the diameter of the rack.
11. Remove any burrs inside the cylinder that remain after punching.
If the burrs are not completely removed, the seal may be damaged.
Be careful not to let metal filings get into the cylinder.
12. Cover the threads in the cylinder with vinyl tape and apply power steering fluid.
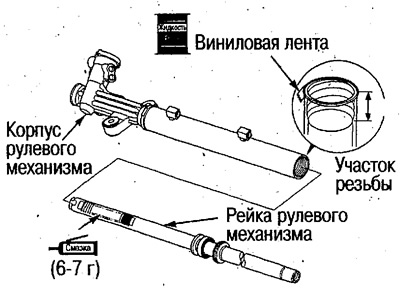
13. Apply grease to the teeth and insert the rack into the steering gear housing.
Caution: Do not scratch the inner surface of the cylinder with the end of the rack.
14. Place the steering gear housing with the rack inserted on the press, with the cylinder side facing up.
15. Install the extension with the mark on the end of the rail.
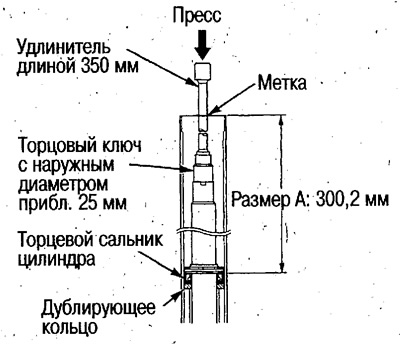
16. Press the rack so that the mark coincides with the end of the cylinder.
Caution: Do not press in beyond the mark as this may damage the seal.
17. Remove the steering gear from the press.
18. Slowly return the steering rack to the center position, wrap the left end of the rack (cylinder side) with vinyl tape and apply steering fluid to it.
Do not extend the rack more than necessary, as the rack teeth may damage the already pressed seal.
19. Apply power steering fluid to the cylinder end seal and install it on the rack.
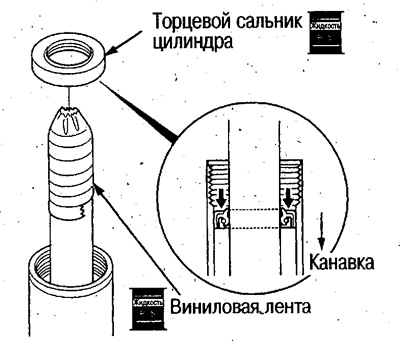
Direct the oil seal groove towards the piston.
20. Remove the vinyl tape.
Caution: Do not leave the vinyl tape on the rail, remove it completely.
21. Lightly press the seal into the cylinder by hand and use the special tool to press the seal to a depth of approximately 60 mm.
Place a mark on the special tool at a distance of 60 mm from its end.
The seal must completely come off the vinyl tape covering the threaded section of the cylinder.
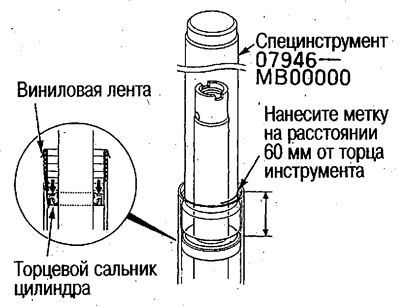
22. Remove the vinyl tape from the threaded area of the cylinder.
Caution: Remove vinyl tape completely.
23. Place the steering gear housing on the workbench and secure it to the flange.
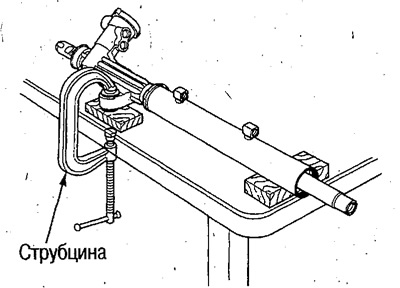
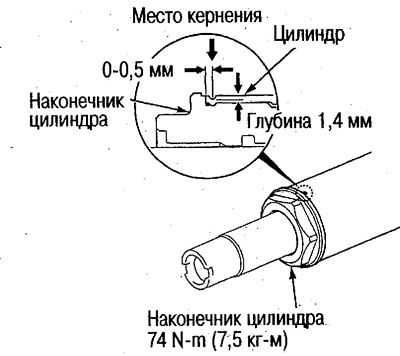
24. Screw in the cylinder tip and tighten to the required torque.
25. Fix the tip by punching from the side opposite to the previous punching location.
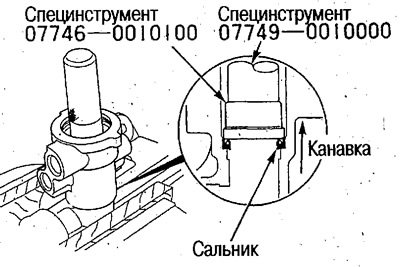
26. Fill the seal with grease and, using a special tool, drive it into the steering gear housing, directing the side with the groove towards the valve.
27. Apply power steering fluid to the special tool and install the sealing ring onto it by stretching the conical section.
Do not leave the rings in a stretched state for a long time, but install them on the coupling immediately.
28. Align the end of the special tool with the groove on the coupling and install the sealing ring into the groove.
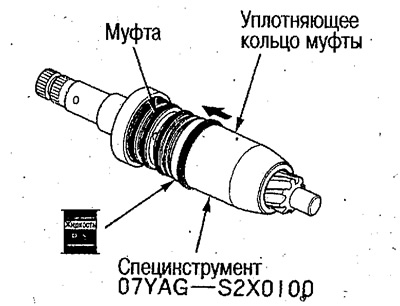
Install the remaining rings in the same way.
After installation, press the sealing ring evenly with your hand.
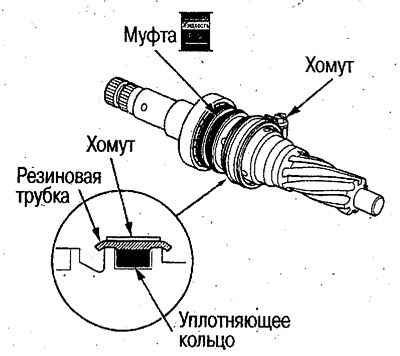
29. Wrap the sealing ring with a rubber tube and tighten it with a clamp.
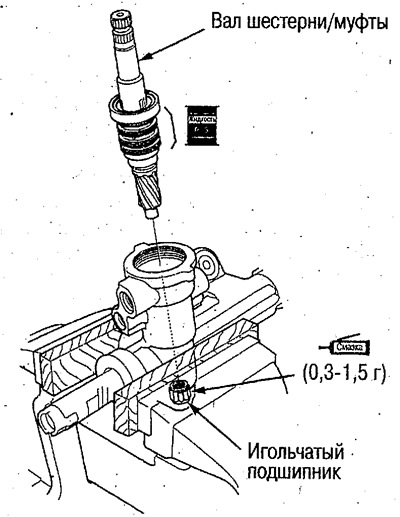
30. Pack grease into the needle bearing located in the steering gear housing.
31. Apply power steering fluid to the clutch seal rings and insert the pinion/clutch shaft into the steering gear housing.
32. Secure the steering gear in a vice.
33. Pack grease into the seal installed in the upper valve plug and apply power steering fluid to the O-ring.
34. Press the upper valve plug into the steering gear housing by hand.
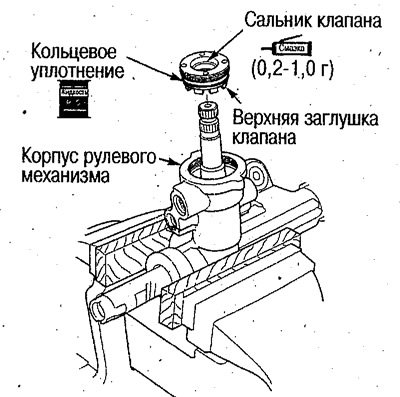
35. Using the special tool, tighten the plug to the required torque.
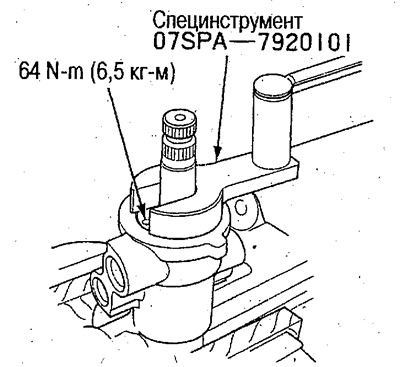
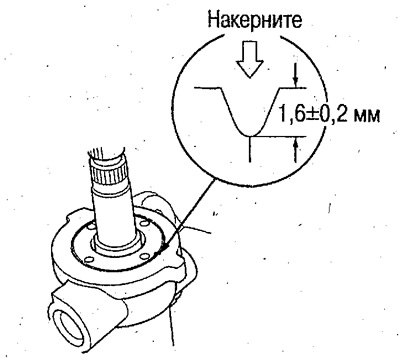
36. Stake the top plug at the border with the body.
37. Install tubes A and B and tighten the union nuts to the required torque.
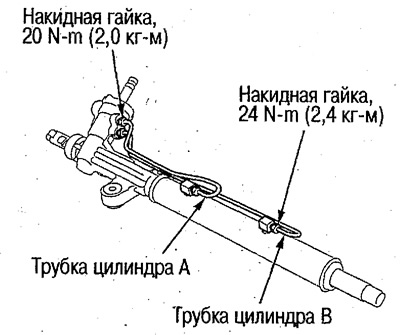
Thoroughly clean the connection areas from dirt.
38. Apply grease to the rubbing surfaces of the guide rack and install it into the steering gear housing.
39. Completely remove the old sealant from the guide screw and apply new sealant to the threaded area.
40. Install the spring and tighten the screw.
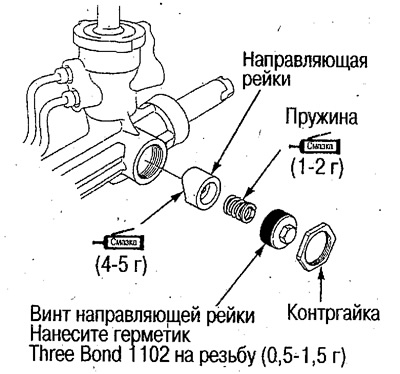
41. Tighten the lock nut by hand and adjust the guide rack (see above).
42. Install the rubber retaining ring onto the end of the rack.
43. Align the tabs of the lock washer with the grooves on the end of the rack and install it on the rack.
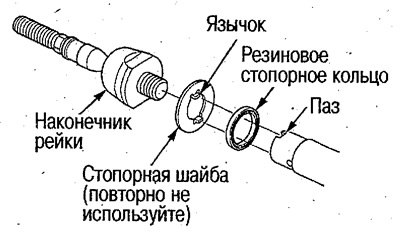
44. Screw the rack end into the steering rack, holding the lock washer with your hand.
45. Tighten the rack tip to the required torque, holding the end of the rack with a wrench.
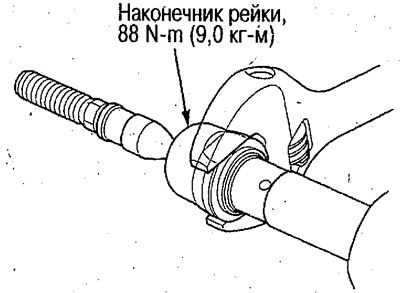
Caution: Do not damage the friction surfaces of the rack when tightening.
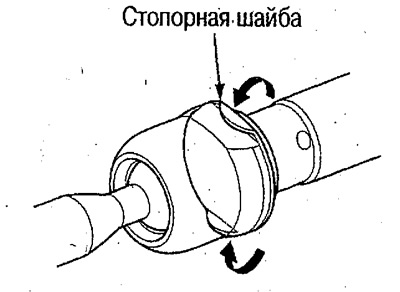
46. Bend the lock washer towards the rack tip.
47. Apply lubricant to the surface of the tip that rubs against the cover.
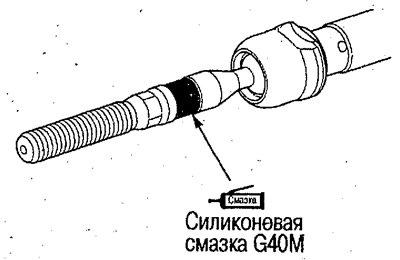
48. Install the cover.
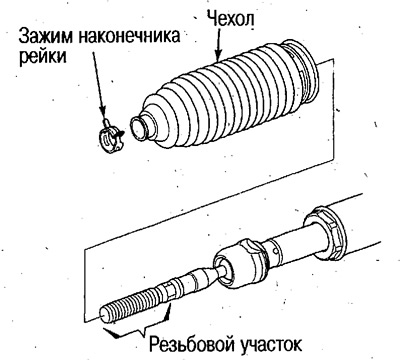
- If any grease gets on the threads, remove it.
- If the cover is reused, check for damage or deformation and replace if necessary.
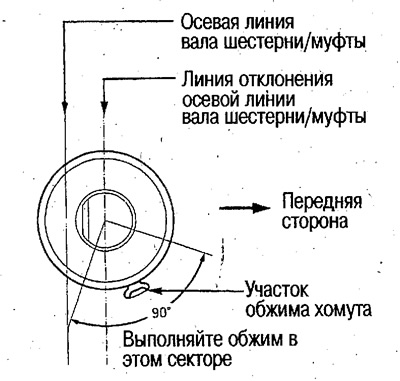
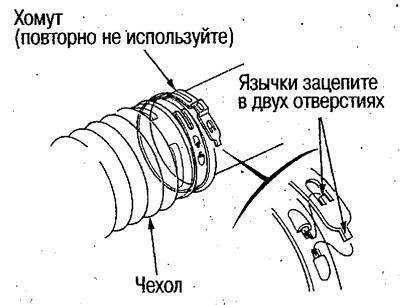
49. Install the boot clamp as shown in the figure.
 |
 |
50. Crimp the cover clamp.
Use pliers to squeeze the clamping area so that a gap of 1.8-2.3 mm remains.
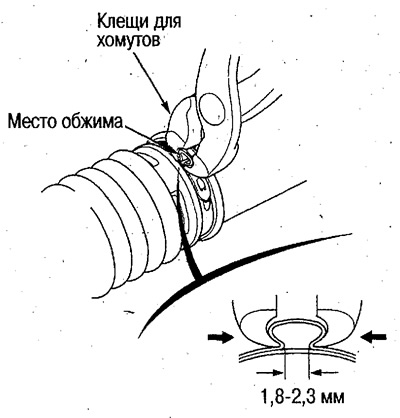
51. Move the rack left and right and make sure that the covers are not twisted or compressed.