


Headlights, exterior and interior lighting of the car Honda Avancier 1


Checking the Light/Turn Signal/Fog Light Switch
1. Remove the steering column cover ( see chapter Steering ). 2. Disconnect the 16-pin light switch connector. 3. Unscrew 2 screws, slide the switch to the side and remove it. 4. Check the conductivity between the...
1. Remove the steering column cover ( see chapter Steering ). 2. Disconnect the 16-pin light switch connector. 3. Unscrew 2 screws, slide the switch to the side and remove it. 4. Check the conductivity between the...
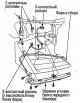
Headlights — replacement, fault diagnostics
Replacing lamps 1. Remove the front bumper ( see chapter Body ). 2. Disconnect all headlight connectors. 3. Remove the 3 mounting screws and remove the headlight assembly and the upper corner beam of the front bumper....
Replacing lamps 1. Remove the front bumper ( see chapter Body ). 2. Disconnect all headlight connectors. 3. Remove the 3 mounting screws and remove the headlight assembly and the upper corner beam of the front bumper....
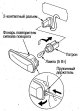
Turn signal repeaters — replacement
1. Press the spring retainer in the recess and remove the turn signal repeater. To avoid damaging the wing, lay down a cloth. 2. Disconnect the 2-pin connector and remove the turn signal repeater.
1. Press the spring retainer in the recess and remove the turn signal repeater. To avoid damaging the wing, lay down a cloth. 2. Disconnect the 2-pin connector and remove the turn signal repeater.
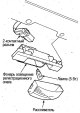
Registration plate lighting lamp
Replacing lamps Caution: Do not scratch the bumper during work. 1. Slide the license plate light and remove it from the rear bumper. 2. Disconnect the 2-pin connector. If only the lamp is being replaced, remove the...
Replacing lamps Caution: Do not scratch the bumper during work. 1. Slide the license plate light and remove it from the rear bumper. 2. Disconnect the 2-pin connector. If only the lamp is being replaced, remove the...

Rear combination lights
Replacing lamps 1. Open the back door. 2. Remove the bumper technological cover ( see chapter Body ). 3. Disconnect all connectors from the flashlight. 4. Loosen the mounting nuts and remove the rear combination light....
Replacing lamps 1. Open the back door. 2. Remove the bumper technological cover ( see chapter Body ). 3. Disconnect all connectors from the flashlight. 4. Loosen the mounting nuts and remove the rear combination light....

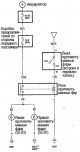
Fog lights
Electrical diagram Replacing lamps 1. Fold the front side of the inner wing ( see chapter Body ). 2. Remove the mounting bolt from the fog light. 3. Disconnect the 3-pin connector and remove the fog lamp. 4. Release the...
Electrical diagram Replacing lamps 1. Fold the front side of the inner wing ( see chapter Body ). 2. Remove the mounting bolt from the fog light. 3. Disconnect the 3-pin connector and remove the fog lamp. 4. Release the...

Brake lights
Electrical diagram Replacing the upper brake light bulb 1. Open the back door. 2. Remove the rear door lower trim ( see chapter Body ). 3. Disconnect the 2-pin connector from the high brake light. 4. Remove the screw...
Electrical diagram Replacing the upper brake light bulb 1. Open the back door. 2. Remove the rear door lower trim ( see chapter Body ). 3. Disconnect the 2-pin connector from the high brake light. 4. Remove the screw...
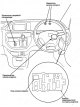
Turn signal/hazard warning lights
Component Locations Electrical diagram Checking the hazard warning switch 1. Remove the center panel (see chapter Body). 2. Disconnect the 10-pin connector from the switch. 3. Press out the switch from the back of the...
Component Locations Electrical diagram Checking the hazard warning switch 1. Remove the center panel (see chapter Body). 2. Disconnect the 10-pin connector from the switch. 3. Press out the switch from the back of the...

Interior lighting lamps
Component Locations Electrical diagram Checking the local/interior lighting lamp 1. Turn the ignition key to the OFF position and remove the lenses. 2. Remove the ceiling console assembly ( see chapter Body ). 3....
Component Locations Electrical diagram Checking the local/interior lighting lamp 1. Turn the ignition key to the OFF position and remove the lenses. 2. Remove the ceiling console assembly ( see chapter Body ). 3....

Interior lighting control system
Component Locations Electrical diagram Checking the Ignition Switch/Ignition Switch Backlight 1. Remove the lower instrument panel cover ( see chapter Body ). 2. Remove the steering column cover ( see chapter Steering...
Component Locations Electrical diagram Checking the Ignition Switch/Ignition Switch Backlight 1. Remove the lower instrument panel cover ( see chapter Body ). 2. Remove the steering column cover ( see chapter Steering...
This section is available on: russian, bulgarian, belarusian, ukrainian, serbian, croatian, romanian, polish, slovak, hungarian
Link in different formats to this section
TEXTHTMLBB Code
- General information
- Controls and instruments
- User manual
- Power unit
- Engine maintenance
- Engine repair
- Cooling system
- Engine management
- Power and exhaust system
- Transmission
- Automatic gearbox
- Drive shafts and differential
- Chassis and running gear
- Steering
- Car suspension
- Brake system
- Body and interior
- Doors, locks and windows
- Interior (internal elements)
- Exterior (external elements)
- Air conditioner
- Electrical equipment
- Power devices
- Equipment and devices
- Headlights and lighting
- Electrical circuits