
Contents: 2WD models ⇊ 4WD models ⇊
1. On 2WD models, move the steering rack all the way to the left, and on 4WD models, move it all the way to the right.
2. Place the steering gear on the rear beam.
2WD models
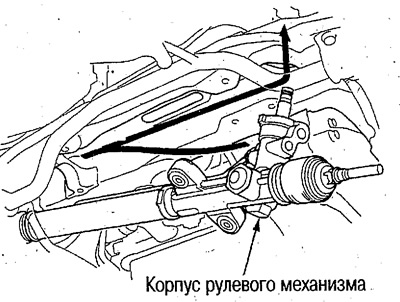
Place the left end of the fully left slatted rail on the left side of the rear beam.
Move the steering gear housing to the left until it stops.
Place the right end on the rear beam.
Pull the valve block side to the right and place the steering gear on the rear beam.
4WD models
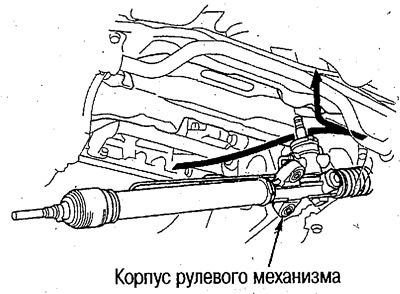
Place the right end of the fully right-sliding rail on the right side of the rear beam.
Move the steering gear housing to the right until it stops.
Place the left tip on the rear beam.
Pull the valve block side to the left and place the steering gear on the rear beam.
3. Install the pinion/clutch shaft rubber bushing onto the valve block.
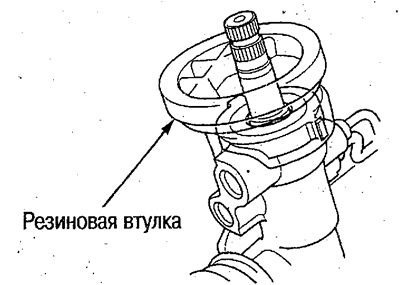
4. Move the steering gear to the installation location. Make sure that the rubber bushing does not fall out and that the tubes do not get caught.
5. Install the cushion on the bracket mounting location on the cylinder side and temporarily install the bracket.
Position the cushion cut and bracket as shown in the picture.
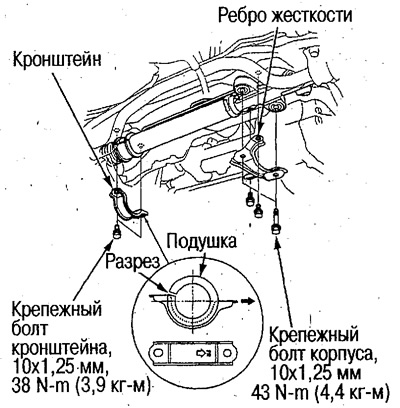
6. Install the stiffener and bracket.
7. Set the steering rack to the position corresponding to the vehicle moving in a straight direction.
8. Connect the fluid supply and return pipes to the valve block.
9. Install the tube clamps onto the rear beam.
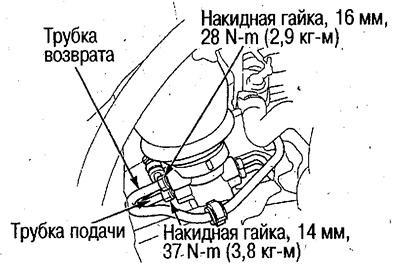
Make sure that hoses and tubes do not touch other components.
10. Move the rack left and right until it stops and stop at the center of the stroke.
11. Attach the joint so that the rack does not move (the pinion/coupling shaft does not turn), as follows:
- Insert the top of the joint onto the steering column shaft so that the flat portion of the shaft aligns with the bolt holes in the joint.
- Insert the lower part of the joint onto the pinion/clutch shaft, align the groove on the shaft with the bolt holes, install the lower joint bolt and tighten it to the required torque. Pull the joint and make sure it does not come off the shaft.
- Insert the upper hinge bolt and tighten it to the required torque.
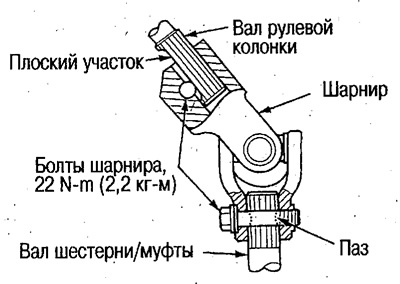
12. Install the hinge cover.
13. Install the following components:
Exhaust pipe A and exhaust pipe mounting bracket B (see chapter Mechanical part of the engine).
Transfer case (4WD models only) (see chapter Automatic transmission).
14. Connect the automatic transmission control cable to the gearbox (see chapter Automatic transmission).
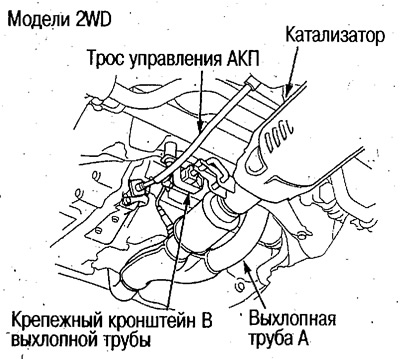 |
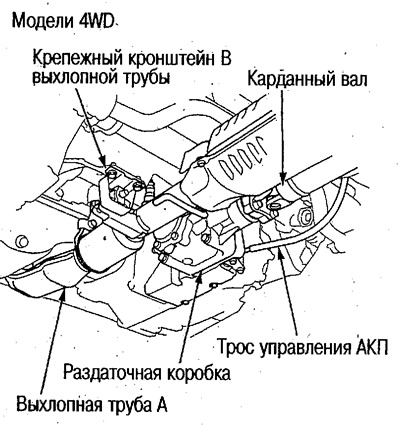 |
15. Connect the left and right tie rod ends to the rack ends.
After adjusting the toe-in, tighten the locknuts. Tightening torque 44 N·m (4.5 kg·m).
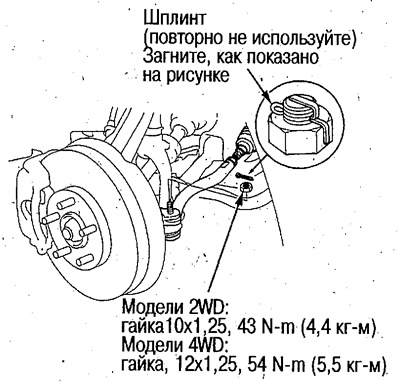
16. Connect the left and right tie rod ends to the steering knuckles.
17. Install the airbag system coil wire to the center position and install the steering wheel (see above).
Make sure that the positions of the steering rack and steering wheel correspond to the vehicle's straight-ahead movement.
18. Install the front wheels.
19. Fill the power steering fluid and bleed air (see above).
20. After installation, perform the following checks.
Start the engine, warm up the oil and check for power steering fluid leaks.
Check the front wheel alignment (see chapter Front and rear suspension).
Check the angle of the steering wheel spokes and adjust if necessary.
If adjustment is made using the rack tips, turn the left and right tips the same number of turns.