
Removal
1. Remove the cylinder head cover (see Section Removal and installation cylinder head covers).
2. Bring the piston of the first cylinder to the TDC position (see Section Bringing the piston of the first cylinder to the top dead center (TDC) position), remove the timing belt (see Section Removal, condition check and installation of the timing belt and timing drive gears).
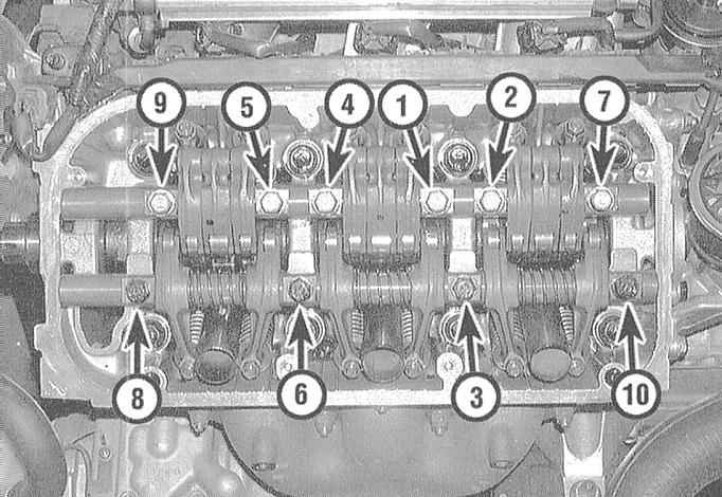
3. Loosen the rocker arm shaft mounting bolts by 1/4 turn (to reduce the force developed by the valve springs) - proceed in the reverse order to that shown in the illustration.
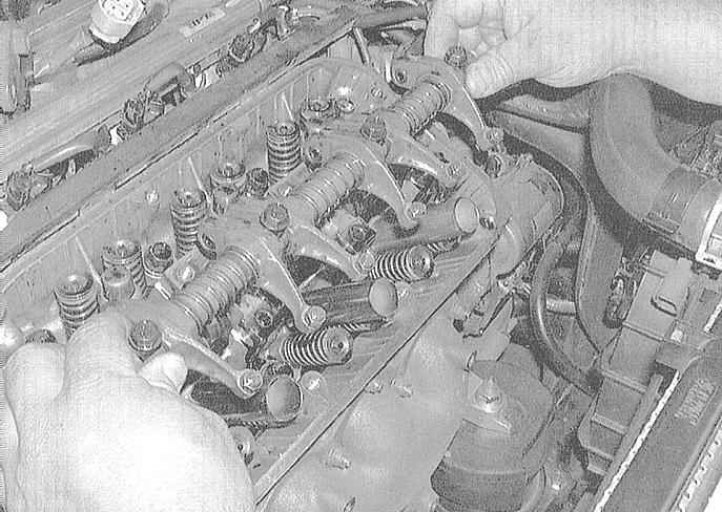
4. Remove the rocker arm and axle assembly from the cylinder head. Do not remove the mounting bolts completely to secure the components to the axle.
Examination
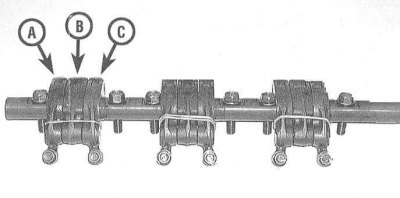
1. Once the rocker arm assembly is removed, it is a good idea to disassemble it to examine the components in more detail. Remove the mounting bolts and remove the rocker arms and springs from the axles. It is a good idea to mark the axle position relative to the bearing caps beforehand.
Caution! It would be wise to secure the primary and secondary intake valve rocker arms with rubber bandages. Try to stack the removed components in the order they were installed, as they must be seated strictly in their original places during assembly.
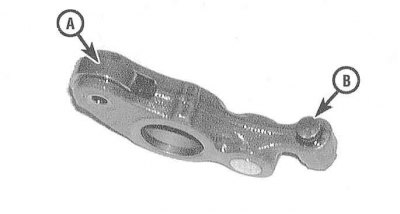
2. Clean the components thoroughly and check them for signs of wear and mechanical damage. Assess the condition of the rocker arm surfaces that contact the camshaft, assess the degree of wear and freedom of rotation of the rollers. Check for scoring and signs of excessive wear on the rocker arm seating surface on the axles, as well as the walls of the rocker arm seating holes themselves. Defective components must be replaced. Make sure that the oil flows inside the axles are clear.
3. Remove the valve clearance adjusters from their seats in the cylinder head and clean them thoroughly. Use your fingers to check the free movement of the plungers.
4. Check the freedom of movement of the synchronizing pistons in the intake valve drive assemblies.
Installation
1. Lubricate all components with clean engine oil and install them in their original locations on the rocker arm shaft.
Attention! Pay attention to the markings that distinguish left-hand components from right-hand components.
2. Lubricate the rocker arm working surfaces with special camshaft grease. Place the removed components on the axle, then install the assembly on the engine.
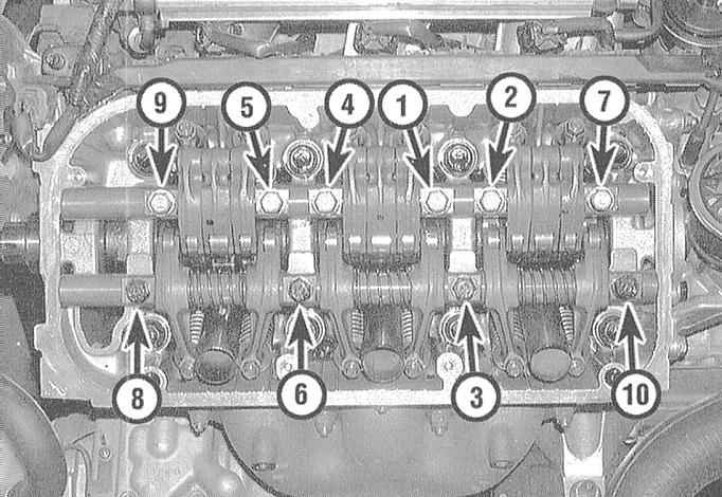
3. In a strictly defined order, in several steps (with a small step), tighten the rocker arm assembly mounting bolts with the required force.
4. Installation of the remaining components is carried out in the reverse order of their dismantling.
5. Finally, do not forget to adjust the valve clearances (if necessary) (see Chapter Settings and ongoing maintenance).
6. Start the engine and check it for signs of oil leaks and proper operation.