
Caution! Due to the very high voltage generated in the ignition system, its components must be serviced with extreme caution. This applies not only to the main components of the electronic ignition system, but also to all associated components, including spark plug wire leads, tachometer and other diagnostic equipment.
1. If the ignition system is not functioning properly, before diagnosing the condition of the distributor, perform the following preliminary checks:
- a) Check the condition of the battery terminal connections and the tightness of the clamps securing the wire ends to them;
- b) Check the battery status (see Section Checking the battery status and replacing it), replace it if necessary;
- c) Check the external condition of the distributor and ignition coil high voltage wires and the reliability of their fastening to the terminals;
- d) If equipped, check the condition of the fuse links in the fuse box located in the engine compartment of the vehicle (see Chapter On-board electrical equipment). Replace burnt-out elements.
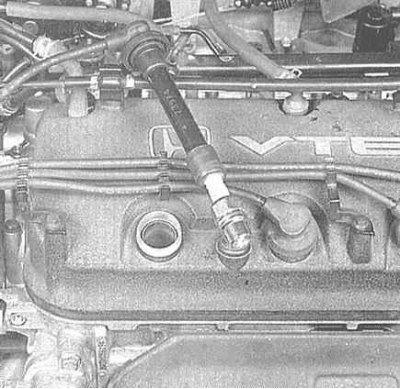
2. Check for proper spark formation at the spark plugs. If the engine cranks but does not start, disconnect the high-voltage wire from one of the spark plugs and connect it to a special calibrated tester (ask at car accessory stores). Fasten the tester clamp to a bolt or metal bracket on the engine block, thereby reliably grounding it to ground. If you do not have a calibrated ignition tester at hand, disconnect the wire from the spark plug and, holding it with pliers with securely insulated handles, pull the rubber tip up the wire and bring the contact terminal to a well-grounded point on the block at a distance of approximately 6.4 mm. When cranking the engine, a clearly visible bright blue spark should jump between the electrode and the tester body / terminal of the high-voltage wire and ground.
3. If the spark breaks through properly and its intensity is not in doubt, repeat the check for the high-voltage wires of the remaining spark plugs. This check allows you to confirm the serviceability of the cover and the distributor rotor, without, however, excluding the possibility of failure of the spark plugs themselves, so unscrew the latter and check their condition in accordance with the procedure given in Chapter Settings and ongoing maintenance description of this Guide.
4. If there is no spark, remove the distributor cap and check its condition, as well as the condition of the rotor (see Chapter Settings and ongoing maintenance). If there are traces of moisture, carefully wipe the surfaces of the cover and runner with a clean dry cloth, then replace the cover and repeat the spark quality check;
5. If removing the moisture does not correct the situation (spark formation is still insufficient or absent), on V6 models, disconnect the secondary wire of the coil from the distributor cap and connect an ignition tester to it (remember to connect the high-voltage wires to all spark plugs). Repeat the above test procedure.
Note: If you do not have an ignition tester at hand, an alternative test of the coil wire is carried out in the same way as in the case of high-voltage spark plug wires by connecting the terminal to ground at a distance of about 6.4 mm.
6. If there is no spark on 4-cylinder models, check the condition of the spring and the carbon contact button inside the distributor cap for signs of burnout and mechanical damage. Replace the distributor cap if necessary.
7. If normal sparking occurs this time, then the cause of the failure lies in a faulty distributor cap, its rotor or the corresponding spark plug wires (see Chapter Settings and ongoing maintenance).
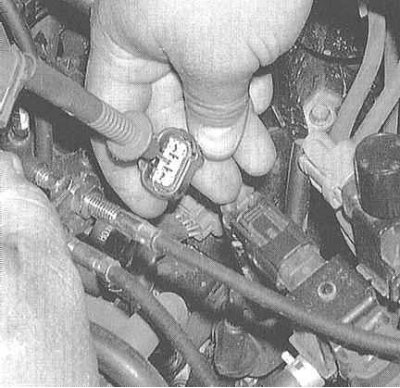
8. If there is no sparking at this stage, proceed to check the contact connections of the primary circuit of the ignition coil - assess the condition and reliability of the terminals. Check the serviceability of the primary voltage supply to the coil from the ignition switch/lock, for which measure the voltage on the positive side of the coil.
Note: Since the ignition coil is built into the distributor on 4-cylinder models, you will need to remove the distributor cap, disconnect the wires from the coil, then check for battery voltage at the black/yellow wire terminal. Make any necessary corrections, then retest.
9. If there is voltage on the coil, but there is still no spark, measure the resistance of the primary and secondary windings of the coil (see Section Checking the condition and replacing the ignition coil). If breaks are detected (infinite ohmmeter reading), replace the coil.
10. If the coil is OK, the ignition control module (ICM) is functioning properly (see Section Checking the proper operation and replacing the ignition control module (ICM)).
11. Further checks of the PGM-IG system should be left to specialists.
[The original is located on the website hondabook.ru]