
Contents: Removal ⇊ Installation ⇊
Removal
1. Disconnect the negative cable from the battery.
Warning! If the car stereo system is equipped with a security code, make sure you have the correct combination to activate the audio system before disconnecting the battery!
2. Label the wires and hoses and disconnect them from the distributor.
3. Find a raised mark (in the form of a number or letter) on the distributor cap indicating the location of the high-voltage terminal of the spark plug wire of the first cylinder. If the cap is not equipped with such marking, find the terminal by following the wire from the spark plug of the first cylinder to it and put the corresponding mark yourself.
4. Remove the cover from the distributor (see Chapter Settings and ongoing maintenance) and turn the crankshaft so that the runner turns with its nose towards the position of the spark plug wire terminal of the first cylinder on the cover (see the description of the procedure for bringing the engine to the TDC position in Chapter Engine).
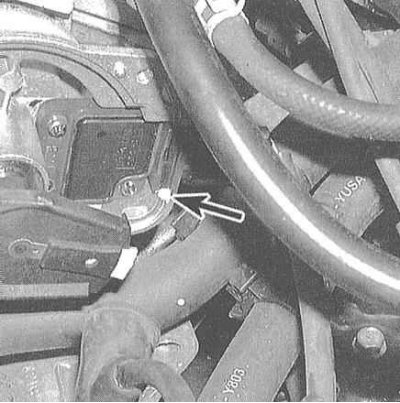
5. Apply an orientation mark to the edge of the distributor housing, directly opposite the runner spout parallel to the axis of the latter (if the runner has several spouts, select the central one). Also mark the mounting position of the distributor base on the engine.
 |
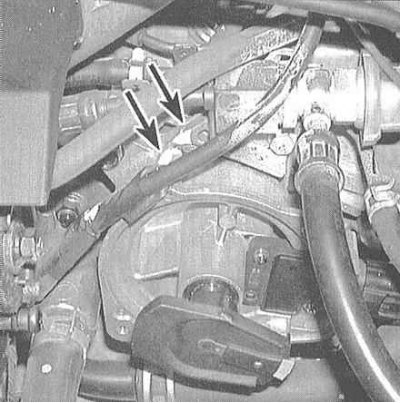 |
6. Loosen the clamp bolt(s) and remove the distributor from the engine by pulling it straight up.
Caution! To avoid reducing the effort required to apply timing marks to zero, do not allow the crankshaft to turn after removing the ignition distributor from the engine!
Installation
Note: If the crankshaft has been allowed to turn with the ignition distributor removed from the engine, the engine should be brought to the TDC position of the first cylinder (see the corresponding Section of the Chapter Engine) and when installing the distributor, achieve the appropriate position of its runner.
1. Place a new sealing ring on the distributor housing.
2. Carefully insert the distributor into the receiving socket in the cylinder head. Ensure that the mounting marks applied during dismantling are aligned.
Note: The projections on the end of the distributor shaft and the corresponding grooves in the end of the camshaft are asymmetrically located, which eliminates the possibility of installing the distributor with a 180° rotation.
3. If you cannot seat the distributor completely, first make sure that the seat marks are aligned correctly, then ensure that the runner is turned with its nose exactly towards the mark on the edge of the housing.
4. Loosely screw in the clamp bolt(s).
5. Carry out further assembly in the reverse order of disassembly. Check the ignition timing, then firmly tighten the clamping bolt(s) securing the distributor to the engine.