
Note:
- Clean all parts thoroughly with solvent or carburetor cleaner and dry with compressed air.
- Blow out all channels.
- Lubricate all components with transmission fluid before assembly.
1. Check the check valve, if it is not seated tightly, replace the piston.
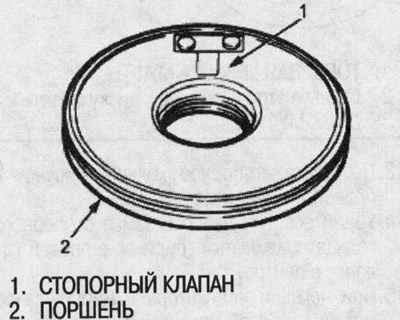
2. Install new O-rings on the clutch piston.
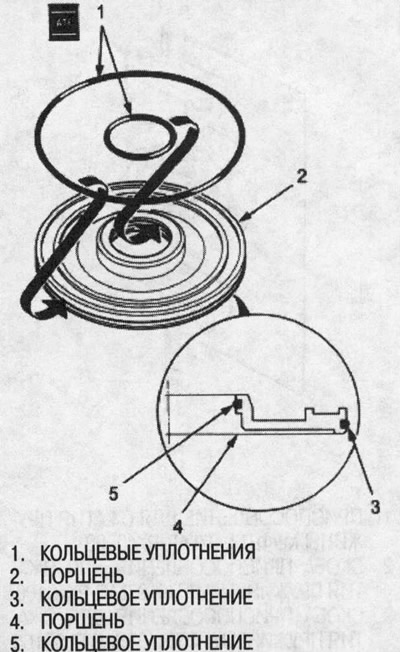
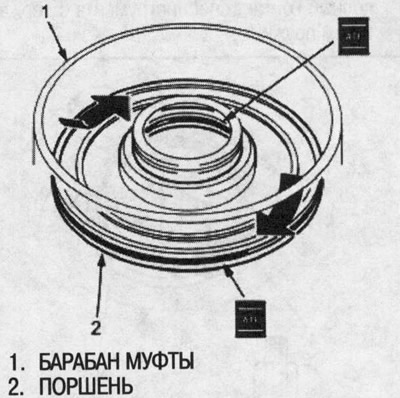
3. Install the piston into the clutch drum. Apply pressure and rotate to ensure proper seating.
Note: Do not compress the O-ring by inserting the piston with excessive force.
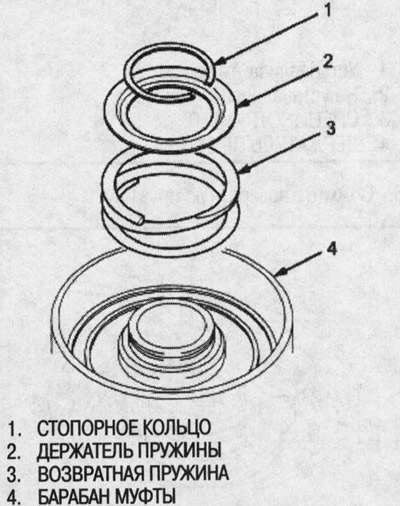
4. Install the return spring and spring retainer and place the snap ring on the retainer.
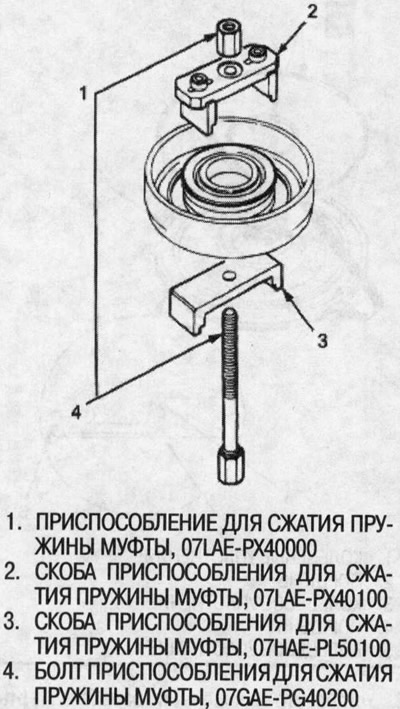
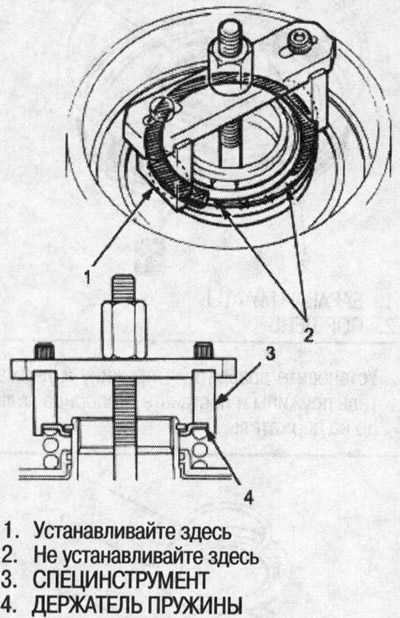
5. Install the special tool as shown in the figure.
Note: If the special tool is installed with either end on a section of the spring retainer that is not supported by the return spring, the retainer may be damaged. Make sure that the special tool makes full contact with the spring retainer.
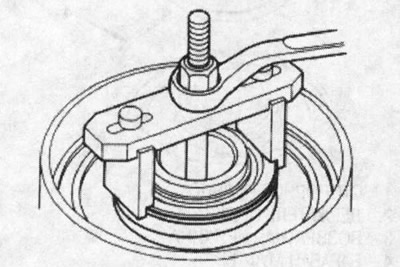
6. Compress the return spring.
7. Install the retaining ring.
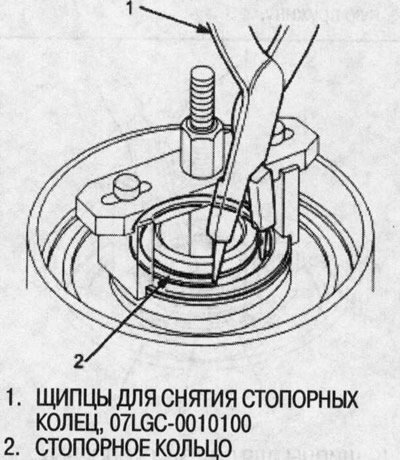
8. Remove the special tool.
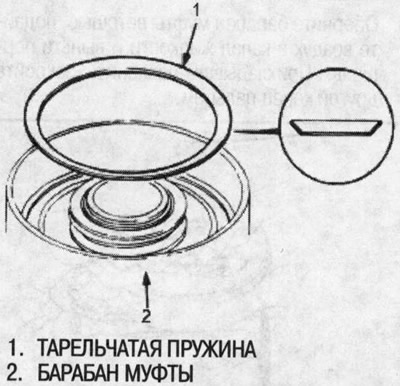
9. Install the disc spring in the direction shown.
10. Soak the clutch discs thoroughly in the recommended transmission fluid for at least 30 minutes.
11. Make sure that the inside of the clutch drum is clean and free of foreign particles.
12. Starting with the clutch plate, install the clutch plates and discs one at a time. Place the clutch end cap with the flat side facing the disc.
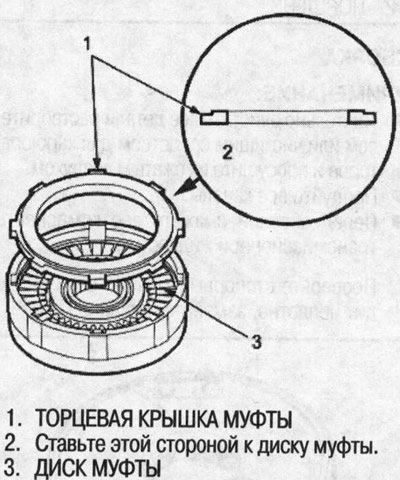
13. Install the retaining ring.
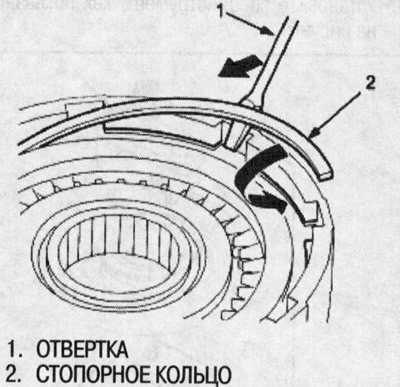
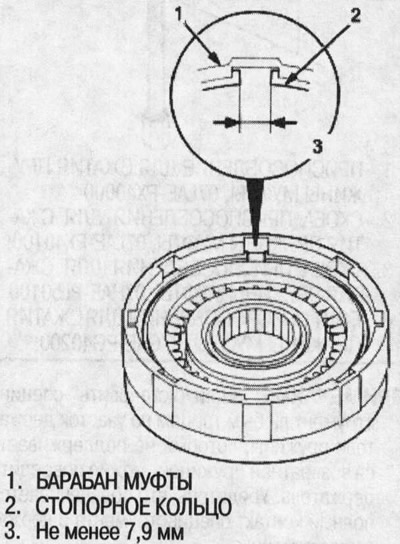
14. Make sure the clearance in the snap ring lock is correct.
15. Using a dial indicator, measure the clearance between the end cover of the clutch and the upper disc. Set the indicator to zero by lowering the end cover of the clutch and lifting it toward the retaining ring. The distance that the end cover of the clutch moves is the clearance between the end cover of the clutch and the upper disc.
Note: Measure at least three places and take the average as the actual gap.
Gap between the end cover of the coupling and the upper disk: standard: 0.6-0.8 mm.
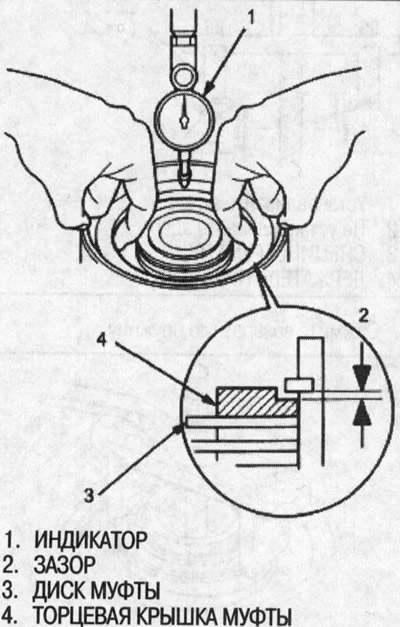
16. If the clearance is greater than the allowable value, select a new coupling end cover from the following table, then recheck.
Note: If the thickest clutch end cover is installed and the clearance remains greater than the allowable limit, replace the clutch discs and plates.
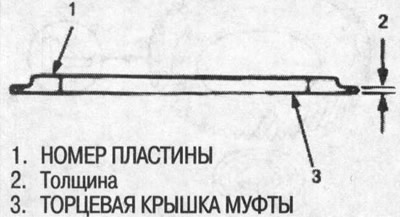
Forward clutch end cover
| Lid No | Catalogue No | Thickness |
| 1 or 15 | 22561-P4V-003 | 3.5 mm |
| 2 or 16 | 22562-P4V-003 | 3.6 mm |
| 3 or 17 | 22563-P4V-003 | 3.7 mm |
| 4 or 18 | 22564-P4V-003 | 3.8 mm |
| beat 19 | 22565-P4V-003 | 3.9 mm |
| 6 or 20 | 22566-P4V-003 | 4.0 mm |
| 7 or 21 | 22567 P4V-003 | 4.1 mm |
| 8 or 22 | 22568-P4V-003 | 4.2 mm |
| 9 or 23 | 22569-P4V-003 | 4.3 mm |
| 10 or 24 | 22570-P4V-003 | 4.4 mm |
| 11 or 25 | 22571-P4V-003 | 4.5 mm |
| 12 or 26 | 22572-P4V-003 | 4.6 mm |
| 13 or 27 | 22573-P4V-003 | 4.7 mm |
17. After replacing the coupling end cover, check that the clearance is within the tolerance.
The article is based on information from the website hondabook