
Warning! Do not smoke when working on the fuel system. Do not produce sparks or open flames in the work area.
1. Relieve the fuel pressure (see above).
2. Remove the inspection panel from the floor.
3. Turn the ignition switch to the OFF position, then disconnect the 5-pin connector from the fuel pump.
4. Disconnect the quick-release couplings from the fuel pump.
5. Loosen the bolts and remove the fuel pump assembly.
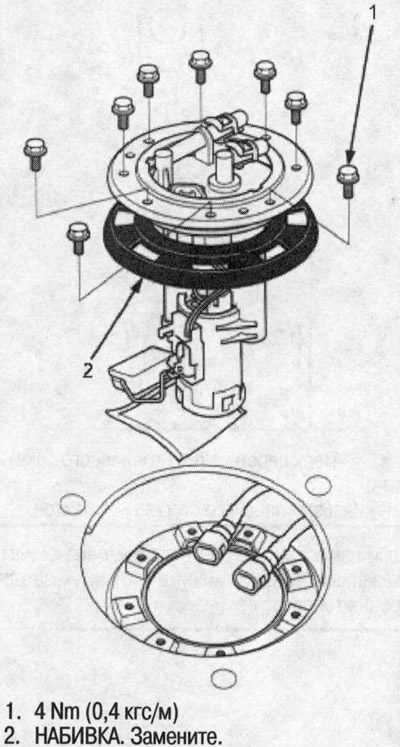
6. Remove the bracket, fuel gauge sensor, hose and wiring harness.
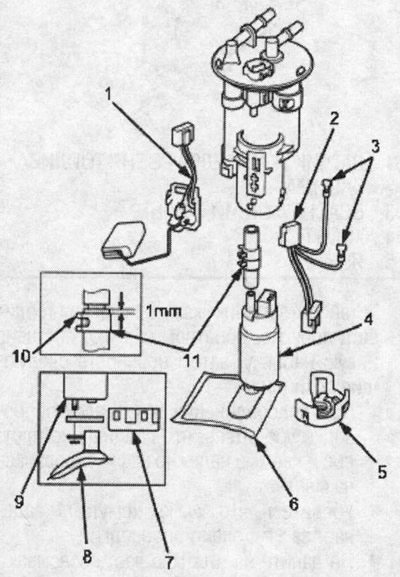
1. fuel level indicator sensor; 2. wiring harness; 3. terminal; 4. fuel pump; 5. bracket; 6. suction filter; 7. bracket; 8. suction filter; 9. fuel pump; 10. tongue; 11. clamp
7. When connecting the fuel pump, make sure that the connection is tight and that the suction filter is securely connected to the fuel pump.
8. Install the fuel filter in the reverse order of removal, installing a new packing, then check the following items:
- When connecting the wiring harness, make sure the connection is tight and the terminal is securely locked in place.
- Make sure the clamp tongue does not touch the wiring harness.
- Do not press on the bottom of the suction filter.
- When installing the fuel gauge sensor, make sure the connection is tight and that the connector is securely locked in place. Do not bend or twist it excessively.
[The original is located on the website HondaBook.ru]