
26. Place a new o-ring and a new piston o-ring on the special tool and slide them onto the special tool towards the large end. Build with the following in mind:
- Do not expand O-rings excessively. Put on the rings carefully so as not to damage them. After putting on, squeeze the sealing rings with (gauge) special tool.
- Replace O-ring and piston seal ring assembly.
27. Pull back the o-ring into the piston groove, then back the piston o-ring into the piston groove on top of the o-ring.
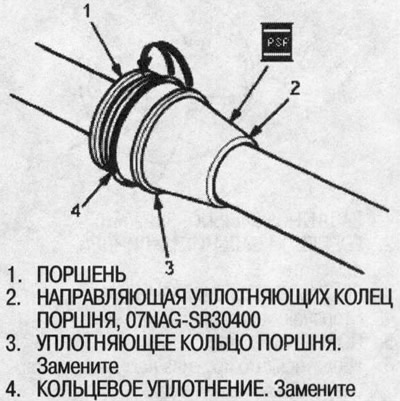
28. Apply power steering fluid to the piston o-ring and inside of the special tool.
29. Carefully slide the special tool onto the rack and piston o-ring.
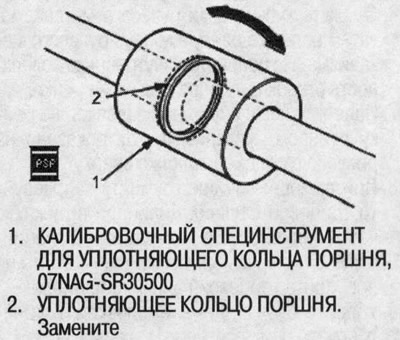
30. Move the special tool up and down several times so that the valve sealing ring fits snugly into the piston.
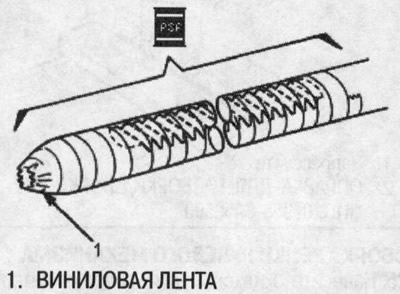
31. Wrap the rack teeth and ends with vinyl tape and apply power steering fluid over the vinyl tape.
Note: Make sure the vinyl tape is wrapped neatly without any ledges.
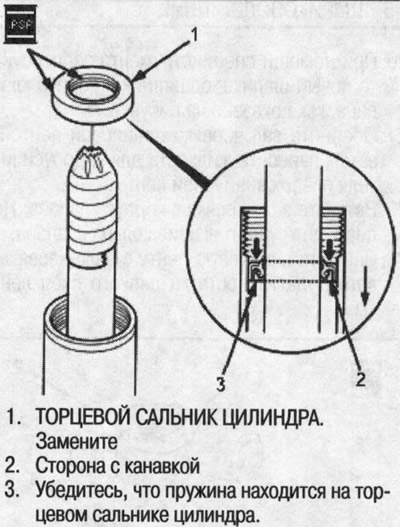
32. Apply power steering fluid to the inside of the new cylinder end seal.
33. Slide the cylinder end seal onto the steering rack with the grooved side facing the piston. When putting on the end seal of the cylinder, do not damage the surface of the sealing lip of the gland with the edges or teeth of the rack.
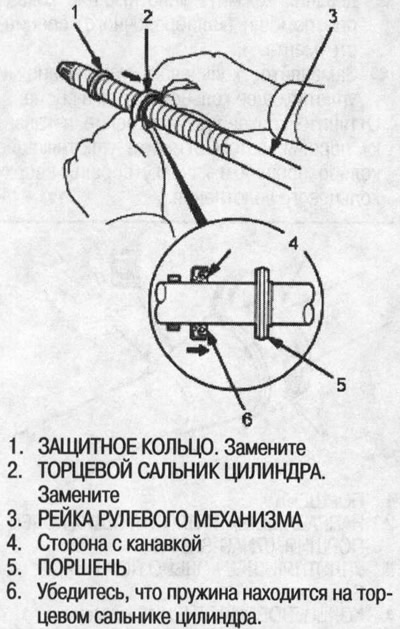
34. Remove the vinyl tape from the steering rack, then remove the remaining adhesive layer of the tape.
35. Put a new protective ring on the steering rack, then - the end seal of the cylinder on the piston.
36. Lubricate the steering rack teeth, then insert the rack into the steering rack housing. Do not damage the inner surface of the cylinder walls with the edges of the rack.
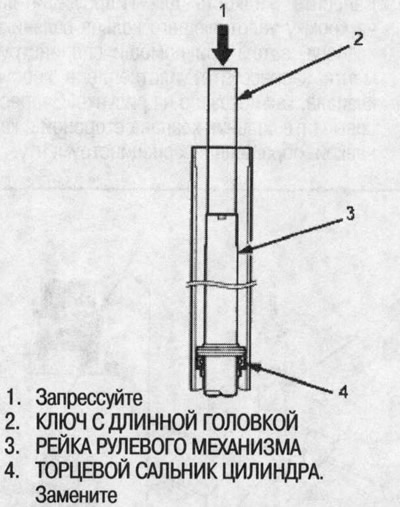
37. Fit the long head wrench onto the steering rack as shown in the illustration in the middle column at the top.
38. Using the special tool, press the end seal of the cylinder into the bottom of the cylinder. Do not press the special tool with excessive force, so as not to damage the end seal of the cylinder.
39. Remove the key with a long head and center the steering rack.
40. Wrap the ends of the rail with vinyl tape and apply power steering fluid over the vinyl tape. Make sure the vinyl tape is wrapped neatly without any ledges.
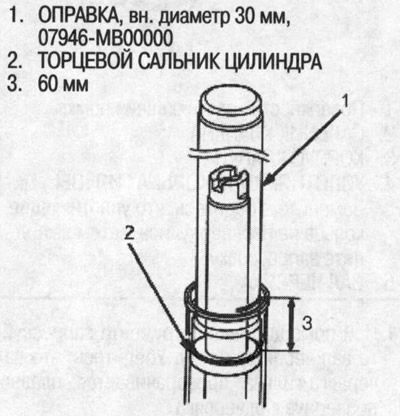
41. Apply power steering fluid to the inside of the new cylinder end seal.
42. Slide the cylinder end seal onto the steering rack with the grooved side facing the piston.
43. Using a special tool, press in the end seal of the cylinder. When putting on the end seal of the cylinder, do not damage the sealing surface of the gland with threads and burrs on the hardened section of the cylinder body.
44. Remove the vinyl tape from the steering rack, then remove the remaining adhesive layer of the tape.
45. Fix the steering gear in a vice with soft jaws, as shown in the figure. Do not clamp the cylinder in a vise.

46. Apply power steering fluid to the inside of the cylinder end, then slide the cylinder end onto the cylinder.
47. Remove the steering gear from the vise.
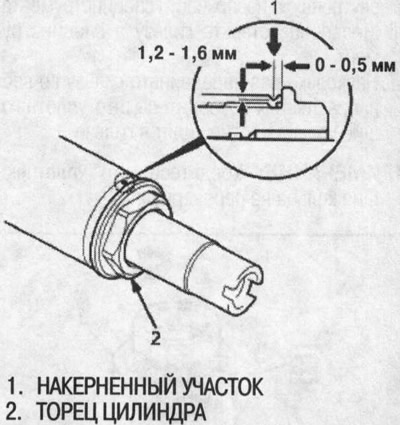
48. After tightening the end of the cylinder, score a point on the cylinder as shown in the figure. Punch the cylinder in the opposite direction from where the punched point was drilled during disassembly.
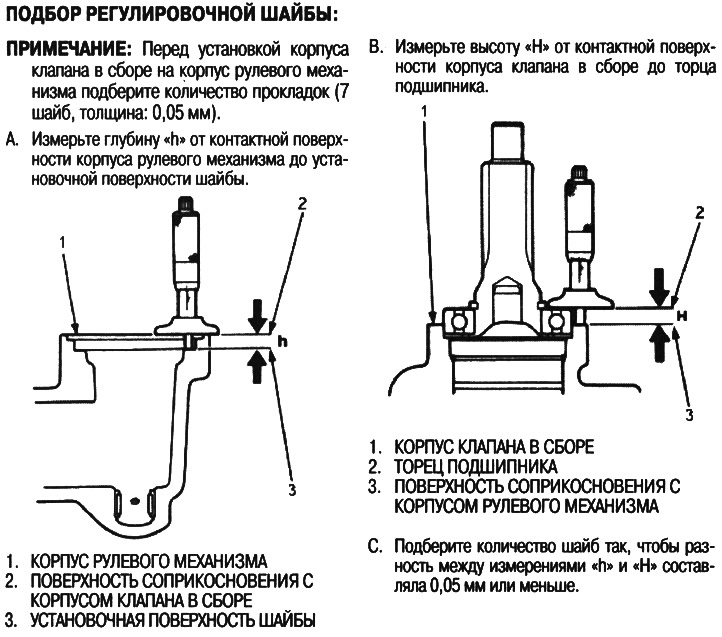
49. Pick up shims (s). Install the original washers only when assembling the steering gear without replacing the worm shaft, valve body and steering gear housing with new ones (drawing on footprint, page top left).
50. Place the matched washers on the bearing surface of the steering gear housing.
51. Apply grease to the needle bearing in the steering gear housing.
52. Apply sealant to the contact surface evenly so that it does not get into the housing.
53. Install the valve body assembly to the steering gear housing by engaging the gears. Observe the installation position of the valve body assembly (tube connection direction).
54. Tighten the bolts to the required torque (drawing on footprint, top right page).
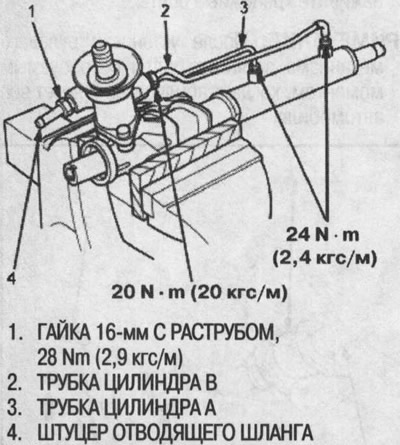
55. Connect the outlet hose fitting, tubes of cylinders A and B.
Build with the following in mind:
- Thoroughly clean the fittings. They must be free of foreign matter.
- Connect cylinder tubes A and B by first tightening the flare nuts by hand, then to the required torque.
56. Put the rubber bushing on the worm shaft.
57. Lubricate the sliding surface of the guide rack and insert it into the steering gear housing.
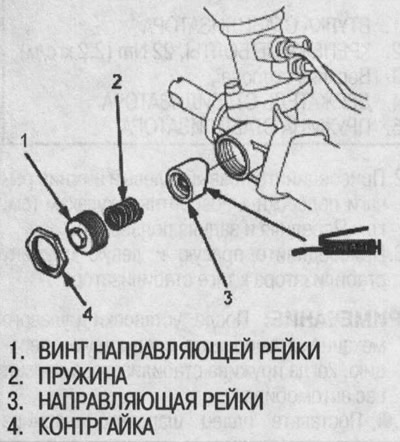
58. Apply new sealant to the rail screw threads.
59. Install the spring, rack screw and locknut on the steering gear.
60. Adjust the rail guide screw (see above). After adjustment, make sure the rail moves smoothly by moving it to the right and left.
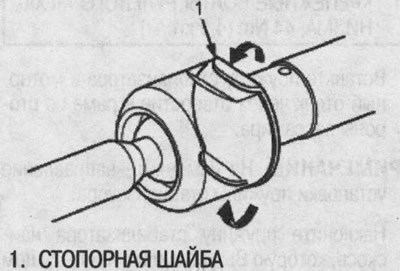
61. Install the lock washer and screw the lugs onto the rail, locking the lock washer so that its protrusions fit into the slots in the lugs.

62. Tighten both rack ends. Do not damage the rail surface with the wrench.
63. Bend the lock washer onto the flats on the rail ends.
64. Apply a thin layer of silicone grease to the contact areas of the grooves and rack boot.

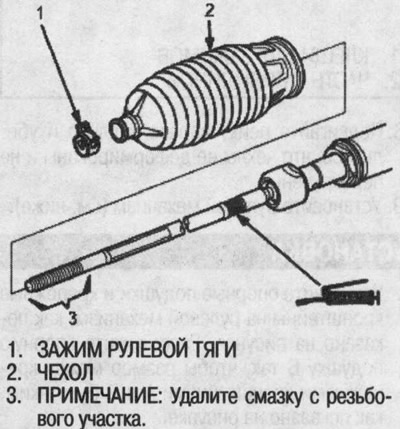
65. Center the steering rack within its travel. Apply sealing adhesive to the inside of the boot and adjacent area around the cylinder body. Put the cover on the end of the rail and place it on the cylinder body. Install the tie rod clamp. After installing the covers, remove excess grease from the threaded section of the rack tip.
66. Install the new boot clip, aligning the tabs with the slots in the tape.
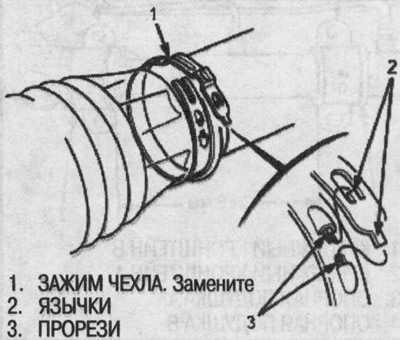
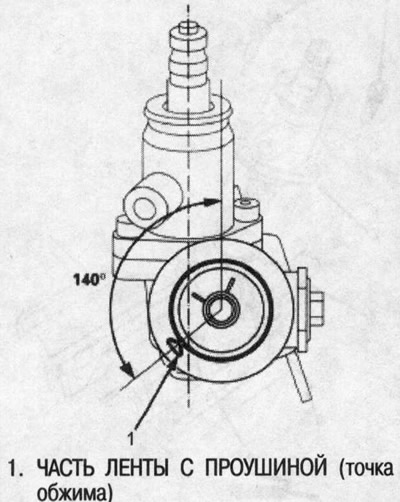
Note: Ribbon parts with eyelets (crimp points) should be at the specified angle as shown in the figure.
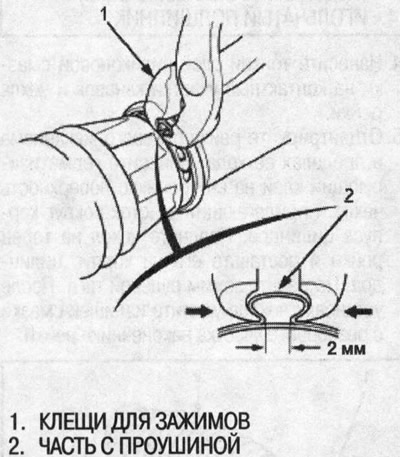
67. Crimp part of the eyelet tape with Oetiker 1098 pliers (available for sale) or equivalent.
68. Move the rail to the right and left and make sure that the covers are not deformed or twisted.
69. Install the steering gear (see below).