
Contents: Adjusting the sound volume ⇊ Switching audio system modes ⇊ Listening to radio broadcasts ⇊ Programming buttons to receive radio…⇊ Automatic search and listening to…⇊ Automatic search and recording of…⇊ Turning on the traffic information…⇊ Listening to CDs ⇊ Ejecting the disc ⇊ Fast forward/rewind playback, skip…⇊ Search for a record (scanning) ⇊ Repeat playback of the current…⇊ Listen to recordings in random order ⇊
The audio system is ready for operation when the ignition key is in position "I" or "II".
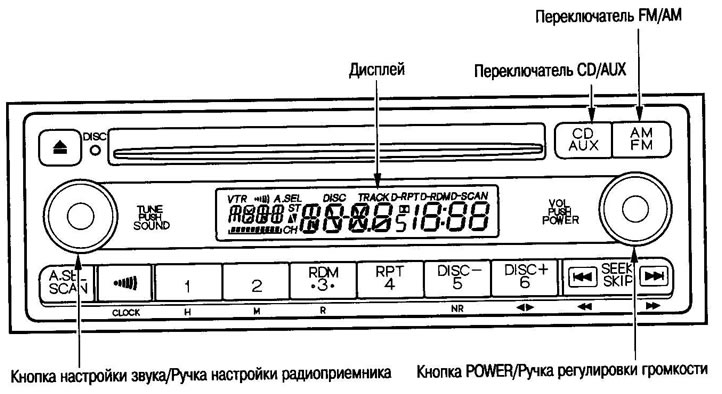
To turn on the audio system, press the POWER button, to turn it off press this button again (drawing on the right).
In addition, the system is turned on by pressing the CD/AUX and FM/AM buttons.
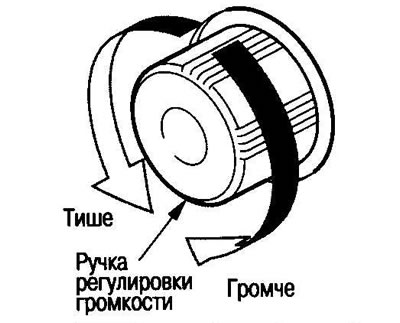
Adjusting the sound volume
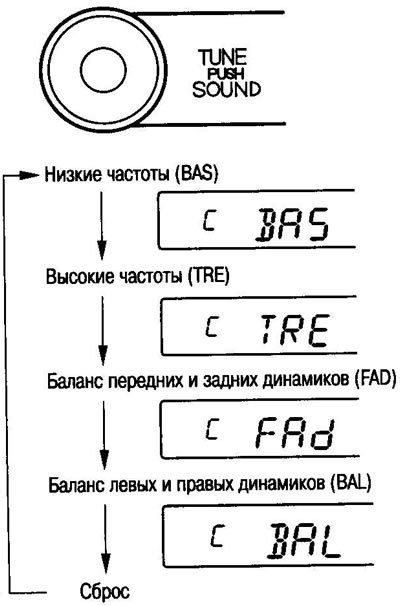
By clicking on the sound settings button (radio tuning knob), you can change the sound settings sequentially (switching sound parameters occurs with each press):
Reference.
- The indication is reset after approx. 5 seconds after setup.
- When all settings are set to the middle position, the letter "C" appears on the monitor.
Switching audio system modes
Switching radio reception ranges is done using the FM/AM button.

To listen to a CD, press the CD/AUX button.

Listening to radio broadcasts
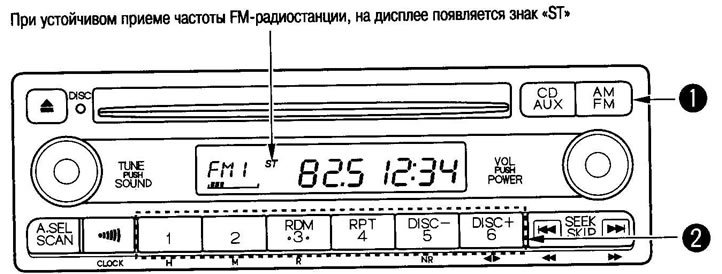
1. Turn on the radio and select the radio frequency range (aM/FM button). Press the button to select one of the AM/FM1/FM2 ranges.
2. Select the desired radio frequency by pressing one of the preset radio frequency buttons.
The buttons can be programmed to receive 6 AM and 12 FM radio stations (6 radio stations for FM1 and FM2 sub-ranges).
Programming buttons to receive radio stations
1. Use the FM/AM button to select the desired band (AM/FM1/ FM2).
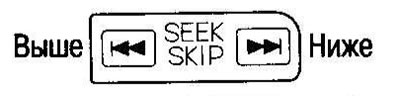
2. Select the radio frequency using the TUNE knob and the SEEK/SKIP button (search/skip) (the search process stops when a radio station is found).
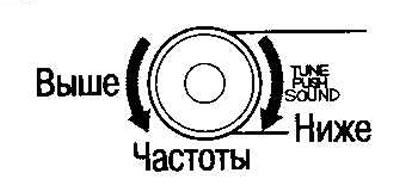
By turning the TUNE knob you can change the radio frequency in a narrow range.
Pressing the SEEK/SKIP button starts the automatic search for the frequency of the broadcasting radio station and after it is found the process stops.
Note: If the signal is weak, it may not be detected during automatic search. In this case, use manual settings.
3. At the desired frequency, press and hold one of the buttons to memorize the radio frequencies (approx. 2 sec.) until the beep sounds.
Note: After removing the battery, previously recorded radio frequencies are erased from the memory, so you need to re-enter the desired radio stations into the memory.
Automatic search and listening to radio stations

If you don't know which radio stations are broadcasting in a given area, you can determine them automatically. To do this, press the "SCAN" button and hold it until you hear a beep (approx. 2 sec.). The system will determine the radio station with the strongest signal, and you will be able to listen to them (approx. 5 sec each). After searching, to exit scanning mode, press and hold the button again (approx. 2 sec.), until the beep sounds.
Automatic search and recording of radio broadcast frequencies

Used when the radio frequency grid changes, such as when traveling to another region.
Briefly press the "A.SEL" button ("A.SEL" will flash).
The radio broadcast frequencies with the strongest signal are automatically determined and stored in memory in order. When the memory is full, A.SEL stops flashing and remains lit. To exit this mode, briefly press the button again. The radio frequency selection buttons are assigned previously recorded data.
Note: The frequencies set automatically can be changed individually.
Turning on the traffic information station

Click on the button
 turning on the information station. To turn off this station, press the button again. To change the station, press the SEEK/SKIP button or turn the radio tuning knob. The information station operates at a frequency of 1620-1629 kHz in AM mode and is recorded in the radio receiver's memory.
Note: Change frequency for buttonimpossible.
Listening to CDs
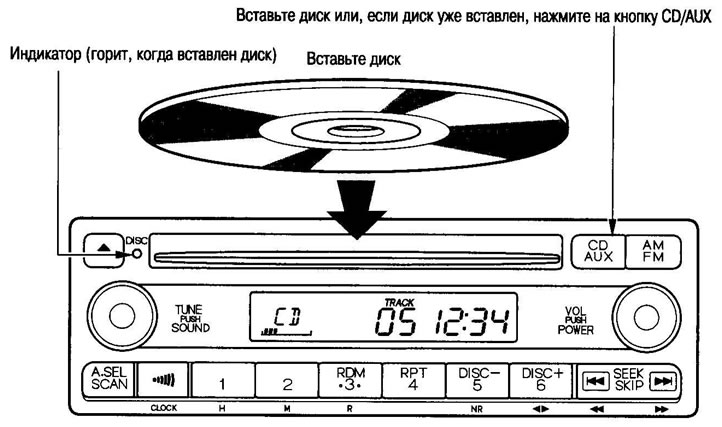
Attention
- Do not use the adapter for 8cm disc. Otherwise, it may cause damage to the player.
- If the disc is not removed within about 15 seconds after pressing the eject button, it will be pulled back in to protect the disc and CD player from dust.
Ejecting the disc

To eject the disc, press the button

If the ignition key was switched to position "0" during playback, press the button
 and remove the disc.
Fast forward/rewind playback, skip and repeat recordings
Click on one of the buttons
 .
.
 Fast forward playback (repeat previous entry)
 Fast forward playback (skip current record)
- If you hold the button down, the current recording will be played at fast forward (cUE - forward or REW - backward lights up on the display).
- If you press the button briefly, you will go to the previous/next entry.
Search for a record (scanning)

Press the SCAN button. The display will show SCAN and the record number will flash. 10 seconds of the beginning of each recording will be played.
On the desired entry, press the button again, scanning will stop.
Note: After the entire disk scan is complete, it resumes from the beginning of the previous scan.
Repeat playback of the current recording

Click on the RPT button (rPT will light up). To turn off repeat mode, press the button again.
Listen to recordings in random order

Click on the RDM button (rDM will light up). To turn off this mode, press the button again.
[Material obtained from the website www.hondabook.ru]