
Note: Wear protective gloves.
1. Remove the following components:
- Door panel
- Plastic lid (if necessary)
- Protective cover of the lock rod
2. Raise the glass fully.
3. Remove the plug, then disconnect the outer handle rod.
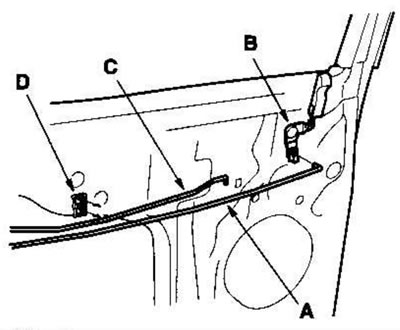
4. Disconnect the lock rod (A) from the lock bellcrank (B) and remove the inner handle rod (C) and the lock rod from the holder (D).
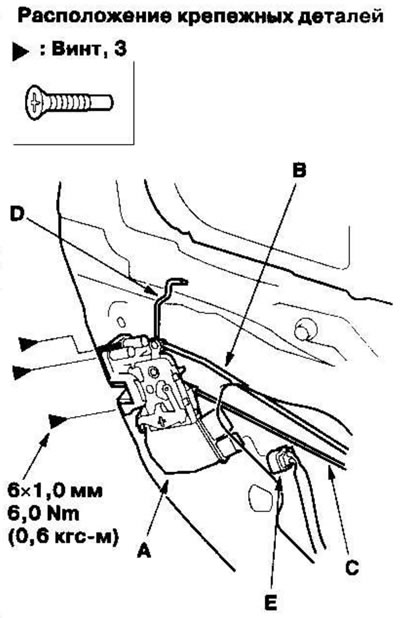
5. On models without central locking: Remove the lock (A). Do not bend the outer handle rod (B), the lock rod (C) and the inner handle rod (D). The illustration shows a Honda lock (the Mitsui lock is similar).
- Disconnect the connector (E).
- Remove the screws.
- Remove the lock through the hole in the door.
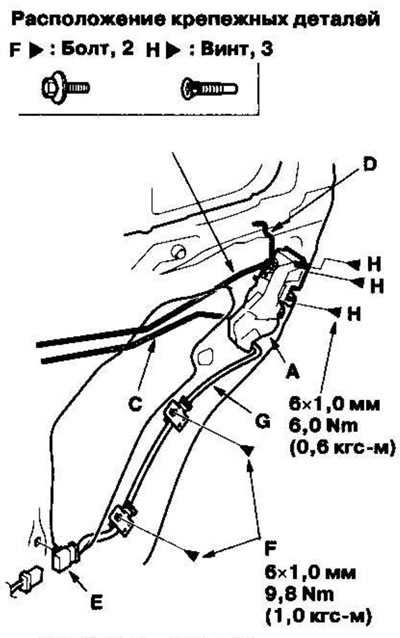
6. On models with central locking: Remove the lock (A). Do not bend the outer handle rod (B), the lock rod (C), and the inner handle rod (D).
- Disconnect the connector (E) and set it aside.
- Remove the bolts (F) and separate the wiring harness (H) from the door.
- Remove screws (H).
4 Remove the lock through the hole in the door.
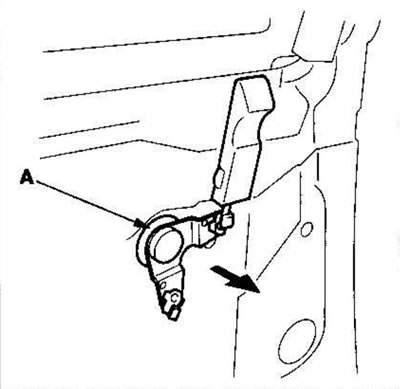
7. If necessary, remove the lock toggle lever (A) from the door.
8. The lock is installed in the reverse order of removal, taking into account the following:
- Make sure the connector is inserted properly and the rods are connected securely.
- Make sure the door locks and unlocks properly.