
Attention! Do not open the radiator cap and do not remove the thermostat until the engine has completely cooled down! See also the warning at the beginning of the Section Antifreeze - general information.
Examination
1. Before finally establishing your opinion about the failure of the thermostat, check the coolant level in the system, the condition and tension of the drive belt (see chapter Settings and ongoing maintenance), as well as the correct functioning of the temperature meter.
2. One of the possible reasons for the engine warming up too slowly (according to meter readings) is the thermostat sticking in the open position. Replace the thermostat with a new one.
3. If the engine overheats, feel the upper radiator hose with your hand. If the hose is not hot, the thermostat may be stuck closed, cutting off coolant circulation through the radiator. Replace thermostat.
Attention! Never operate the vehicle with the thermostat removed! This may break the feedback of the onboard processor, which will lead to increased toxicity of exhaust gases and an excessive increase in fuel consumption.
4. If the upper hose is hot, this means that the coolant is circulating through the radiator properly, i.e. thermostat is open. Refer to the materials of the Section devoted to the diagnosis of malfunctions of the cooling system.
Replacement
1. Disconnect the negative cable from the battery.
Attention! If the stereo system installed in the car is equipped with a security code, before disconnecting the battery, make sure that you have the correct combination to activate the audio system!
2. Drain the coolant from the radiator (see chapter Settings and ongoing maintenance). If the mixture has been changed recently, save it for future use.
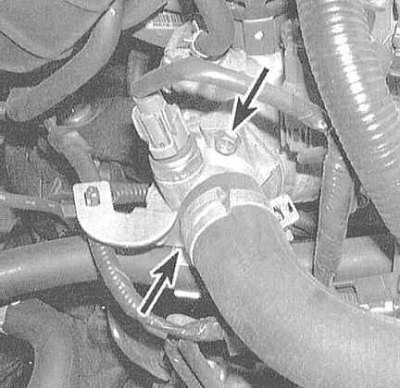
3. Walk along the upper radiator hose to the engine and find the thermostat housing cover.
4. Loosen the clamp and remove the hose from its connecting pipe. If the hose "stuck", grab it with tongs (as close to the cut as possible) and try to rotate on the nozzle in order to destroy the retaining layer of deposits. The old hose to be replaced can be simply cut (try not to scratch the pipe).
5. If the surface of the nozzle in contact with the hose is corroded or mechanically damaged, it makes sense to replace the thermostat housing cover.
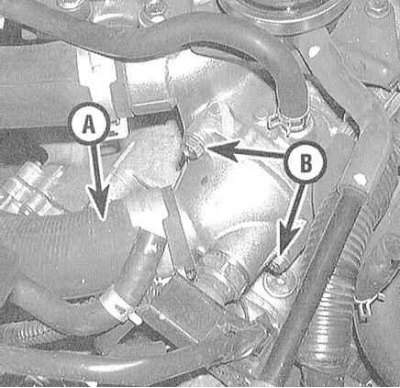
6. Turn out fixing bolts and remove a cover of a casing of the thermostat.
If cover "got used to", tap it with a soft-faced hammer. Prepare to collect spilled liquid.
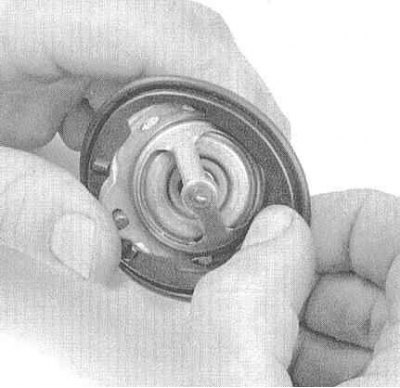
7. Try to remember the installation position of the thermostat (valve finger up), then remove it from the case.
8. Remove all traces of sealant and old gasket material from casing and cover surfaces.
9. Replace thermostat rubber seal.
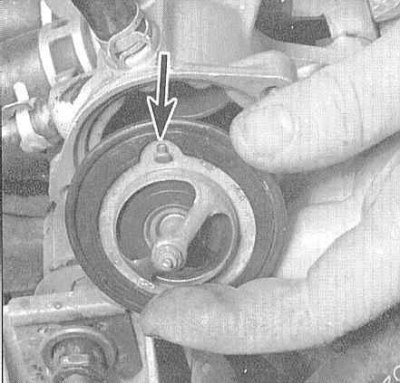
10. Install the thermostat in the casing (do not use any sealant). Make sure that it is turned with the bleeder finger up, and with the spring-equipped side towards the engine.
11. Replace the cover and secure it with bolts, tightening the latter with the required force.
12. Connect a hose to a branch pipe of a cover and firmly fix it with a collar. Replace all components removed for access.
13. Fill the system with the required amount of coolant (see chapter Settings and ongoing maintenance).
14. Start the engine and check for leaks and thermostat operation (see paragraphs 2 to 4).