
1. Block the front wheels. Raise the rear of the vehicle and secure it securely.
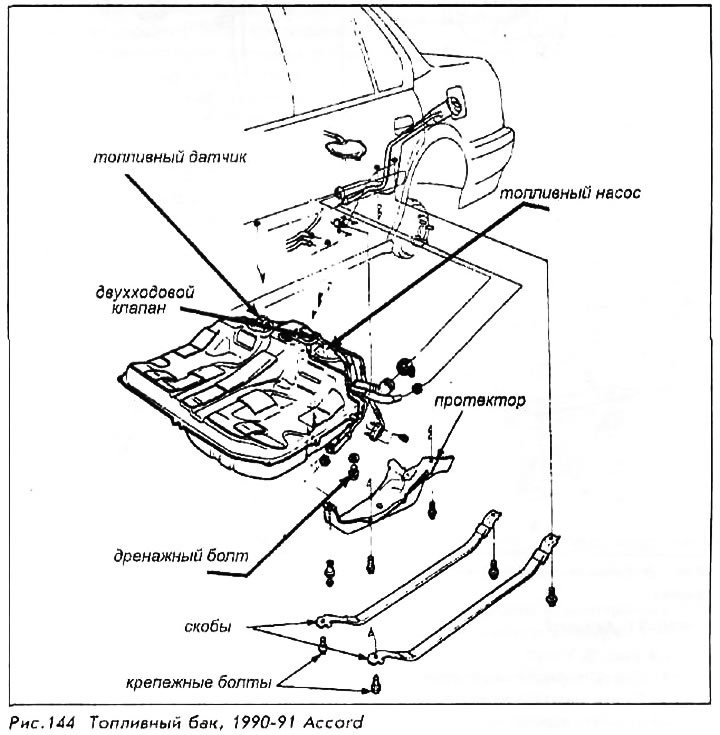
2. Remove the drain bolt from the tank and drain the remaining fuel.
3. Disconnect the 3-pin connector in the trunk.
4. Remove the protector from the fuel hoses on the side of the tank.
5. Mark and disconnect the hoses. Release the clamps and, turning the hose, remove it from the fitting.
6. Use a jack and a wide plate under the tank. Adjust the position as needed to keep the tank evenly supported.
7. Remove the nuts holding the tank brackets. The staples will fall down.
8. Lower the jack and remove the tank from under the car.
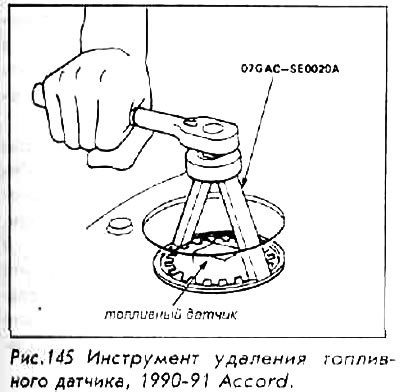
9. If the fuel gauge needs to be removed, use the Honda tool 07GAC-SE0020A to remove the thrust bushing. Then pull out the sensor.
For installation:
10. Install, if removed, the fuel gauge. Tighten the fastener.
11. Place the tank on a jack and position it under the vehicle. Put the tank back in place.
12. Fit the tank brackets and tighten the fixing nuts to 38 Nm.
13. Connect the hoses and electrical wiring connectors. Tighten the fuel line fitting to 37 Nm.
14. Install fuel line protector.
15. Fit the drain bolt to the tank with a new washer and tighten to 50 Nm.
16. Lower the vehicle to the ground. Connect the 3-pin connector in the trunk.
17. Using the funnel on the fuel filter and pouring fuel slowly, fill the fuel tank.
18. During cranking, the starter may run longer than usual due to lack of fuel in the lines.