
Starting in 1988 on the Prelude model, the ECU has a built-in self-test routine, typical of models with variable fuel injection. This feature makes it much easier to solve problems that arise, since the computer is able to indicate where to look for a malfunction.
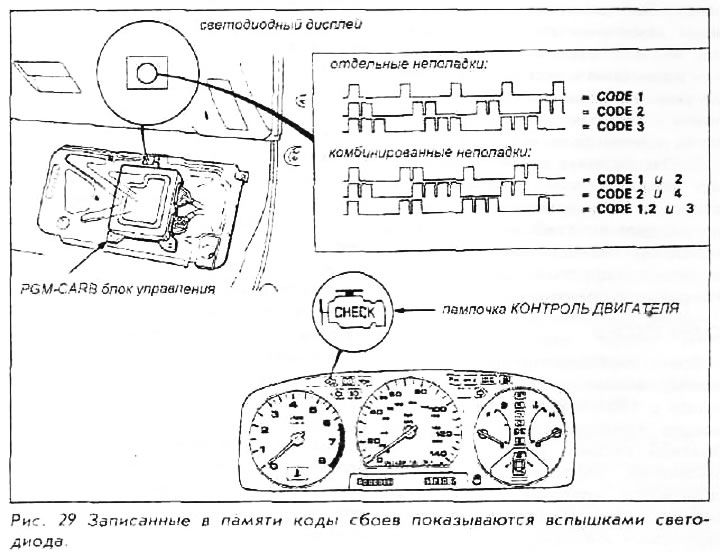
The engine control device constantly monitors the input and output signals. As soon as it detects a signal outside the operating range - too small or too large a signal - it immediately turns on the CHECK ENGINE control light (engine control), located on the instrument panel. This alerts the driver that there is a problem. In addition, the ECU device attributes a certain code to the failure that has occurred, which is recorded in the computer's memory. This code can later be extracted and used in system testing.
The ECU has a software protection function. If an error occurs in a real signal, then the ECU ignores it and replaces it with some fixed value. When the control lamp is on, it means that the controller is currently using at least one fixed signal instead of a real one, which may degrade the vehicle's driving characteristics. Fixed signals are selected for the most common driving conditions such as warm engine, moderate throttle opening, etc. If the fixed signal does not correspond to real conditions, then the operation of the engine will differ from what is expected.
Several codes can be stored in memory at once. The ability to narrow down the search for a faulty circuit to one or two significantly reduces testing time. The most common mistake when using fault codes is to assume that the faulty node is the one indicated by the code, and not the entire electrical circuit associated with it. (For example, code 1 indicates an incorrect oxygen content signal. But this does not automatically mean that the oxygen sensor is faulty. It usually works flawlessly. More often there is a contact failure in the connector.) Since the ECU monitors the incoming signal, any electrical part or assembly can cause a malfunction signal. Bad connections, poor grounding, and even blown fuses can cause a noticeable change in the signal to the controller. When using fault codes, always remember that you must carefully check the entire circuit associated with the node indicated by the code. Most often, the failure is caused by a bad or rusty contact. The nodes themselves, generating signals, rarely fail under normal conditions.
Deciphering codes
The ECU is located at the front of the floor near the front passenger footwell. Remove the floor mat. The large top protective cover of this module will become visible. Open the diagnostic panel from the dashboard. On the top edge of the cover there is a window through which the LED is visible. Turn on the ignition without starting the engine. The LED will start flashing. The number of flashes reflects the number of code. For example 14 flashes, a pause and 5 more flashes means code 14 and code 5.
If the read code is not in the code list, the number of LED flashes should be recalculated. If, nevertheless, the code turned out to be incorrect, then it is necessary to replace the ECU module with a checked and serviceable one and repeat reading the code. After reading the codes, refer to the appropriate diagnostic card for testing.
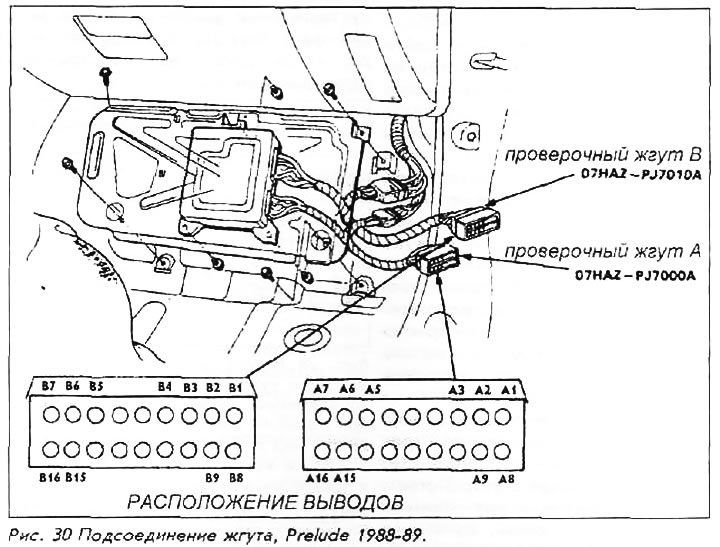
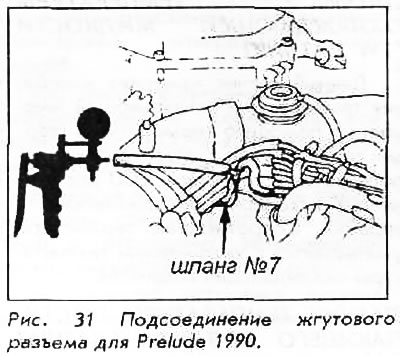
Note that some tests require a Honda type tester. (Use fixture #07HAZ-PJ7010A or 07HAZ-PH7000A for 1988-89 and 07LAJ-PT30100 for 1990.) This device allows you to safely test electrical circuits. It connects between the ECU and the harness.
Prelude Model Crash Codes (PGM-CARB system)
| Code 1 | oxygen content |
| Code 2 | vehicle speed pulse generator |
| Code 3 | exhaust manifold absolute pressure, electrical signal (IDA) |
| Code 4 | vacuum switch signal |
| Code 5 | exhaust manifold absolute pressure, vacuum signal (IDA) |
| Code 6 | coolant temperature |
| Code 7 | gear position signal (for automatic transmission); clutch switch signal (for manual transmission) |
| Code 8 | ignition coil signal |
| Code 10 | inlet air temperature |
| Code 14 | electronic air flow control (EACV) |