
Attention:
- Adjustment is performed on a cold engine (below 38°C).
- Before adjusting the belt tension, check the condition of the belts.
- Since the belts are tensioned automatically by springs, do not apply additional force when adjusting.
- Do not loosen the adjusting nut more than 1 turn.
- The crankshaft pulley bolt has a right-hand thread. Adjustment is performed by rotating the crankshaft counterclockwise using the crankshaft pulley bolt as shown in the figure, so the bolt may become loose. After finishing the work, use the TORX key to tighten the crankshaft pulley bolt to the required force.
- Bolt - 16x1.5 mm:
 : 245 N·m (25 kg·m)
1. Disconnect the terminal and connector of the generator electrical wiring, remove the electrical wiring from the valve cover (see below).
2. Remove the valve cover.
- For valve cover installation, see above.
- Be careful not to get engine oil on the belts.
3. Remove the top cover.
- Do not use the top cover to store small parts. Before installing the cover, remove dirt with a cloth.
4. Set the piston of cylinder No.1 to the TDC position of the compression stroke.
5. Loosen the adjusting nut 2/3 - 1 turn.
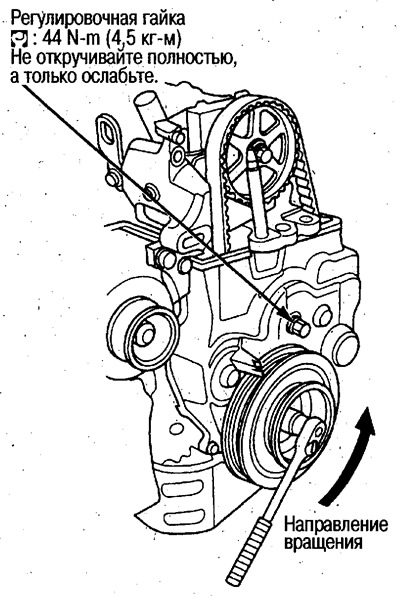
6. Turn the crankshaft 1 revolution, then turn it further so that the camshaft pulley turns 3 teeth.
Attention:
- The timing belt and balance shaft belt are adjusted simultaneously.
- If the camshaft pulley has turned more than 3 teeth, do not turn the crankshaft in the opposite direction. Turning the crankshaft counterclockwise, re-set the piston of cylinder #1 to the TDC position of the compression stroke and make the adjustment.
7. Tighten the adjusting nut to the required torque.
 : 44 N·m (4.5 kg·m)
(The text was taken from the website www.HondaBook.ru)