
Attention:
- Do not apply oil to the friction surfaces of the disc and pads.
- Be sure to replace non-reusable components with new ones.
- Do not allow foreign particles to enter the cylinders and anthers.
- Be careful not to get brake fluid on paint surfaces. If it does get on paint surfaces, rinse immediately with water.
- Make sure all components are clean and start assembling.
- Do not reuse drained brake fluid.
- Use genuine Honda DOT 3 or DOT 4 brake fluid.
- To prevent chemical changes in the brake fluid, do not mix fluids of different types.
See above for installation of brake pads and gaskets.
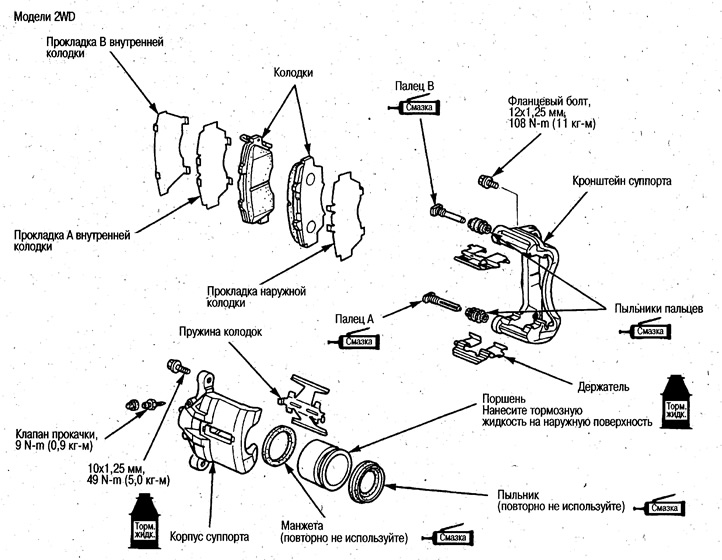
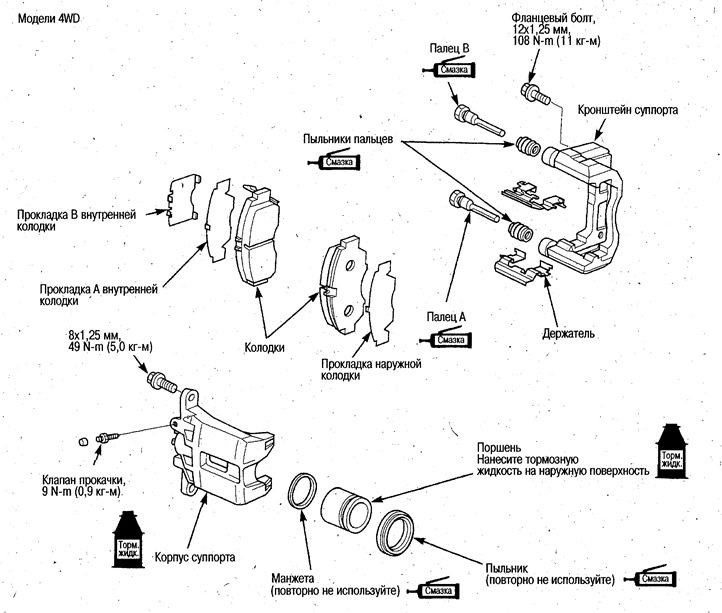
The assembly is described using the example of 2WD models
1. Apply KS62M silicone grease to the piston collar and install it into the groove of the caliper body.
2. Apply rubber lubricant to the boot seal area and install it into the groove of the caliper body.
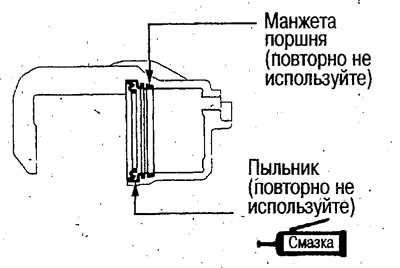
3. Apply brake fluid to the outer surface of the piston and the inner surface of the cylinder, install the piston into the cylinder and insert the boot into the piston groove.
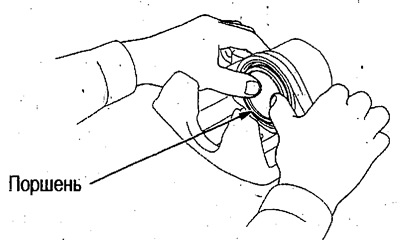
Attention:
- Do not insert the piston at an angle or with excessive force.
- Don't tear the duster.
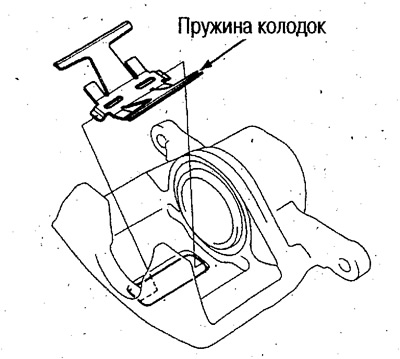
4. Install the pad spring into the caliper body.
5. Apply Nippon Grease RM to the pins, pack the dust boots with grease and install on the caliper bracket.
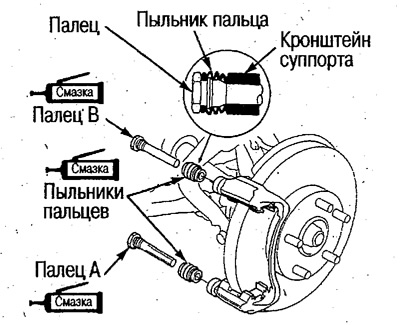
Correctly insert the anthers into the grooves of the bracket and pins.
6. Install the brake pads (see above).
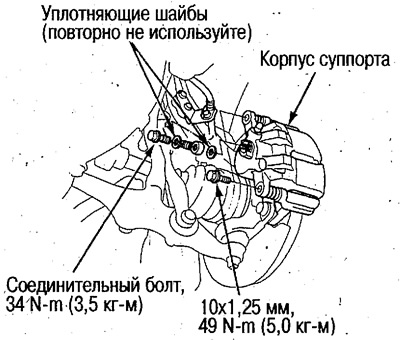
7. Install the brake caliper on the bracket, fix the caliper pin with a wrench and tighten the flange bolt.
8. Secure the brake hose with a connecting bolt with a sealing washer.
9. Purge (see above).