Testing
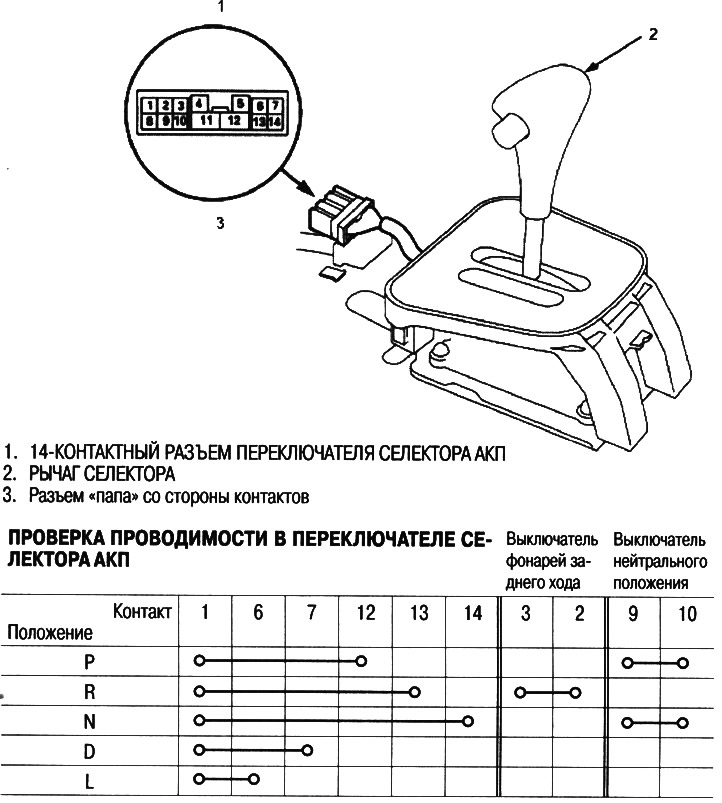
1. Remove the front console (see ch. «Body»), then disconnect the 14-track automatic transmission selector switch connector.
2. Check the continuity between the contacts in each position according to the following table:
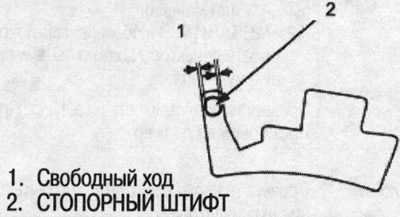
Move the selector lever back and forth in each position without pressing the release button and check the continuity within the free play.
If there is no conductivity within the free play, adjust the installation position of the automatic transmission selector switch as follows.
Adjustment
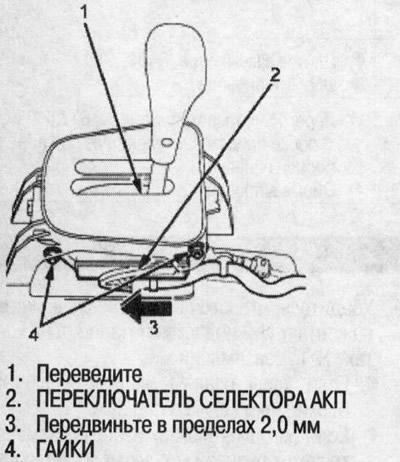
1. Switch to position P and loosen the nuts.
2. Move the switch in the direction of the arrow within 2.0 mm so that between contacts No. 1 and No. 12 there is conductivity within the free travel of the selector lever.
3. Recheck continuity between each of the contacts.
Note:
If adjustment is not possible, check for damage to the latch and/or selector lever bracket. If there is no damage, replace the switch. The engine should start when the selector lever is in position N within the free play.
Replacement
1. Remove the front console, then disconnect the 14-track automatic transmission selector switch connector.
2. Turn off two fixing nuts.
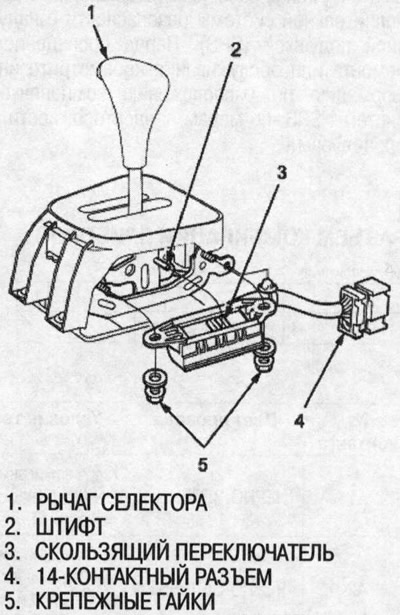
3. Move the sliding switch to the position «Neutral», as it shown on the picture.
4. Move the selector lever to position «Neutral», then set the switch.
5. Secure the switch with two mounting nuts.
6. Carry out testing of the switch in position P and N of the selector lever. The engine should start when the selector lever is in position N within the free play.
7. Connect the 14-pin connector, secure the harness with a clamp, and install the front console.