
Caution: Install the jack and stands only in designated areas.
1. Apply the parking brake, chock the rear wheels. Jack up the front wheels and place the car on supports.
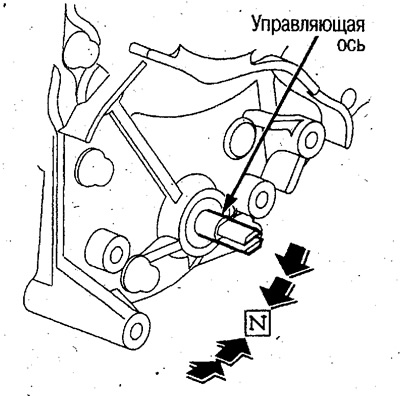
2. Set the selector lever to position N.
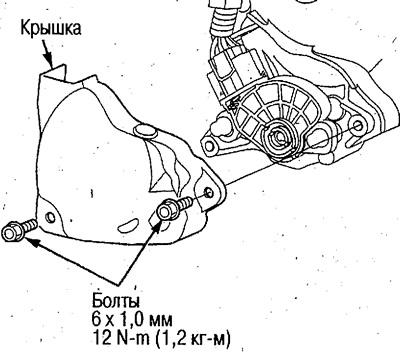
3. Remove the selector lever switch cover.
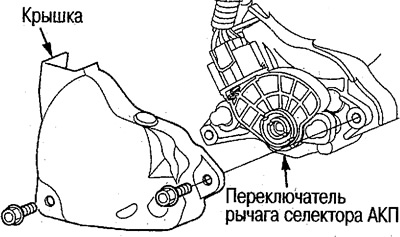
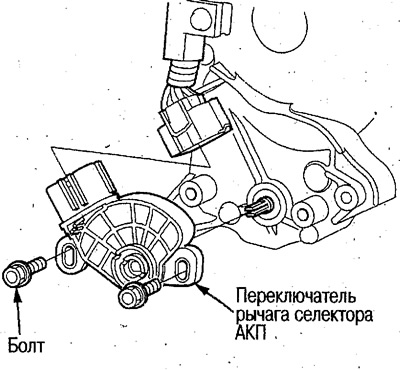
4. Loosen the mounting bolts, disconnect the connector and remove the automatic transmission selector lever switch.
5. Make sure the control axis is in the position shown in the figure.
6. Align the grooves of the rotary section so that they are in line with the adjustment grooves of the N range. To do this, insert a 2 mm thick feeler gauge into all grooves and fix the N position.
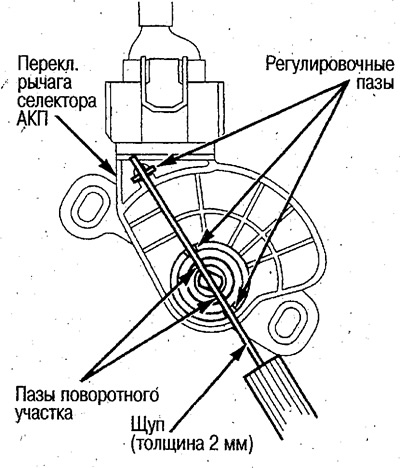
7. Connect the automatic transmission selector lever switch connector from the electrical wiring side and install it with the probe fixed in position N.
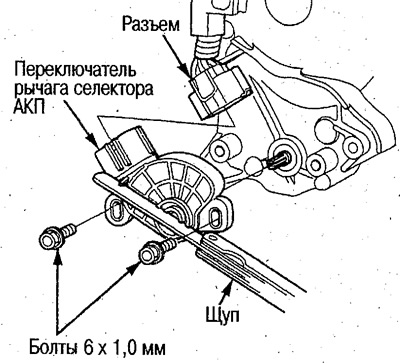
8. Without removing the dipstick, tighten the mounting bolts to the required torque.
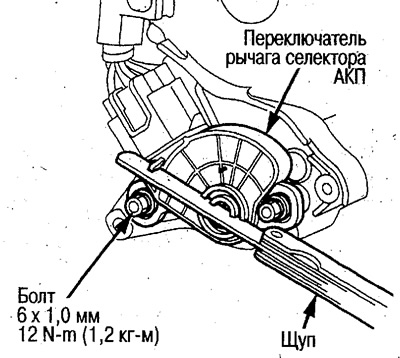
9. Firmly tighten the connector and install the switch cover.
10. Turn the ignition key to the ON (II) position and check that the N indicator lights up. Move the selector lever to all positions and check that its position indication is correct.
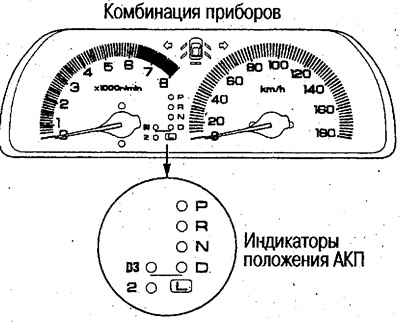
11. Start the engine, move the selector lever to all positions and make sure that:
- The engine starts only in positions N and P.
- When the selector lever is in the R position, the reversing lights come on and a warning buzzer sounds.
[The article is based on information from the website hondabook.ru]