
Note:
- Cover the fenders with a protective cloth to prevent damage to the paintwork.
- To avoid damaging the electrical wiring, disconnect it carefully by grasping the connector.
- Label all wiring and hoses to avoid misconnection. Also make sure that they do not come into contact with other electrical wiring and hoses and do not interfere with other components.
1. Lock the hood in the open position.
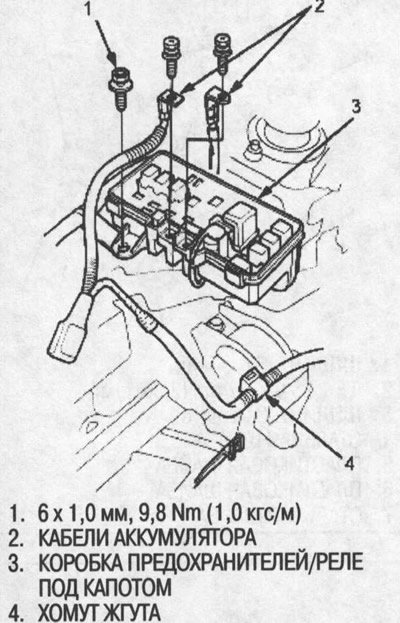
2. First disconnect the cable from the negative battery terminal, then from the positive one.
3. Disconnect the battery cables from the fuse/relay box under the hood.
4. Remove the harness clamp.
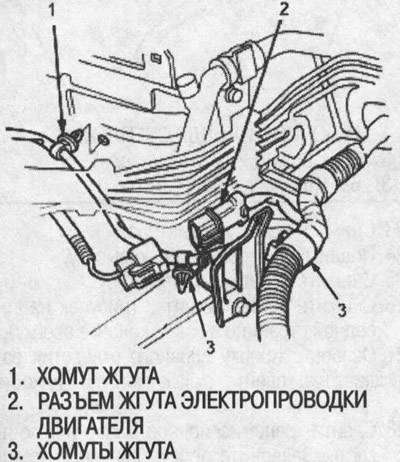
5. Disconnect the engine wiring harness connector on the right side of the engine compartment.
6. Remove the harness clamps.
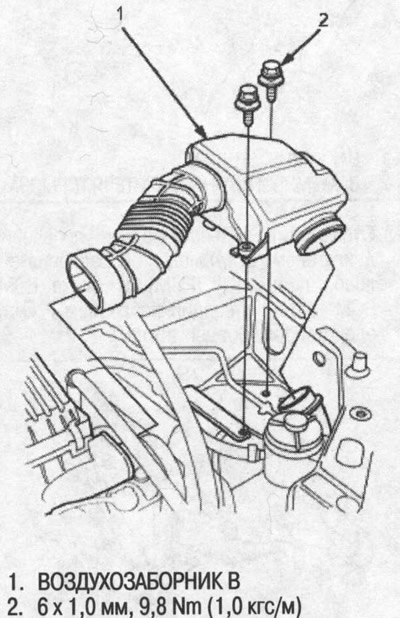
7. Remove air intake B.
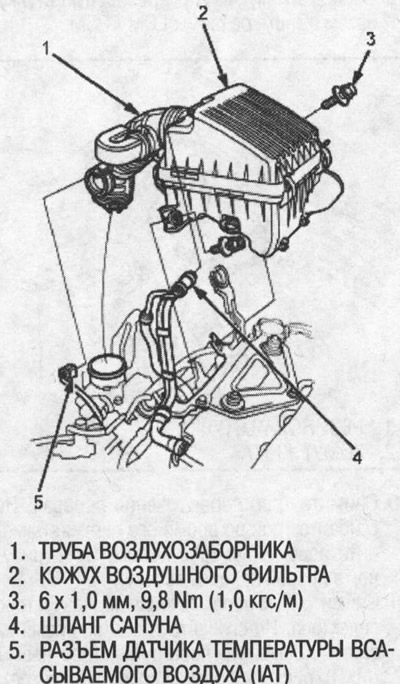
8. Remove the breather hose, then disconnect the intake air temperature sensor connector (IAT).
9. Remove the air filter cover and air intake pipe.
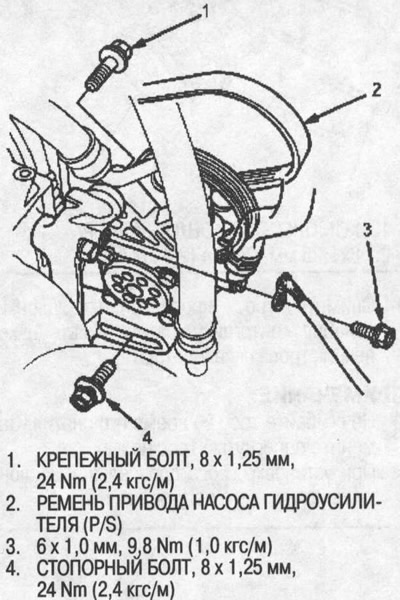
10. Remove the mounting bolt and locking bolt, then remove the power steering pump drive belt (R/S) and the pump itself, without disconnecting the hoses from the hydraulic booster (figure in the right column above).
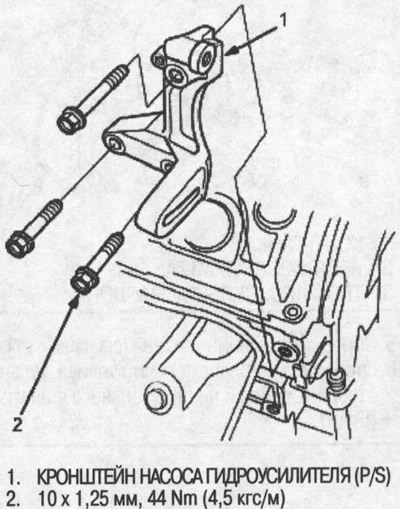
11. Remove the P/S power steering pump bracket (drawing in the right column in the center).
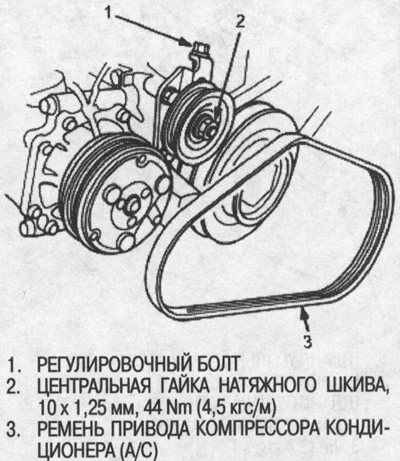
12. Loosen the adjusting bolt of the central nut of the idler pulley, then remove the A/C compressor drive belt (A/C).
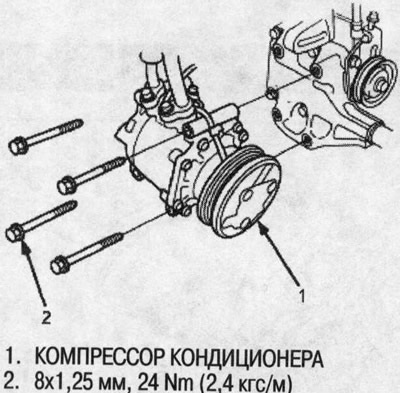
13. Remove the air conditioning compressor without disconnecting the hoses from the air conditioner.
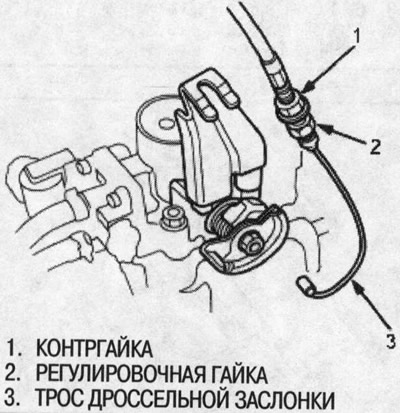
14. Remove the throttle cable by loosening the locknut, then remove the accelerator cable tip.
Note:
- Do not bend the cable while removing it. Replace the bent cable with a new one.
- When installing the throttle cable, adjust it.
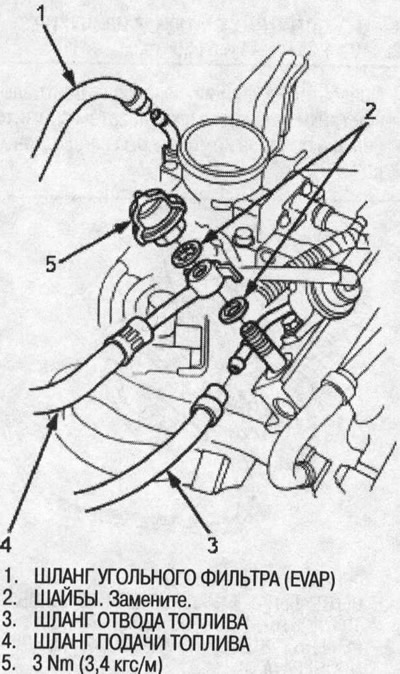
15. Relieve fuel pressure (see chapter 11).
16. Disconnect the fuel supply hose, fuel return hose and carbon filter hose (EVAP).
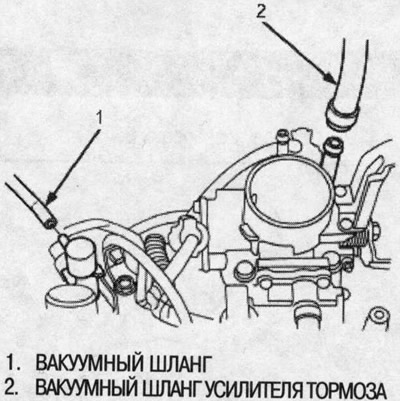
17. Disconnect the brake booster vacuum hose and vacuum hose.
18. Disconnect the engine control module connectors (ECM) /power train control module (RSM) from the ECM/PCM, then disconnect the engine wiring harness connectors.
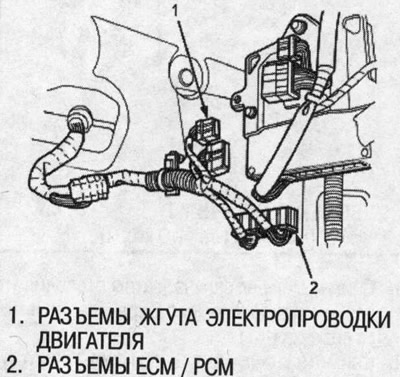
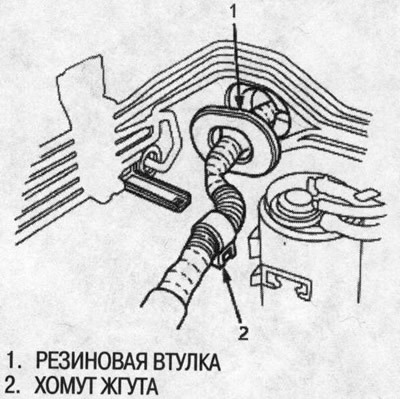
19. Remove the harness clamp and rubber grommet, then remove the ECM/PCM connectors.
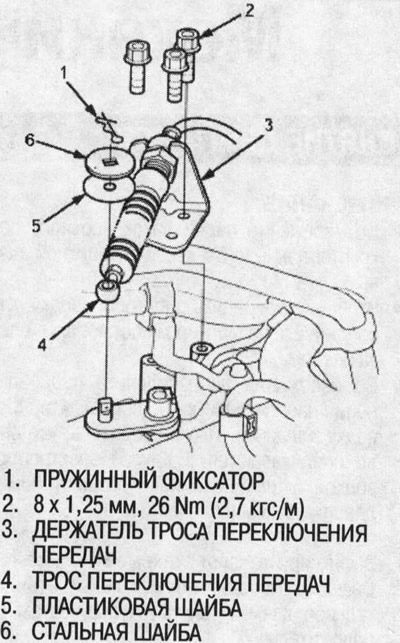
20. Remove the shift cable. Do not bend the cable while removing it. Replace the bent cable with a new one (CVT) (figure in the right column above).
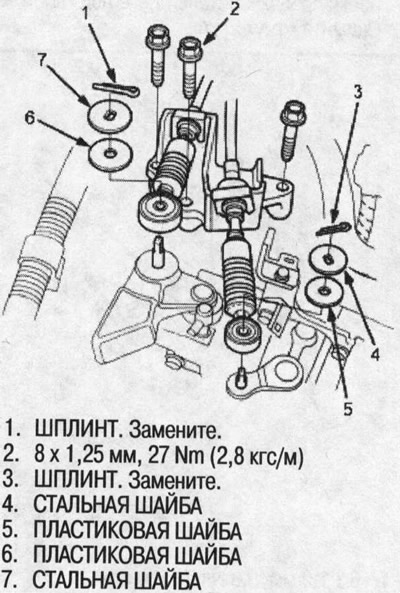
21. Remove the shift cable and selector cable. Do not bend cables while removing them. Replace the bent cable with a new one (ITUC) (drawing in the right column in the center).
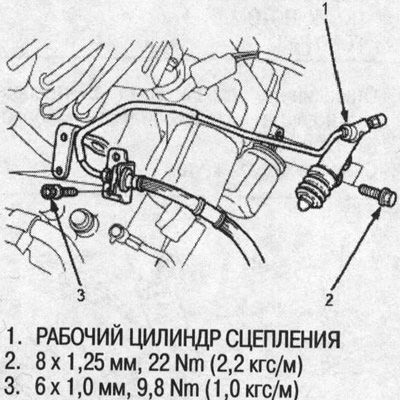
22. Remove clutch slave cylinder and tubes/hoses assy (ITUC) (figure in the right column below).
Note:
- Do not disconnect tubing/hose assemblies.
- After removing the slave cylinder, do not press the clutch pedal.
- Do not bend tubing.
23. Remove the radiator cap.
24. Raise winch to full height.
25. Remove the front wheels.
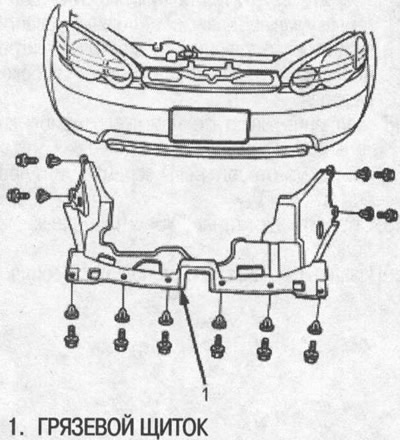
26. Remove mudguard (figure on the next page in the top left column).
27. Loosen the radiator drain plug, drain the engine coolant.
28. Drain transmission oil or fluid. Screw in the drain plug with a new washer, see the relevant chapters.
29. Drain the engine oil. Replace the drain plug with a new washer.
30. Disconnect the stabilizer links.
31. Remove the ball joints of the lower suspension arms.
32. Remove drive shafts.
Note: Apply fresh engine oil to all components. Put plastic bags on the ends of the drive shafts and tie them up.
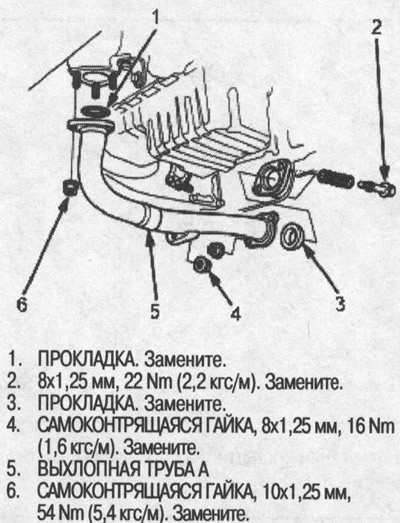
33. Remove exhaust pipe A.
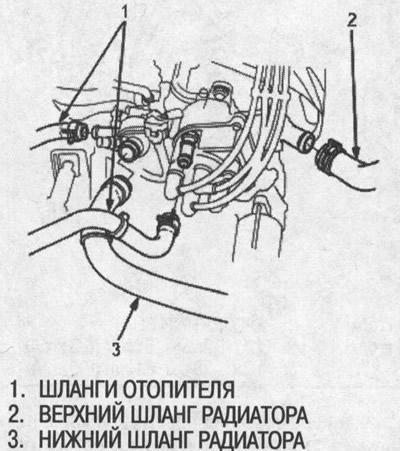
34. Lower the winch, then disconnect the upper radiator hose, lower radiator hose, and heater hoses.
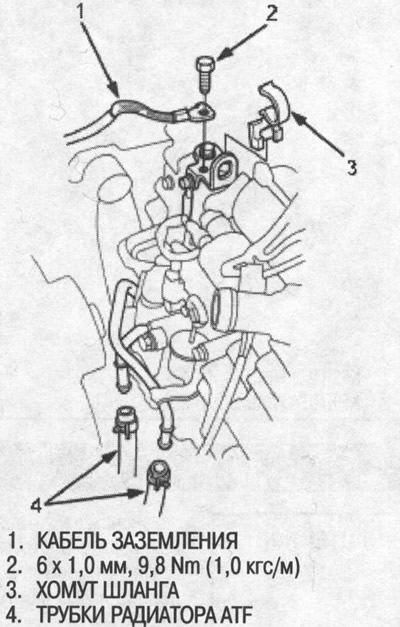
35. Remove the hose clamp and ground cable.
36. Disconnect the automatic transmission fluid cooler hoses (ATF), then plug the ATF cooler hoses and pipes.
37. Attach winch chain to engine as shown.
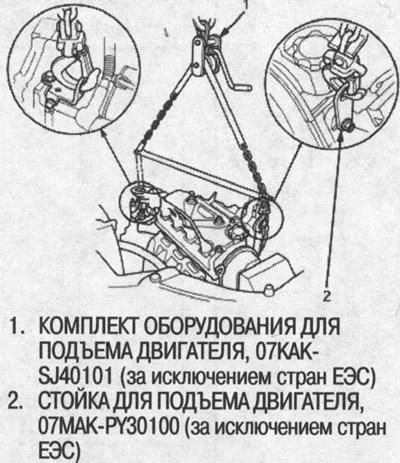
38. Raise the winch to full height.
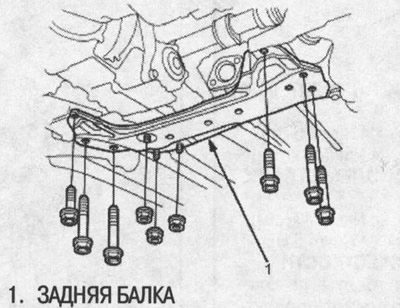
39. Remove the rear beam.
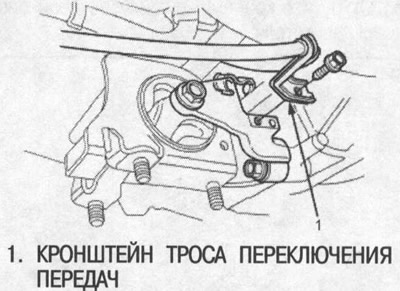
40. Remove shift cable bracket from rear support bracket (CVT) (figure in the right column above).
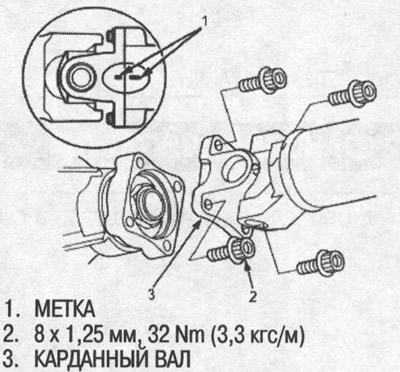
41. When removing the cardan shaft, put marks on the connecting flange of the transfer case and the cardan shaft, as shown in the figure. They will help to correctly install the driveshaft when reinstalling.
42. Remove the four bolts securing the propeller shaft, then separate the propeller shaft from the transfer case connecting flange.
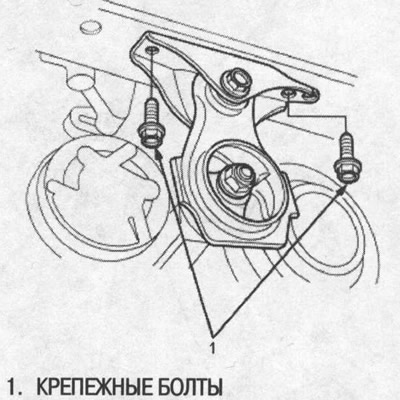
43. Turn off fixing bolts of an arm of the left forward support.
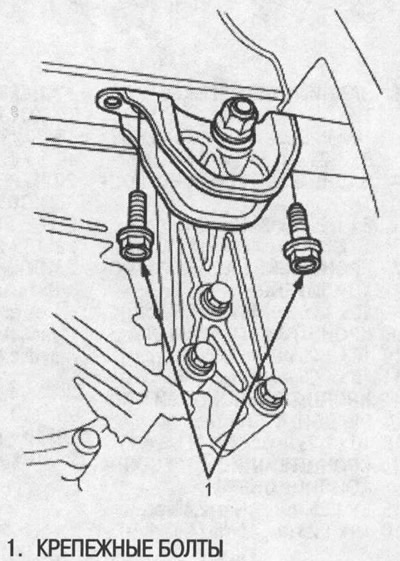
44. Turn off fixing bolts of the right forward support.
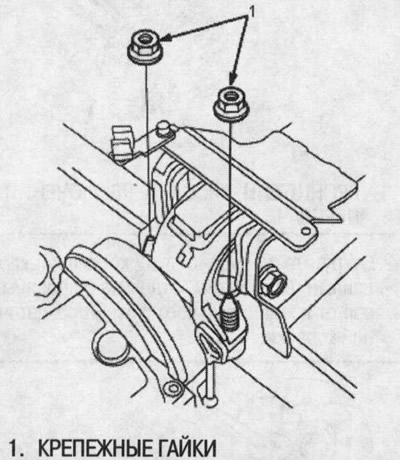
45. Turn off fixing nuts of a lateral support of the engine.
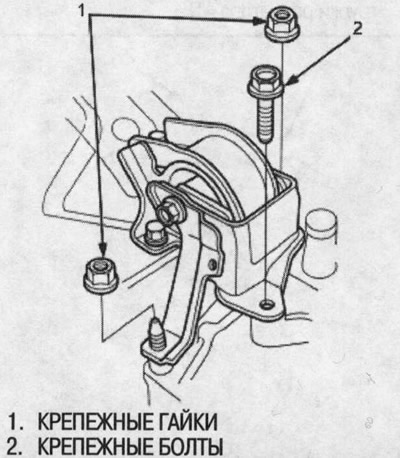
46. Turn off fixing bolts/nuts of an arm of a support of a transmission.
47. Make sure you completely disconnect the vacuum hoses, fuel hoses, coolant hoses and electrical wiring from the engine/transmission assembly.
48. Slowly lower the engine about 15 cm. Check again that all hoses and wiring are disconnected from the engine.
49. Lower the engine. Remove the chain winch.
50. Remove the engine from under the car.