1. rear stiffener; 2. 10x1.25 mm, 44 nm (4.5 kgf/m); 3. 8x1.25mm, 24nm (2.4 kgf/m); 4. rear stiffener; 5. 8x1.25mm, 24nm (2.4 kgf/m); 6. 10x1.25 mm, 44 nm (4.5 kgf/m); 7. power steering pump bracket; 8. 10x1.25 mm, 44 nm (4.5 kgf/m); 9. generator bracket; 10. 10x1.25 mm, 44 nm (4.5 kgf/m); 11. 10x1.25 mm, 44 nm (4.5 kgf/m); 12. engine side support bracket; 13. 10x1.25mm, 54nm (5.5 kgf/m); 14. A/C compressor bracket; 15. 8x1.25mm, 24nm (2.4 kgf/m); 16. 10x1.25 mm, 44 nm (4.5 kgf/m); 17. front stiffener; 18. 10x1.25 mm, 44 nm (4.5 kgf/m); 19. 8x1.25 mm, 24 nm (2.4 kgf/m); 20. front stiffener; 21. 8x1.25 mm, 24 nm (2.4 kgf/m); 22. 10x1.25 mm, 44 nm (4.5 kgf/m); 23.element of rigidity. tighten the bolts on the stiffener in the order indicated by the numbers in the figure (24-27).; 24. 8x1.25 mm, 24 nm (2.4 kgf/m); 25. 8x1.25 mm, 24 nm (2.4 kgf/m); 26. 10x1.25 mm, 44 nm (4.5 kgf/m); 27. 10x1.25 mm, 44 nm (4.5 kgf/m)
The engine is installed in the reverse order of removal. Install the support bolts/nuts in the sequence shown. Failure to follow this procedure may result in excessive noise and vibration and reduce bushing life.
1. Roll the engine under the car. Attach the chain winch to the engine, then lift the engine until it is in the desired position in the vehicle.
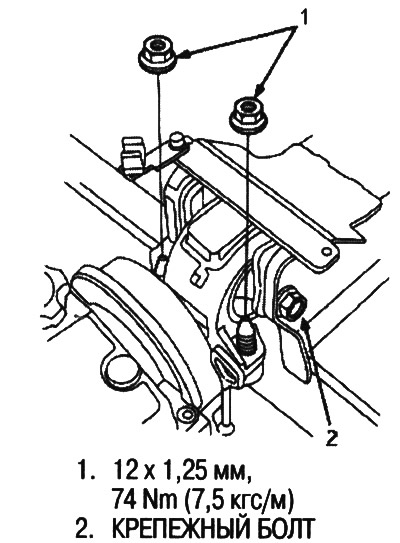
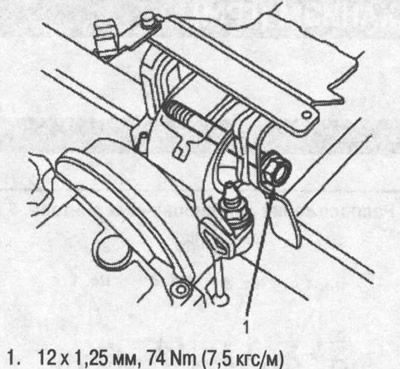
2. Tighten the engine side mount mounting nuts, then loosen the mounting bolt.
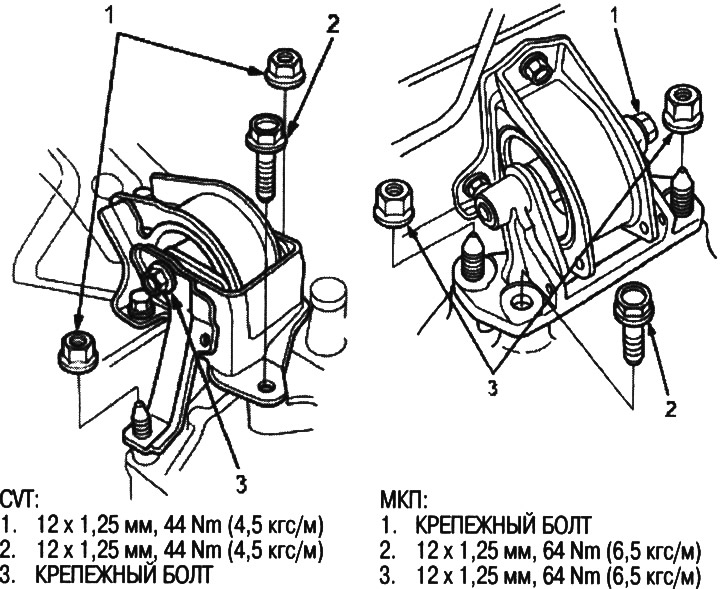
3. Tighten the mounting bolts/nuts of the transmission support bracket, then loosen the mounting bolt.
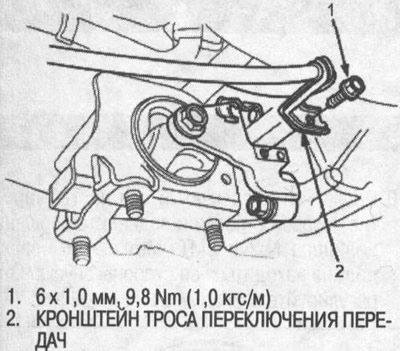
4. Install shift cable bracket to rear support bracket (CVT) (picture on next page top left).
5. Install the rear beam.

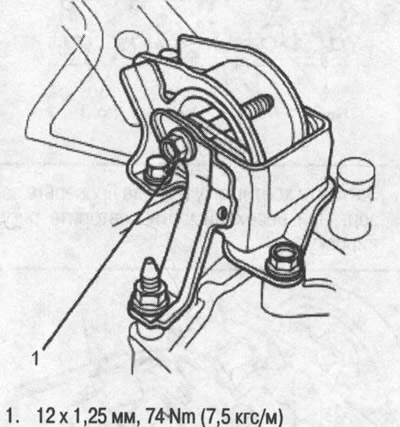
6 Tighten the motor side mounting bolt (figure in the middle column at the top). Tighten the transmission mount bracket fixing bolt (figure in the middle column at the bottom).
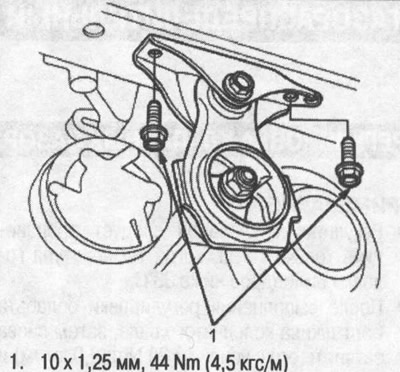
7. Tighten the mounting bolts of the left front support bracket (figure in the right column above).
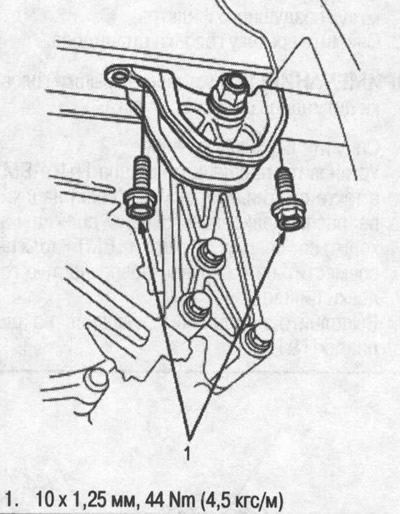
8. Tighten the fixing bolts of the right front support (figure in the right column below).
9. Adjust and verify the following:
- Make sure the circlips on the ends of the drive and countershafts are in place.
- Adjust the throttle cable.
- Fill the engine with engine oil.
- Fill the gearbox with ATF.
- Fill the radiator with engine coolant and bleed the cooling system.
- Clean the terminals and battery cable lugs with sandpaper, assemble them, then apply grease to prevent corrosion.
- Check for fuel leaks. After assembling the fuel line sections, turn the ignition switch to the ON position (II) (do not turn on the starter) so that the fuel pump is activated for about two seconds and the fuel line is pressurized. Repeat this operation two or three times and check for fuel leakage at any point in the fuel line.
- Check wheel alignment.
 |  |
 |  |