
HondaBook.ru
Auto companies Volkswagen Auto companies Ford Auto companies Lada Auto companies Skoda Auto companies BMW Auto companies Mazda Auto companies Peugeot
English Русский
Български
Беларускі
Український
Српски
Hrvatski
Română
Polski
Slovenský
Magyar
Bookmark Contacts Sitemap   


Accord Civic Fit / Jazz CR-V HR-V Others Articles
Fit 1 (2001-2008)

Engine assembly — removal (Honda Fit 1)

  • Main
  • Honda Fit
  • 1 (2001-2008)
  • Power unit
  • Engine repair
  • Engine assembly — removal
0
Note:
  • Relieve any residual fuel pressure before removing the fuel supply hose.
  • The coolant in the cooling system is under pressure. Make sure the engine is cool before removing the radiator cap to avoid steam burns.
  • After the temperature drops, wrap the lid with a cloth and open it carefully.
  • The garage jack and hoist hooks must be securely installed in the designated places.


1. Remove the battery.

2. Remove the air filter housing.

3. Disconnect the wiring harness retainer and remove the battery tray.
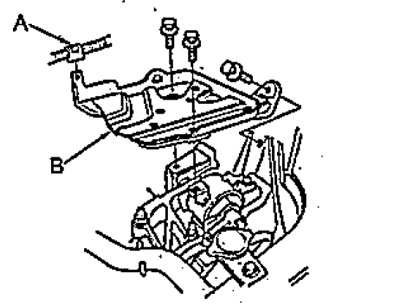
A - retainer,

A - retainer,
B - battery tray.


4. Disconnect the electronic control unit connectors.
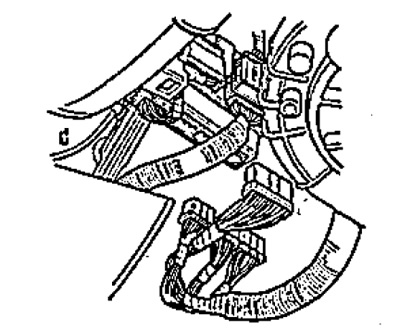
4. Disconnect the electronic control unit…


5. Remove the wiring harness by disconnecting the two clips and the seal.
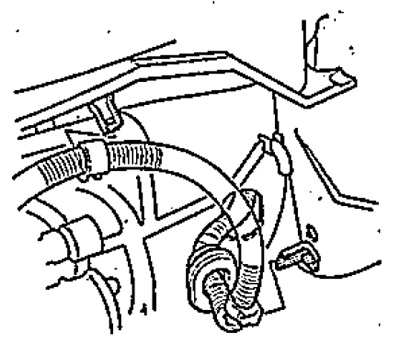
5. Remove the wiring harness by disconnecting the…


6. Disconnect the power wires from the fuse box, disconnect the wire clamps.
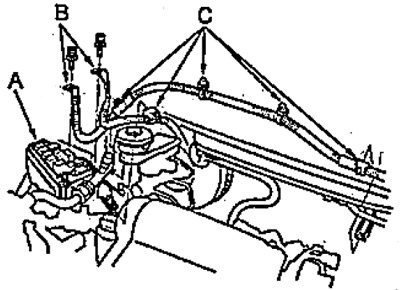


A - fuse box,

A - fuse box,
B - power wires,
C - wire clamps.


7. Remove the fuse box from the rack.

8. Loosen the lock nut and remove the throttle cable.
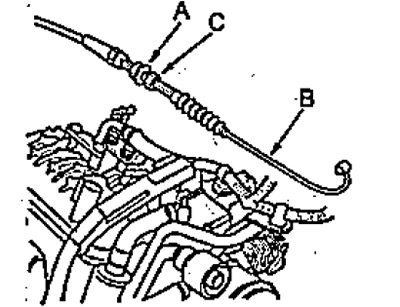
A - lock nut,

A - lock nut,
B - throttle cable,
C - adjusting nut.


9. Release residual fuel pressure (see chapter "Fuel injection system").

10. Disconnect the fuel vapor recovery system hose and vacuum hose.
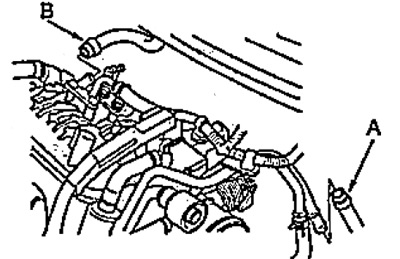
A - fuel vapor recovery system hose,

A - fuel vapor recovery system hose,
B - vacuum hose.


11. Disconnect the transmission control cable.
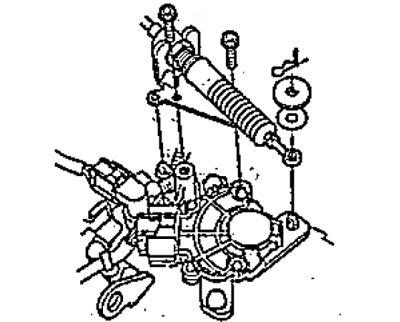


11. Disconnect the transmission control cable.


12. Remove the accessory drive belt.

13. Remove the radiator cap.

14. Hang the front part using a hoist.

15. Remove the mudguard.
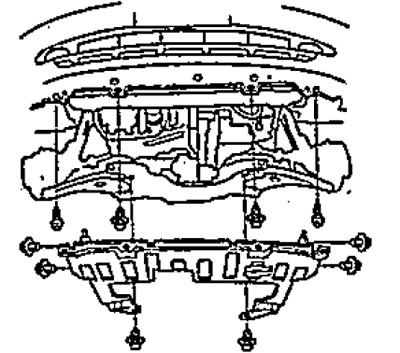
15. Remove the mudguard.


16. Open the radiator drain cock and drain the coolant.

17. Drain the engine oil.

18. Drain the transmission oil.

19. Remove the oxygen sensor and catalytic converter.
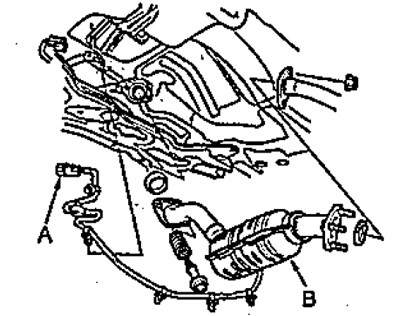
A - oxygen sensor connector,

A - oxygen sensor connector,
B - catalytic converter.


20. Remove the anti-roll bar struts (see chapter "Suspension").


21. Disconnect the ball joint from the lower suspension arm.

22. Disconnect the drive shafts.

23. Disconnect the propeller shaft from the transfer case.

24. Disconnect the steering gear from the subframe (see chapter "Steering").

25. Disconnect the air conditioning compressor electromagnetic clutch and the air conditioner.

Note: Do not disconnect the air conditioner hoses.
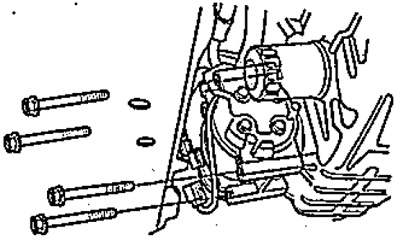

Note: Do not disconnect the air conditioner hoses.


26. Remove the air conditioner fan shroud.

27. Disconnect the transmission fluid cooler hoses.
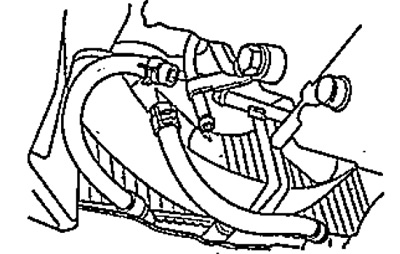
27. Disconnect the transmission fluid cooler…


28. Disconnect the upper and lower hoses.
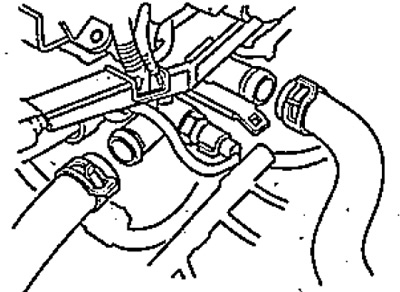
28. Disconnect the upper and lower hoses.


29. Disconnect the heater hoses.
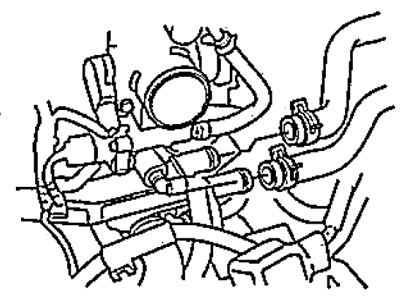


29. Disconnect the heater hoses.


30. Attach the chain hooks to the engine lifting eyes.
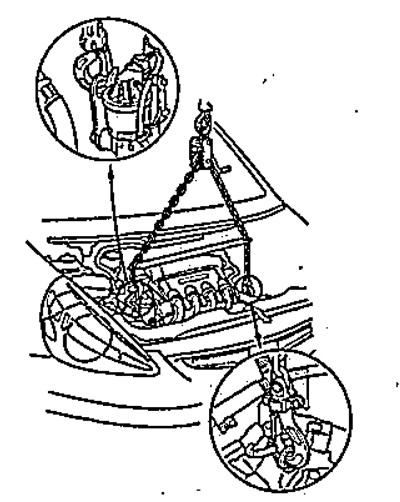
30. Attach the chain hooks to the engine lifting…


31. Disconnect the ground wire and transmission mount bracket.
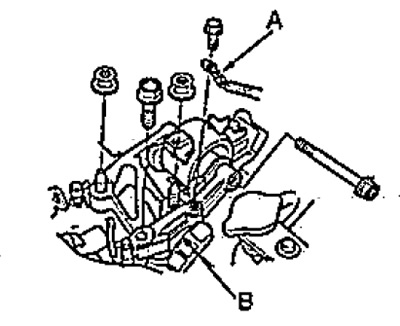
A - ground wire,

A - ground wire,
B - transmission support bracket.


32. Disconnect the ground wire and the front engine mount bracket.
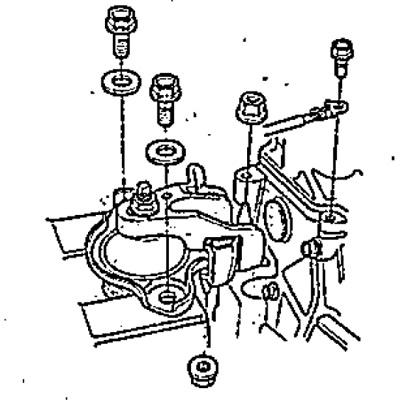
32. Disconnect the ground wire and the front…


33. Remove the rear engine mount mounting bolts.
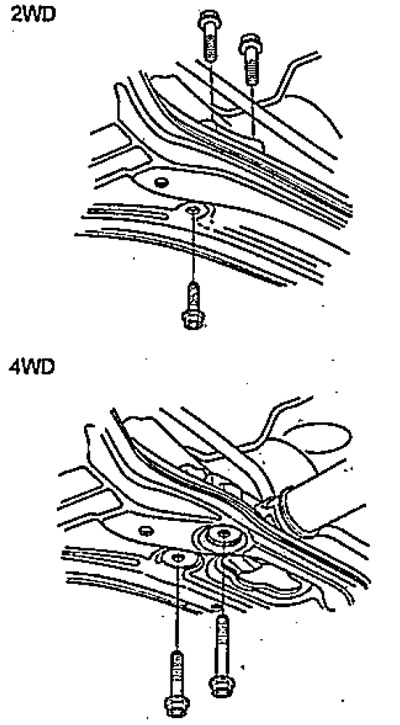


33. Remove the rear engine mount mounting bolts.


34. Remove the subframe.
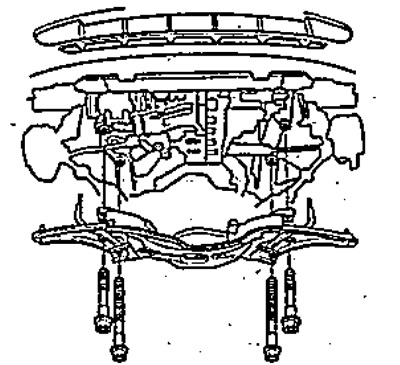
34. Remove the subframe.


35. Make sure all wires, hoses and connectors are disconnected from the engine.

36. Carefully lower the engine down, avoiding contact with the body and radiator.

(The article was copied from the website «Hondabook.ru»)
This article is available at: russian, bulgarian, belarusian, ukrainian, serbian, croatian, romanian, polish, slovak, hungarian
This information has been verified: Varvara Vereshchagina
Share with friends:
◀ Previous
Fit 1: Engine repair
Next ▶

Checking and adjusting the valve clearance (L15A)
Checking and adjusting the clearance in the valve drive (L1ZA)
Engine assembly — installation
Timing chain — removal
Timing chain — installation
Removal the cylinder head
Checking the cylinder head for flatness
See also other articles from Honda manuals:
Engine Oil Recommendations Honda Accord 3 (1985-1989)
Emergency engine start Honda Civic 3 and 4 (1983-1991)
Location of serviced units and assemblies in the engine compartment Honda CR-V 1 (1995-2001, petrol)
Engine Starting Procedure Honda HR-V 1 (1998-2006, petrol)
Starting the engine Honda Avancier 1 (1999-2003, petrol)
Link in different formats to this article
Comments and feedback from visitors
No comments yet


How much will 43 + 42 ?


Fit 1 (2001-2008) 
  • General information
  • User manual
  • Maintenance
  • Power unit
  • Engine repair
  • Cooling and lubrication system
  • Injection and power system
  • Control system
  • Engine electrical equipment
  • Transmission
  • Clutch
  • Mechanical gearbox
  • Automatic gearbox
  • Variator (CVT)
  • Drive shafts and gearbox
  • Chassis and running gear
  • Car suspension
  • Steering
  • Brake system
  • Body and interior
  • Exterior (external elements)
  • Interior (internal elements)
  • Doors, locks and windows
  • Heater and air conditioner
  • Safety system
  • Electrical equipment
  • Equipment and devices
  • Wiring diagrams (since 06.2001)
  • Wiring diagrams (since 06.2004)
HondaBook.ru © 2018–2026 • Mobile version • Sitemap: EN BG BY UA RS HR RO PL SK HU • Feedback • Driver Information • Search system • Bookmark
Accord 3 (1985-1989) • Accord 6 (1997-2002) • Civic 3 and 4 (1983-1991) • Civic 5 and 6 (1991-2000) • Civic 6 (1995-2000) • Civic 7 (2000-2005) • Civic 8 (2005-2011) • Fit 1 (2001-2008) • CR-V 1 (1995-2001) • CR-V 2 (2002-2006) • HR-V 1 (1998-2006) • Avancier 1 (1999-2003) •
 
This website uses cookies to ensure proper functioning. By clicking "OK," you agree.