
WARNING: This procedure requires the use of special tools or equivalent. Before removing from the rack, a special spring puller must be used to hold the spring.
1. Raise and secure the front of the vehicle. Make sure the stands are placed correctly.
2. Remove the front wheels.
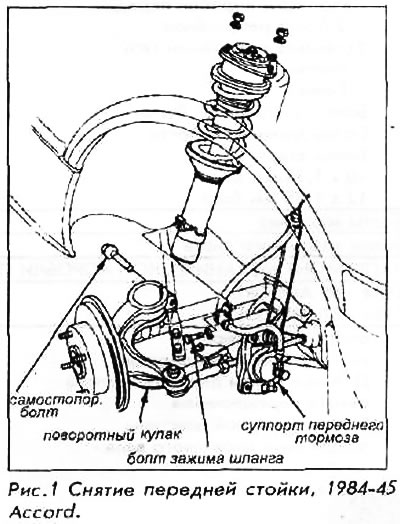
3. Disconnect the brake hose clamp from the rack.
4. Having unscrewed mounting bolts, remove the brake caliper. Use twine or stiff wire to hang the caliper away from the work area. Do not disconnect the brake hose from the caliper.
5. Disconnect the anti-roll bar from the lower suspension arm.
6. Remove the self-locking tie bolt at the bottom of the strut. Place a jack or other support under the suspension arm. Use a hammer to poke the fist down and away from the post; do not let the disc and knuckle assembly fall off after loosening them.
7. In the engine compartment, remove the rubber cover and 3 nuts from the upper shock mount.
CAUTION: Do not remove the center (axial) nut at the top of the shock absorber.
8. To remove a rack in gathering from the car.
Disassembly
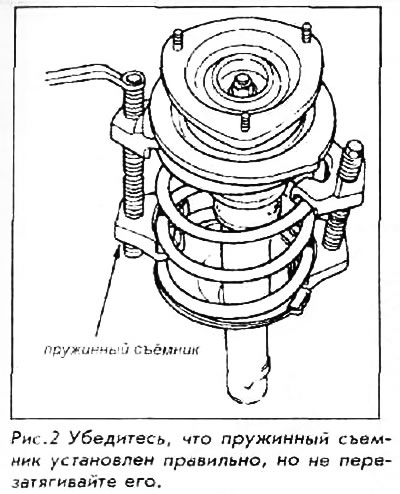
9. Install the spring puller on the spring. Tighten the puller just enough to remove the force of the spring on the top cup.
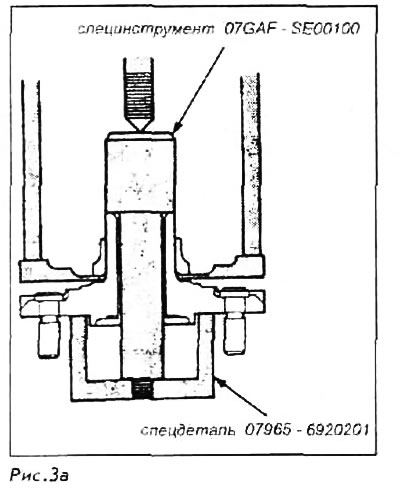
10. With the spring compressed, remove the central nut. Use the correct size hex wrench to keep the shaft from rotating while loosening the nut.
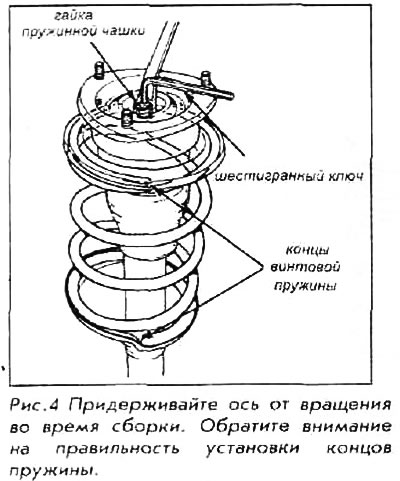
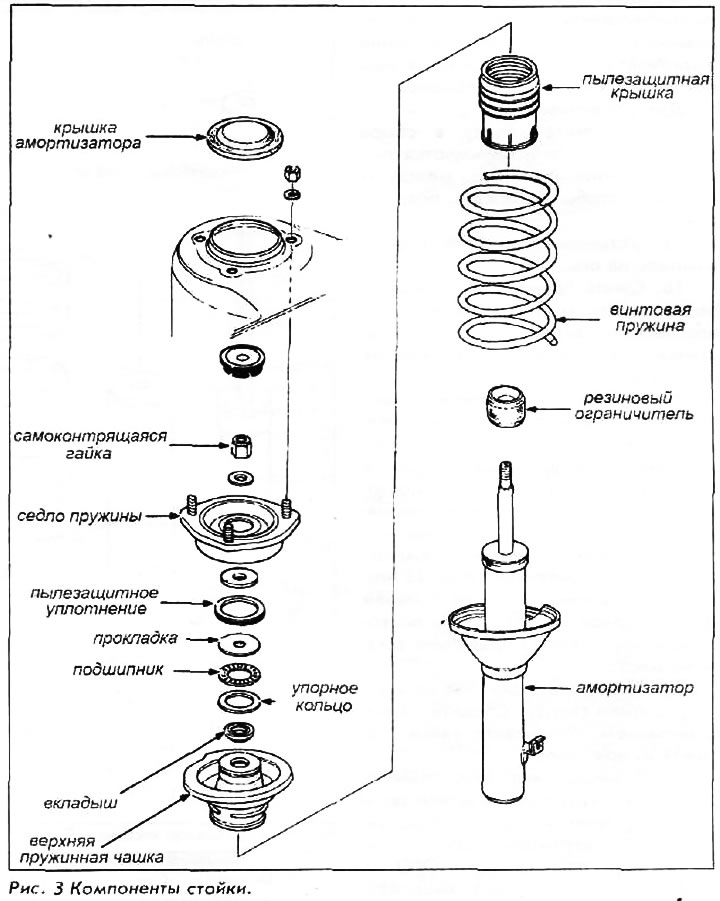
11. Remove the top mount. Carefully remove the seals, gaskets, and bearing at the top of the strut; save their order for correct subsequent assembly. Remove the compressed spring.
12. If the spring needs to be checked or replaced, slowly release the tension on the puller arms. Remove the tool when the spring is released to normal length.
13. Manually check the shock absorber for smooth operation over the entire stroke. Check it also for smoothness for short (50-100 mm) blows. Replace the assembly if you feel any sign of unevenness or binding. The shock absorber itself is not collapsible; it has no parts to be replaced.
For installation:
14. Place the stand assembly upright. If a vise is used, place something between their jaws to avoid damage.
15. Install the rubber stop on the axle.
16. Compress the spring and install it on the shock absorber. Make sure the bottom coil aligns exactly in the bottom cup. Install the dust cover.
17. Install the upper spring cup, gaskets, bearing, seal and fastener. Coat both sides of the bearing with grease before installing. Make sure the top cup is aligned with the top coil of the spring.
18. Install a new upper axle nut; tighten it to 45 Nm.
19. Slowly loosen the spring remover, making sure that the released spring is properly seated.
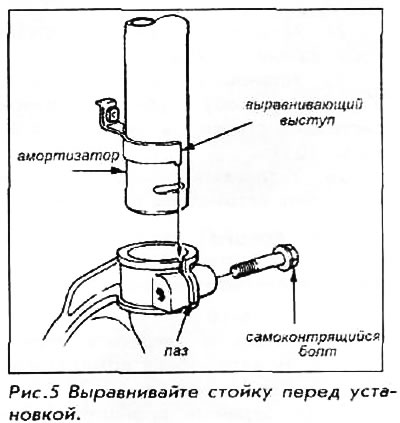
20. Place the stand in its mounting position from above. Watch out for alignment. Install the nuts, tighten them by hand.
21. With the strut properly aligned at the base and top, place a jack under the lower control arm. Raise the car with a jack until it raises a LITTLE; this will seat the shock absorber in the fist.
22. Install and tighten the coupling bolt to 65 Nm.
23. Tighten the top three mounting nuts to 39 Nm. Install the rubber cover on the top mount.
24. Install the stabilizer bar, tighten the bolts to 22 Nm.
25. Install the brake caliper. Install the brake pipe bracket to the rack; tighten it only up to 10 Nm.
26. Install the front wheels and lower the car to the ground.