
a) (2WD models) Apply the parking brake and chock the rear wheels. Jack up the front of the vehicle and support it on stands. Make sure the front wheels turn freely.
b) (2WD models) Jack up the vehicle and place it on stands.
c) Check the following parameters:
- engine coolant level;
- engine oil level;
- automatic transmission fluid level;
- ignition timing angle;
- idle speed.
2. Remove the mudguards.
3. Unscrew the plug and connect the pressure gauge in its place.
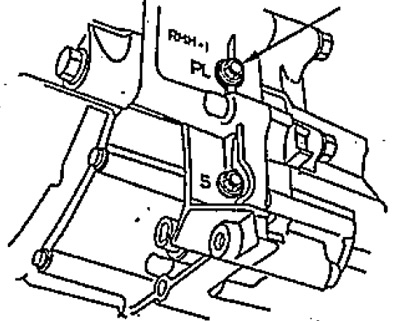
Pressure gauge connection nipple for checking pressure when the selector is in the "P" or "N" position.
4. Warm up the engine and automatic transmission.
5. Stop the engine and connect the diagnostic tool to the DLC(A).
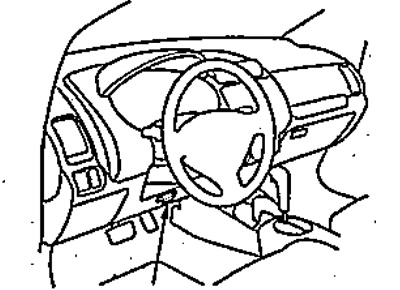
6. Check the working fluid pressure with the selector in position "P" or "N".
- a) Move the selector to position "P" or "N".
- b) Set the engine crankshaft speed to 2000 rpm.
- c) Measure and record the pressure value.
- d) Stop the engine and disconnect the pressure gauge,
- d) Install a new seal on the plug and tighten it.
Tightening torque: 18 Nm.
7. Check the working fluid pressure in the circuit of the first and second gear clutches.
a) Remove the air filter housing (see chapter "Maintenance and general check and adjustment procedures").
b) Unscrew the plugs and connect the pressure gauges in their place.
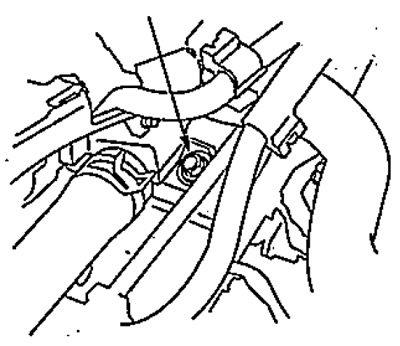
Connection nipple for pressure gauge for checking pressure in the first gear clutch circuit.
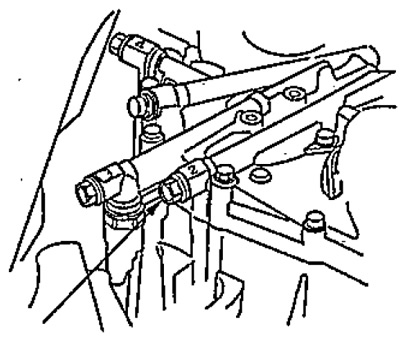
Connection nipple for pressure gauge for checking pressure in the second gear clutch circuit.
c) Temporarily install the air filter housing.
d) Start the engine.
d) Move the selector lever to position "1" (models without manual shift mode) or "S" (first gear engaged) (models with manual shift mode) and set the engine speed to 2000 rpm.
e) Measure and record the pressure in the first gear clutch circuit.
g) Move the selector lever to position "2" (models without manual shift mode) or "S" (second gear engaged) (models with manual shift mode), and set the engine speed to 2000 rpm.
c) Measure and record the pressure in the second gear clutch circuit.
i) Stop the engine and remove the air filter housing.
j) Disconnect the pressure gauges. Install a new seal on the plug and tighten it.
- Tightening torque - 18 Nm
l) Install the air filter housing (see chapter "Maintenance and general check and adjustment procedures").
8. Check the working fluid pressure in the circuit of the third, fourth and fifth gear clutches.
a) Unscrew the plugs and connect the pressure gauges in their place.
Table: Troubleshooting based on test results on a fully braked vehicle.
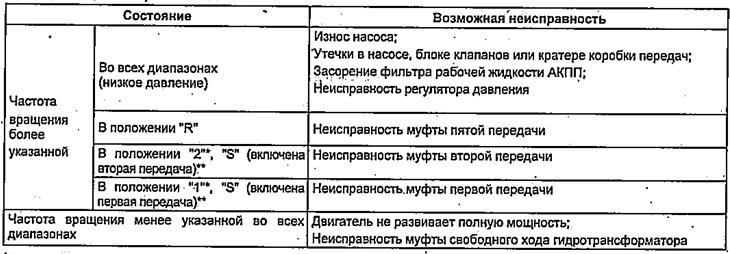
Note:
- * - models without manual gear shift mode;
- ** - models with manual gear shift mode.
Table. Working fluid pressure and possible malfunctions.
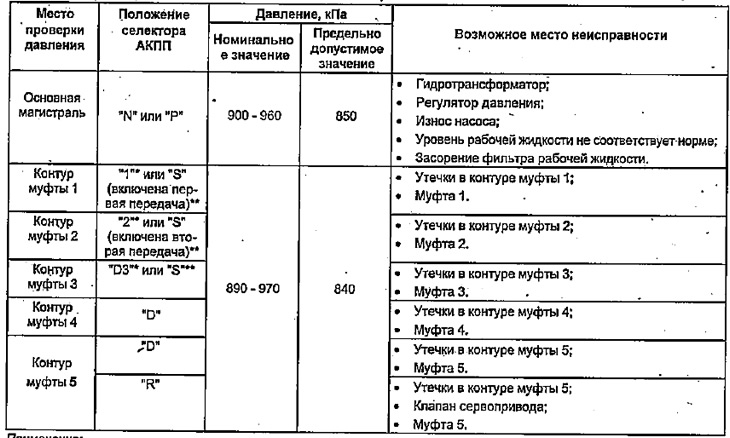
Note:
- * - models without manual gear shift mode;
- ** - models with manual gear shift mode.
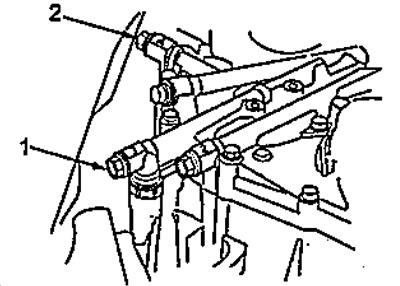
Connection nipples for pressure gauges to check the pressure in the circuit of the third and fourth gear clutches. 1 - nipple for the clutch, 3rd gear, 2 - nipple for the clutch, 4th gear.
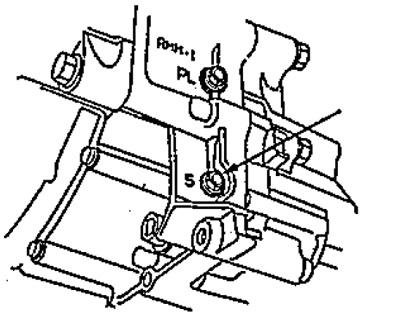
Connection nipple for pressure gauge for checking pressure in fifth gear clutch circuit.
b) Start the engine.
c) Move the selector lever to position "D3" (models without manual shift mode) or "S" (models with manual shift mode) and set the engine speed to 2000 rpm.
d) Measure and record the pressure in the third gear clutch circuit.
d) Move the selector to position "D" and set the engine speed to 2000 rpm.
e) Measure and record the pressure in the fourth and fifth gear clutch circuit.
g) Set the idle speed and press the brake pedal to brake the wheels.
c) Move the selector to the "R" position and set the engine speed to 2000 rpm.
i) Measure and record the pressure in the fifth gear clutch circuit.
k) Turn off the engine,
l) Disconnect the pressure gauges. Install a new seal on the plug and tighten it.
- Tightening torque - 18 Nm
9. Compare the measured values with those given in the table "Working fluid pressure and possible malfunctions". If the pressure does not correspond to the given one, then use the table to determine the location of the malfunction.
10. Install the fender liners.
[Material obtained from the website «HondaBook.ru»]