
Contents: Examination ⇊ Removal and installation ⇊
Examination
1. Remove the center console (see chapter "Body").
2. Disconnect the selector lock solenoid valve connector.
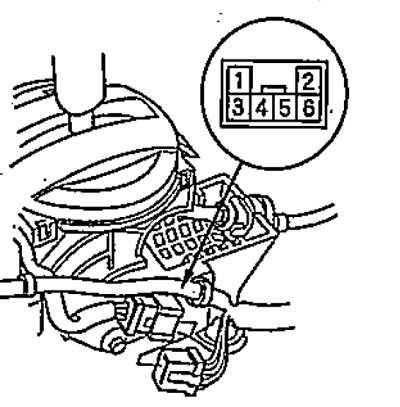
3. Connect terminal "1" to the positive terminal of the battery, terminal "3" to the negative terminal and check the operation of the selector lock solenoid valve.
4. Make sure that when voltage is applied to the above terminals, the selector can be moved from the "P" position to another position. Disconnect the wires from the battery and make sure that the selector cannot be moved from the "P" position to any other position.
5. Press the selector release button and check that the selector can be moved from the "P" position to another position.
6. Connect the selector lock solenoid valve connector.
7. Install the center console (see chapter "Body").
Removal and installation
1. Remove the center console (see chapter "Body").
2. Remove the indicator (A) from the selector position indicator panel (B) and remove the bulb (C).
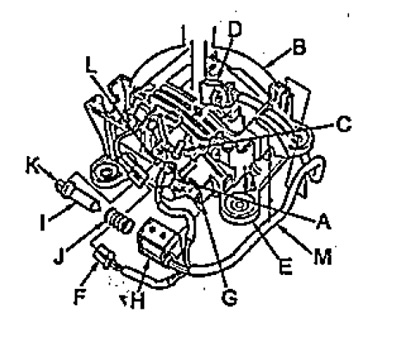
Z. Remove from selector (E) and disconnect connector (D).
4. Disconnect the connector (F) of the automatic transmission selector lever "P" position sensor.
5. Bend back the retainer (G) and remove the selector lock solenoid valve (H). Hold the plunger (I) and spring (J) while removing.
Note:
- Installation is carried out in the reverse order of removal.
- When installing the plunger, align the hole (K) in the plunger with the pin (L).