
1. Clean the surface of the cylinder head and block.
2. Install the new cylinder head gasket and dowel pins onto the cylinder block.
Note: Always use a new cylinder head.
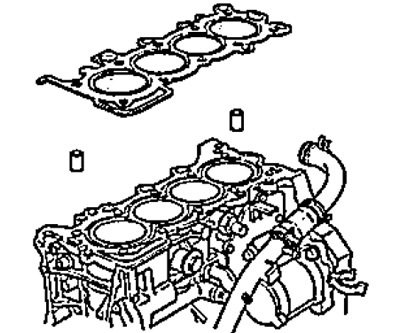
3. Make sure the crankshaft keyway is facing up.
4. Place the cylinder head on the cylinder block,
5. Measure the diameter of the cylinder head bolt at two points.
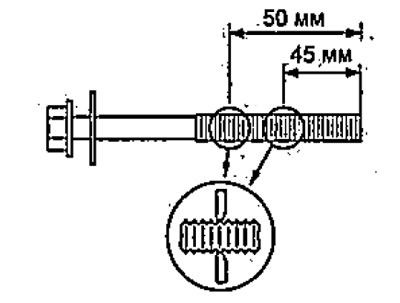
6. If the bolt diameter is less than 8.6 mm, replace the bolt.
7. Apply fresh engine oil to the threads and under the bolt heads.
8. Tighten the cylinder head bolts in the sequence shown in the illustration. Do not overtighten the bolts. If a bolt makes a noise when tightening, remove it and retighten it.
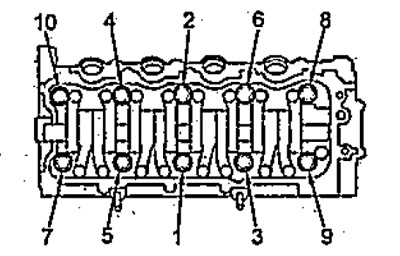
- Tightening torque - 29 Nm
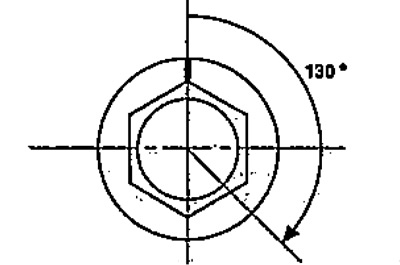
9. Tighten all bolts by 130°.
Note: If the bolts were tightened to a greater angle; turn them inside out and repeat the procedures starting from step "5".
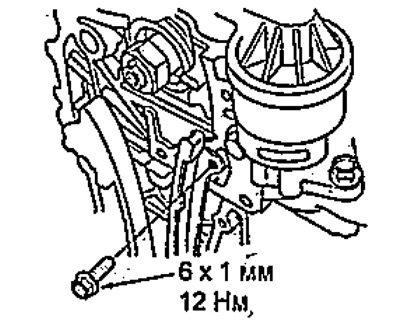
10. Install the timing chain guide bolt.
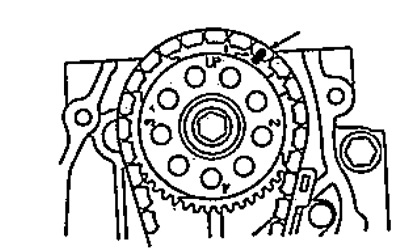
11. Install the chain on the camshaft sprocket, aligning the marks. Install the sprocket on the camshaft.
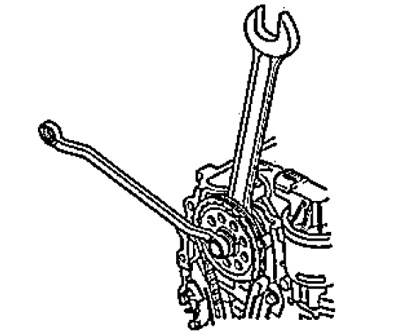
12. Secure the camshaft with a 27 mm wrench and tighten the bolt.
- Tightening torque - 56 Nm
13. Temporarily install the crankshaft pulley,
14. Apply engine oil to the tensioner contact surface through the oil return hole in the cylinder head.
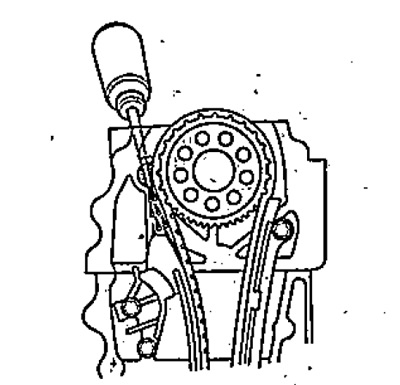
15. Secure the crankshaft pulley and install the wrench on the camshaft sprocket bolt.
16. Turn the camshaft clockwise until the chain tensioner is compressed, then remove the M6x1.0 mm bolt.
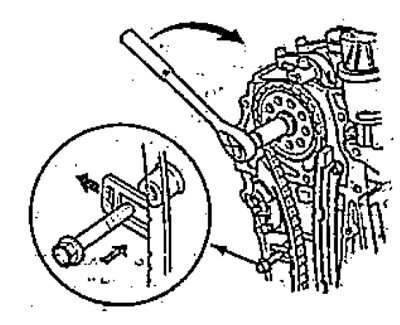
Note:
- The torque when turning the camshaft bolt should not exceed 56 Nm.
- Do not turn the camshaft counterclockwise.
17. Check the front crankshaft oil seal for wear. If the seal is damaged, replace it.
18. Remove sealant from the surface of the chain cover, bolts and bolt holes.
19. Clean the contact surfaces of the timing chain cover.
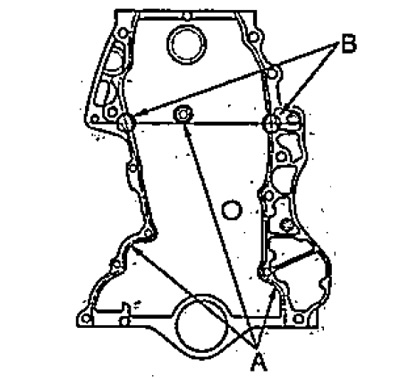
20. Apply sealant to the contact surfaces of the cylinder block and timing chain cover.
Note:
- Apply a continuous bead of sealant with a diameter of 1.5 mm to the areas marked "A".
- Apply a 3mm diameter bead of sealant to the chain cover at the locations marked "B".
- The parts must be installed within the time specified in the sealant's instructions for use, otherwise the sealant must be removed and reapplied.
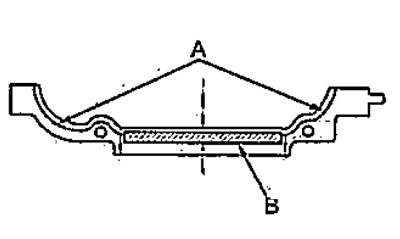
21. Apply sealant to the part of the chain cover that contacts the oil pan.
Note:
- Apply a continuous bead of sealant with a diameter of 1.5 mm to the areas marked "A".
- Apply a 5mm bead of sealant to the area marked "B".
- The parts must be installed within the time specified in the sealant's instructions for use, otherwise the sealant must be removed and reapplied.
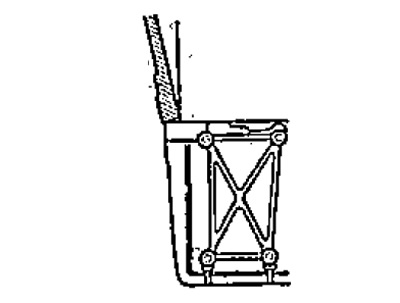
22. First install the chain cover face onto the oil pan, and then install the cover onto the cylinder block.
Note: When installing the cover, do not move its lower part along the contact surface of the oil pan.
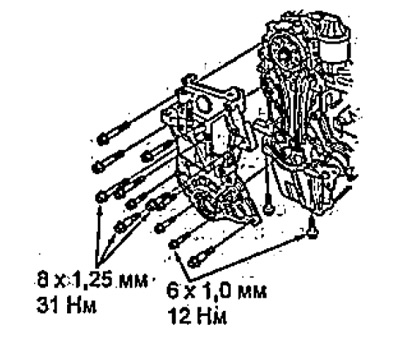
A - timing chain cover,
B - oil pan,
C - cylinder block.
23. Install the wire retainer and connect the crankshaft position sensor connector.
24. Install the front engine bracket and ground wire.
25. Install the crankshaft pulley.
26. Install the cylinder head cover,
27. Install the coolant pump pulley.
28. Install the intermediate roller.
29. Install the generator bracket mounting bolt.
30. Install the attachment drive belt and adjust its tension.
31. Install the connecting tube with the O-ring seal.
32. Install the coolant bypass flange.
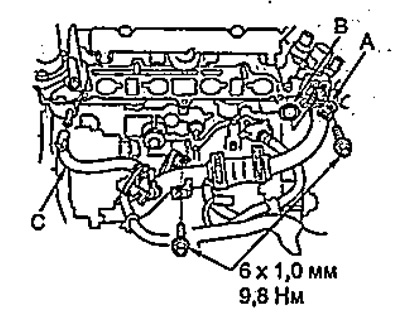
A - connecting tube,
B - ring seal,
C - coolant bypass hose.
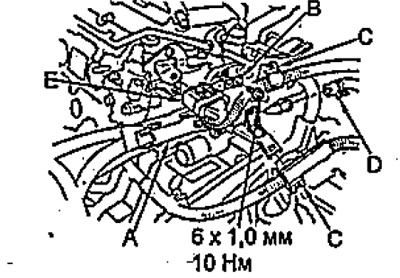
33. Install the wire holder "A", ground wire "B", wire retainer "C", coolant bypass hose "D" and wire harness retainer "E".
34. Install the fuel manifold.
35. Install the exhaust manifold.
36. Install the intake manifold.
37. Install the heater hose.
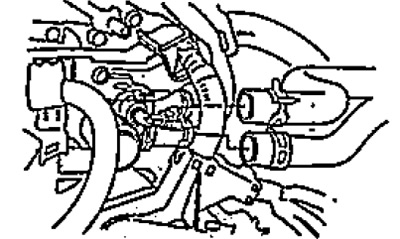
38. Install the upper and lower radiator hoses.
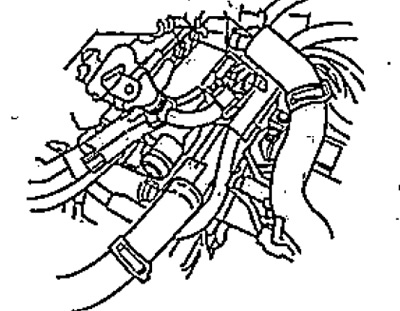
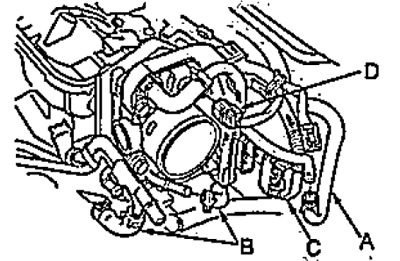
39. Connect the purge hose "A", coolant bypass hose "B", throttle body connectors "C" and fuel vapor canister "D".
40. Install the air filter assembly.
41. Adjust the valve clearance.
42. Make sure all tubes and connectors are connected correctly;
43. Check for fuel leaks. Turn the ignition switch to the "ON" (II) position (do not start the engine) so that the fuel pump operates for 2 seconds and increases the pressure in the fuel line. Repeat this operation 2-3 times and check the fuel line for fuel leaks.
44. Fill with coolant and bleed air.
45. Reset the crankshaft position sensor parameters and re-enter them (see section "Control system").
46. Check the minimum stable idle speed.
47. Check the ignition timing angle.
[The text of the article is available on the website «www.HondaBook.ru»]