
Warning! If the car stereo system is equipped with a security code, make sure you have the correct combination to activate the audio system before disconnecting the battery!
2. The control panel is attached to the rear of the instrument panel trim. The procedure for removing the trim is described in Chapter Body.
3. Separate the instrument panel trim and move it away from the instrument panel just enough to allow the two connectors to be disconnected from the back of the heater/air conditioning control panel.
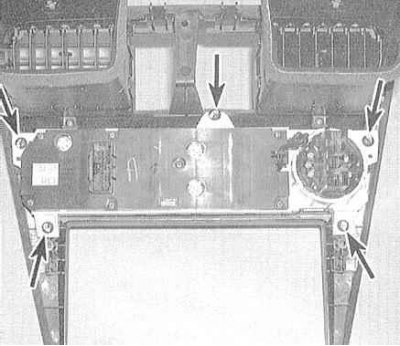
4. Remove the mounting screws and separate the control panel from the instrument panel trim.
5. Installation is carried out in reverse order.
Adjusting the cable
1. The supply of hot coolant to the heater heat exchanger is controlled by a special flap installed on the rear bulkhead of the engine compartment (on the engine side). The flap is driven by a metal cable connected to the control lever for mixing the air supplied to the passenger compartment on the control panel of the heater/air conditioner.
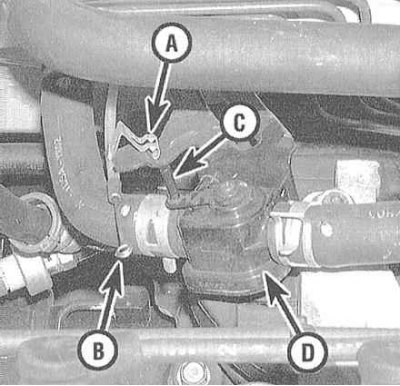
2. In the engine compartment, release the cable from the retainer on the control valve assembly.
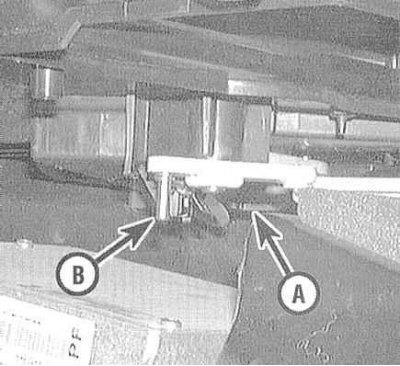
3. In the vehicle interior, release the lock and remove the cable loop from the hook of the air mix control lever.
4. Turn on the ignition and move the air mix control lever to the MAX COOL position. Connect the cable loop to the lever and, pressing the cable casing against the stop, snap the lock into place.
5. In the engine compartment, pull the heat exchanger flap lever towards the bulkhead until it stops, connect the cable end to it and snap the casing into the retainer.