
Precautionary measures
Warning! Do not smoke when working on the fuel system. Do not produce sparks or open flames in the work area.
The fuel pipe/quick coupling assembly connects the fuel pump built into the fuel tank with the fuel filter and fuel return pipe, and the fuel filter with the fuel supply pipe. To remove or install the fuel filter, fuel pump and fuel tank, you must disconnect or connect the quick couplings. Please note the following:
- The fuel pipe/quick coupling assembly is not heat resistant, do not damage it during welding or other heat generating operations.
- The fuel line/quick connector assembly is not acid-resistant, do not touch it with the cloths used to wipe off the electrolyte. Replace the fuel line/quick connector assembly if it has come into contact with electrolyte or similar substances.
- When disconnecting or connecting the fuel pipe/quick connector assemblies, do not bend or twist them excessively. If there is any sign of damage, replace.
Disconnected quick-release couplings can be reconnected, but the retainer on the insertion tube cannot be reused once removed. Replace the retainer:
- when replacing the fuel pump
- when replacing the fuel supply pipe
- if it was taken off the phone
- if it is damaged
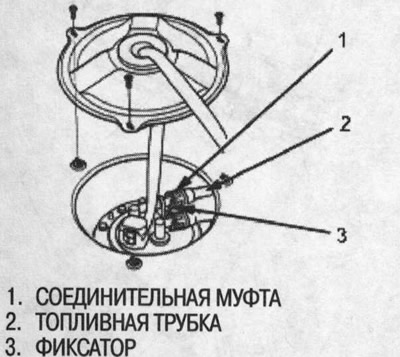
Disconnection
Warning! Do not smoke when working on the fuel system. Do not produce sparks or open flames in the work area.
1. Disconnect the negative cable from the battery.
2. Remove the filler cap and release the fuel pressure in the fuel tank.
3. Relieve the fuel pressure (see below).
4. Check that the quick-release connections are not dirty and clean them if necessary.
5. While holding the coupling in one hand, squeeze the locking tabs with the other hand and pull the coupling apart.
Note:
- Do not damage the tube or other components. Do not use a tool.
- If the coupling does not come off, wiggle it while squeezing the locking tabs until the coupling comes off.
- Do not remove the clamp from the tube; if you remove it, you will have to replace it with a new one.
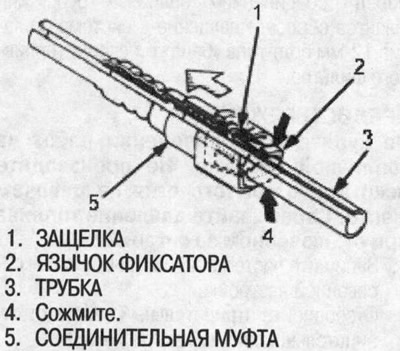
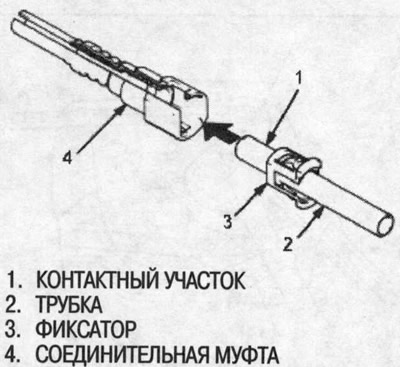
6. Check the contact area of the tube for contamination and damage.
- If the surface is dirty, clean it.
- If the surface is rusty or damaged, replace the fuel pump or fuel supply line.
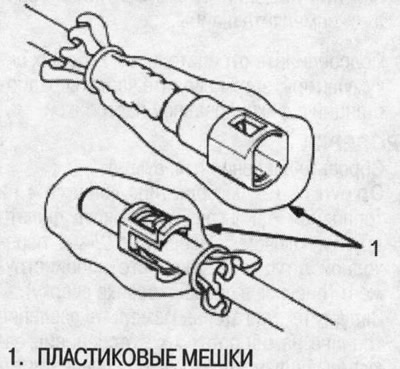
7. To avoid damage and to prevent foreign objects from getting into the disconnected coupling and tube, place plastic bags over them.
Note: The retainer cannot be reused after removal. Replace the retainer:
- when replacing the fuel pump
- when replacing the fuel supply pipe
- if it was taken off the phone
- if it is damaged
Connection
Warning! Do not smoke when working on the fuel system. Do not produce sparks or open flames in the work area.
1. Check the contact area of the tube for contamination and damage and clean if necessary.
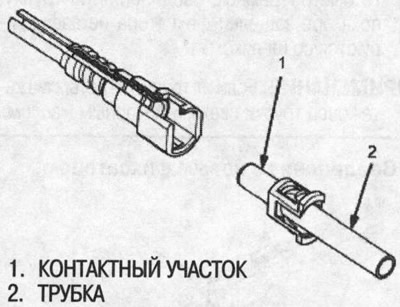
2. Insert a new retainer into the coupling if the retainer is damaged or:
- when replacing the fuel pump
- when replacing the fuel supply pipe
- if it was taken off the phone
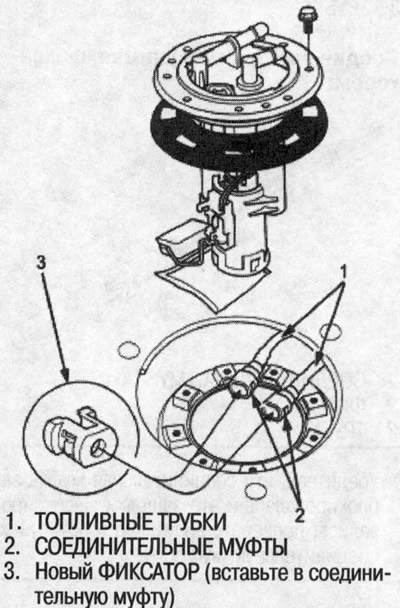
Before connecting the new fuel line/quick connect assembly, remove the old retainer from the connecting line.
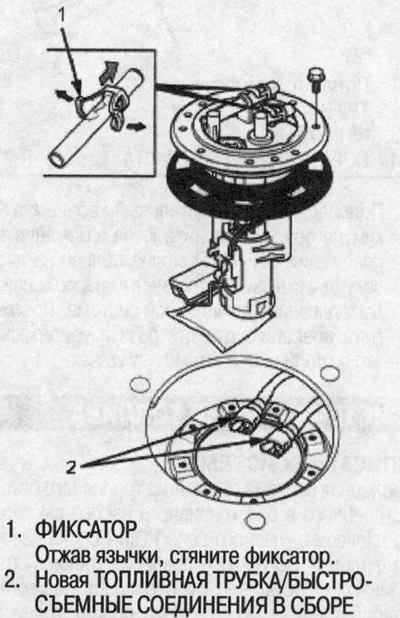
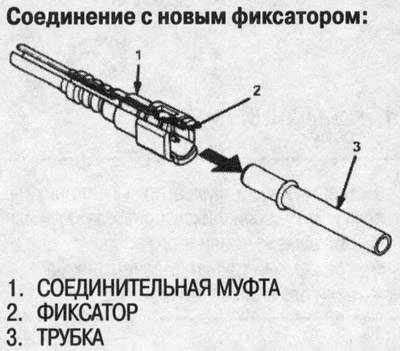
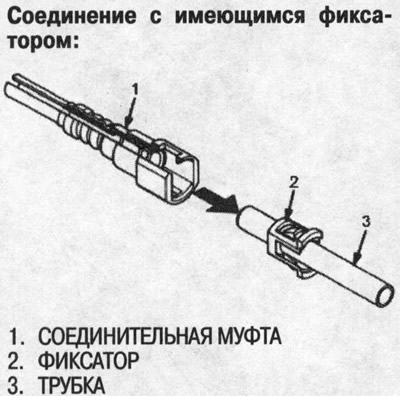
3. Align the quick-release couplings with the tube and the retainer latches with the grooves of the coupling. Then push the quick-release couplings onto the tube until both retainer latches click into place.
Note: If they are difficult to fit, lubricate the end of the tube with fresh engine oil.
 |
 |
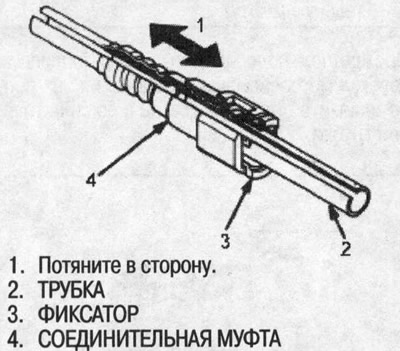
4. Make sure that the coupling is locked and that the latches are engaged; check visually and by pulling on the coupling.
5. Connect the negative cable to the battery and turn the ignition key to the ON (II) position. The fuel pump will turn on for about two seconds and pressurize the fuel system. Repeat the operation two or three times and make sure there are no leaks in the fuel system.