
2. Remove the steering wheel
3. Remove the lower instrument panel cover on the driver's side.
4. Remove the steering column covers (drawing at the beginning of the chapter).
5. Remove the combination switch assembly from the steering column shaft by disconnecting the connectors.
6. Disconnect the ignition switch connectors.
7. Remove the steering column joint cover.
8. Disconnect the steering column joint and remove it from the steering column shaft.
9. Remove the steering column by unscrewing the mounting nuts and bolts.
10. Installation is carried out in the reverse order of removal, taking into account the following:
Make sure that the wires are not pinched or compressed by other parts when installing the steering column.
Make sure the wiring harness is properly routed and secured.
Make sure the connectors are connected securely.
Make sure the steering column joint is connected as follows:
- Connect the upper end of the steering column joint to the steering column shaft (align the bolt hole with the flat part on the shaft as shown in the figure).
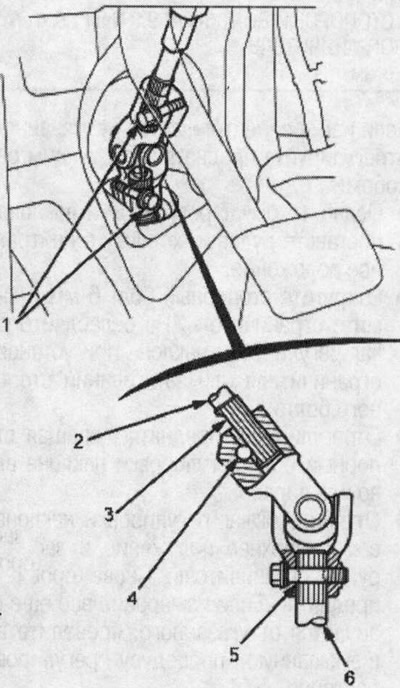
1. 22 Nm (2.2 kgf/m); 2. steering column shaft; 3. flat area; 4. bolt hole; 5. groove; 6. worm shaft
- Connect the lower end of the steering column joint to the worm shaft (align the bolt hole with the groove around the shaft), insert the bolt and tighten it. Make sure the lower bolt is securely tightened in the groove on the worm shaft.
- Place the steering column joint and make sure it is fully seated. Then insert the top bolt and tighten it.
[Information obtained from this source: hondabook]