
2. Check the drive pulley pressure control solenoid valve.
a) Remove the air filter and air duct.
b) Disconnect the solenoid valve connector.
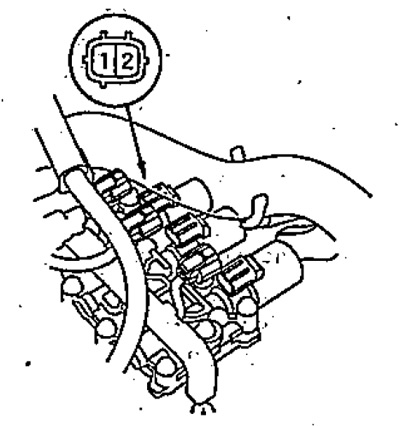
c) Measure the resistance of the drive pulley pressure control solenoid valve.
- Nominal resistance - 3.8 - 6.8 Ohm
d) If necessary, connect the positive battery terminal to terminal "1" and the negative battery terminal to terminal "2". Make sure that the valve clicks.
3. Check the start inhibit solenoid valve.
a) Disconnect the solenoid valve connector.
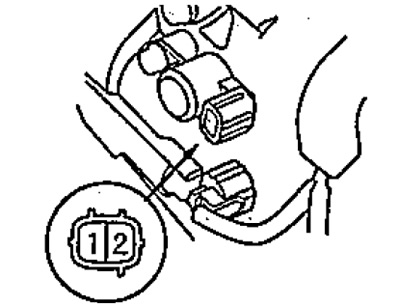
b) Measure the resistance between the terminals of the solenoid valve connector.
- Nominal resistance - 11.7 - 21.0 Ohm
c) If necessary, connect the positive battery terminal to terminal "1" and the negative battery terminal to terminal "2". Make sure that the valve clicks into place.
4. Check the pulley pressure control solenoid valve.
a) Remove the air filter and air duct.
b) Disconnect the solenoid valve connector.
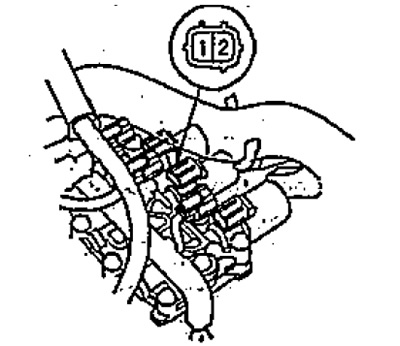
c) Measure the resistance between the terminals of the solenoid valve connector.
- Nominal resistance - 11.7 - 21.0 Ohm
d) If necessary, connect the positive battery terminal to terminal "1" and the negative battery terminal to terminal "2". Make sure that the valve clicks into place.
5. Check the starting clutch control solenoid valve.
a) Remove the air filter and air duct.
b) Disconnect the solenoid valve connector.
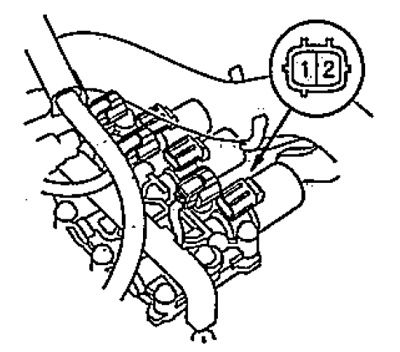
c) Measure the resistance between the terminals of the solenoid valve connector.
- Nominal resistance - 3.8 - 6.8 Ohm
d) If necessary, connect the positive battery terminal to terminal "1" and the negative battery terminal to terminal "2". Make sure that the valve clicks into place.
6. Check the manual gear ratio change mode switch.
a) Remove the steering wheel.
Note: Refer to the instructions in the chapter "Supportive Restraint System (SRS)".
b) Make sure that there is conductivity between terminals "8" and "9" of the gear switch connector when the switch is pressed and that there is no conductivity when the switch is released.
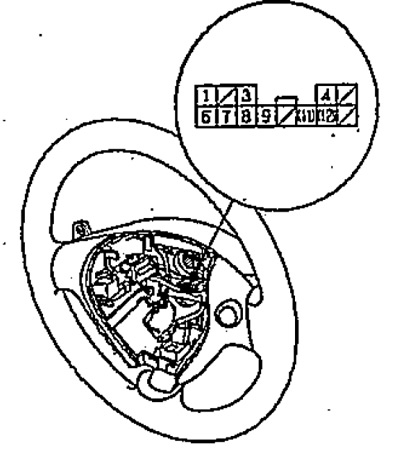
7. Check the gear ratio change switches on the steering wheel.
a) Remove the steering wheel.
b) Check for conductivity between terminals "6" and "9" of the gear ratio change switch connector with the "+" switch (gear ratio increase switch) pressed.
c) If necessary, remove the upshift switch on the steering wheel and make sure that there is continuity between the terminals of its connector when the switch is pressed.
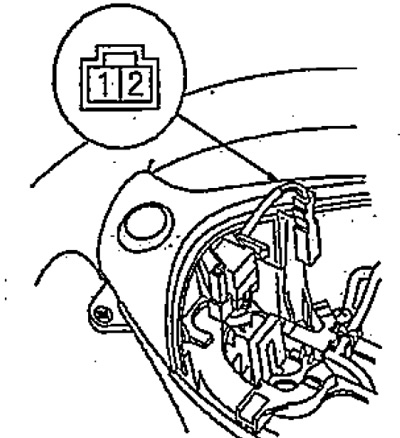
d) Check for conductivity between terminals "7" and "9" of the gear ratio change switch connector when the switch is pressed (gear ratio reduction switch).
c) If necessary, remove the downshift switch on the steering wheel and make sure that there is continuity between the terminals of its connector when the switch is pressed.
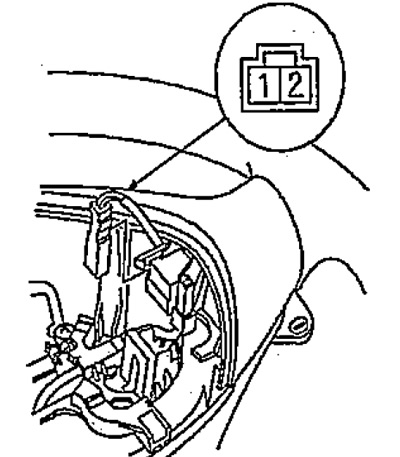
8. Check the start inhibit switch.
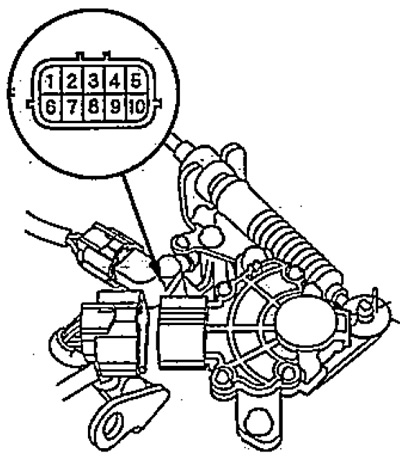
a) Remove the air filter.
b) Disconnect the start inhibit switch connector.
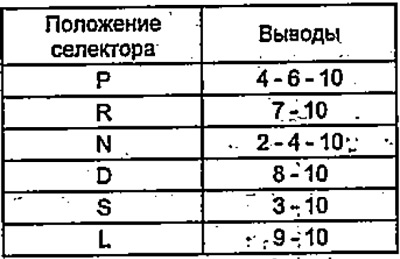
c) Measure the conductivity between the connector terminals according to the table.
 |
 |
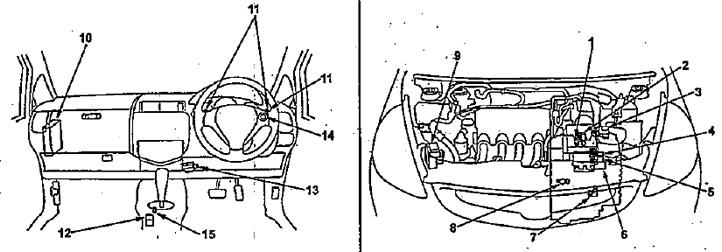
Location of electrical components of the variator control system.
1 - variator speed sensor,
2 - driven gear speed sensor,
3 - selector position sensor,
4 - electromagnetic valve for controlling the drive pulley,
5 - electromagnetic control valve, driven pulley,
6 - electromagnetic valve for controlling the starting clutch,
7 - drive pulley speed sensor,
8 - electromagnetic start inhibit valve;
9 - ABS electronic control unit,
10 - electronic control unit of the variator,
11 - manual gear ratio change switches on the steering wheel,
12 - electromagnetic valve of selector lock,
13 - diagnostic connector,
14 - manual gear ratio change mode switch,
15 - position sensor "P" (since 2003).
Table. Conclusions of the control unit of the variator. Models with left-hand drive.
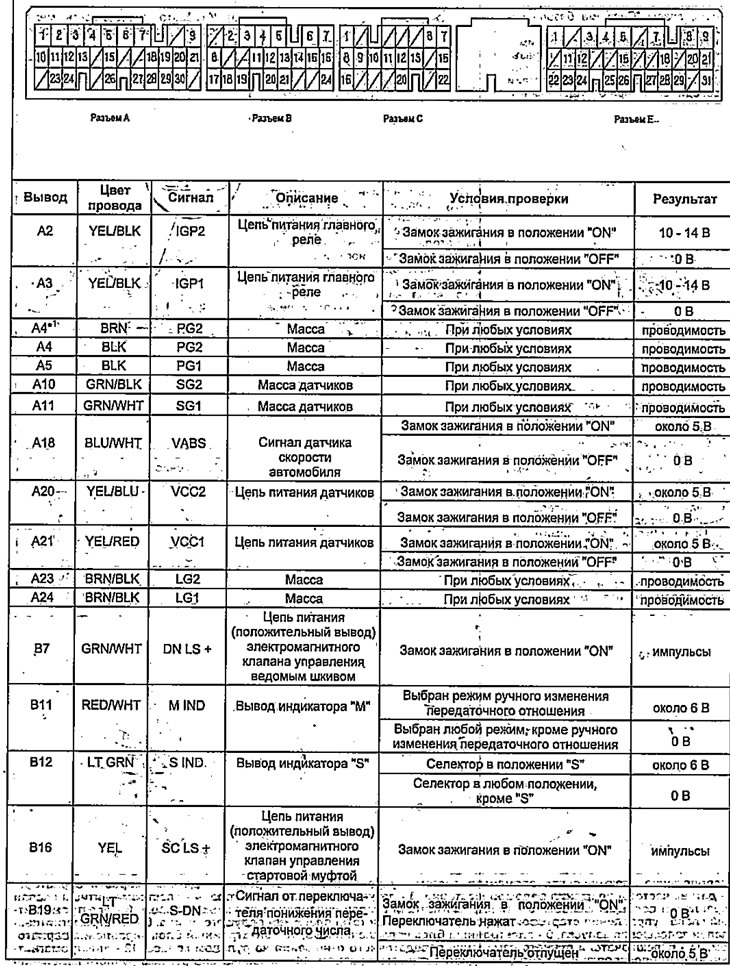
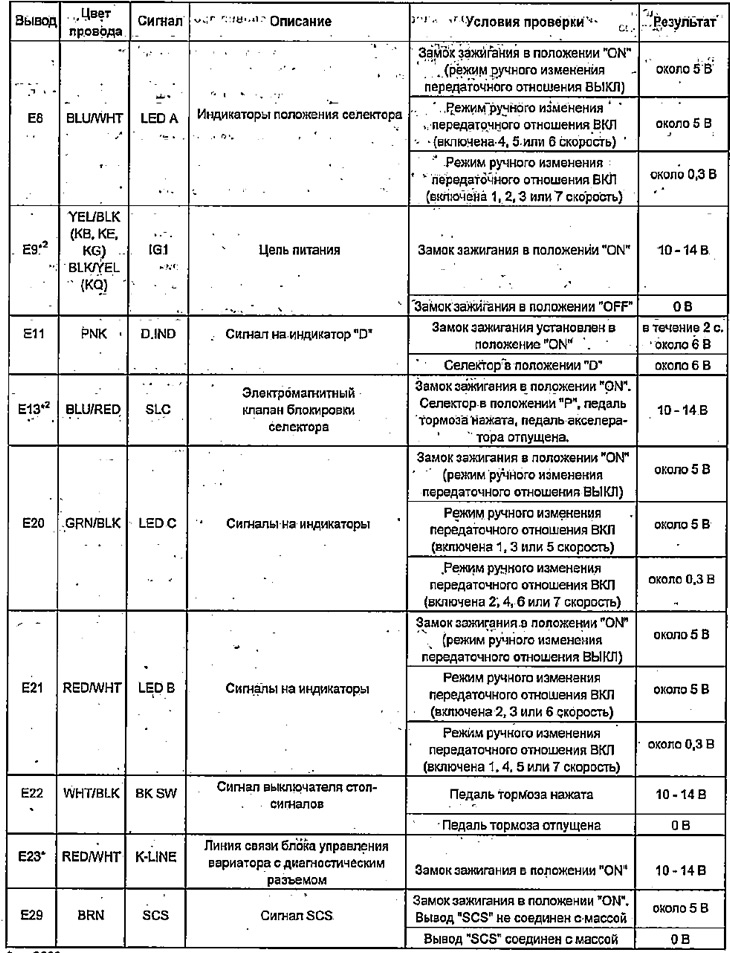
* - since 2003.
*1 - L13A1 (KV, KE, KG, KQ)
*2 - since 2005.
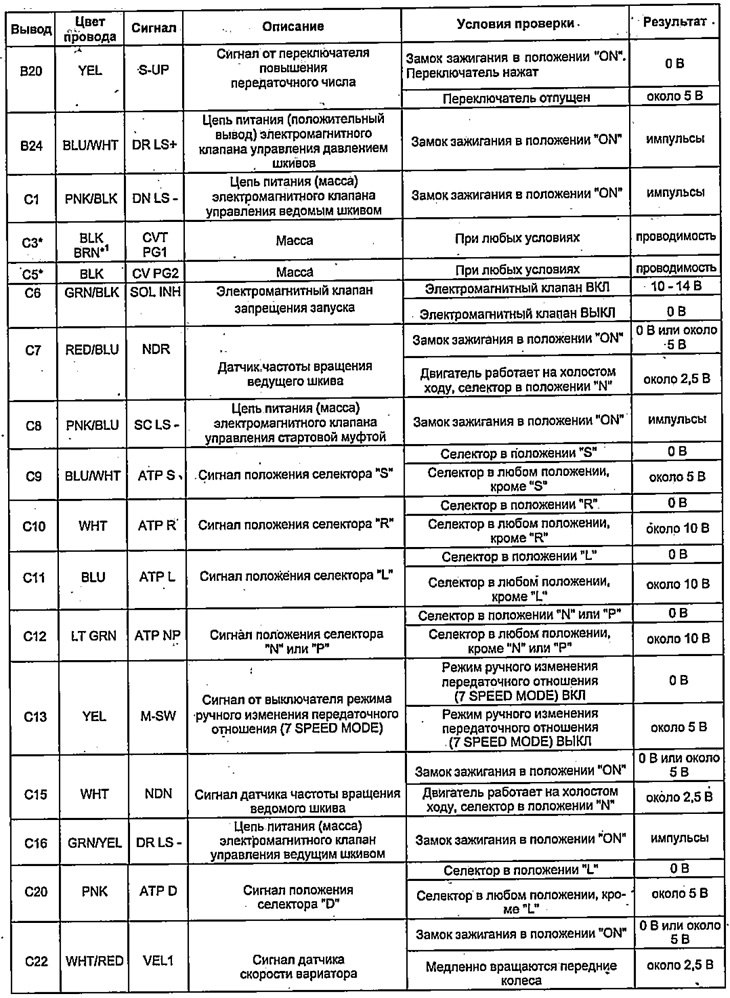
Table. CVT control unit pinouts. Right-hand drive models.
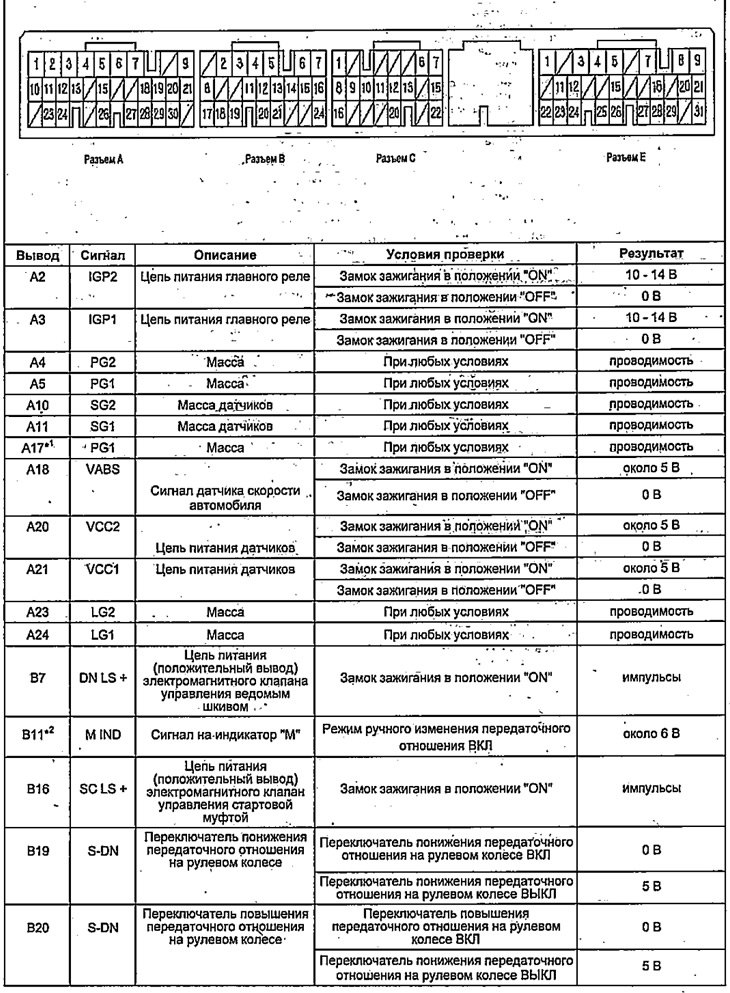
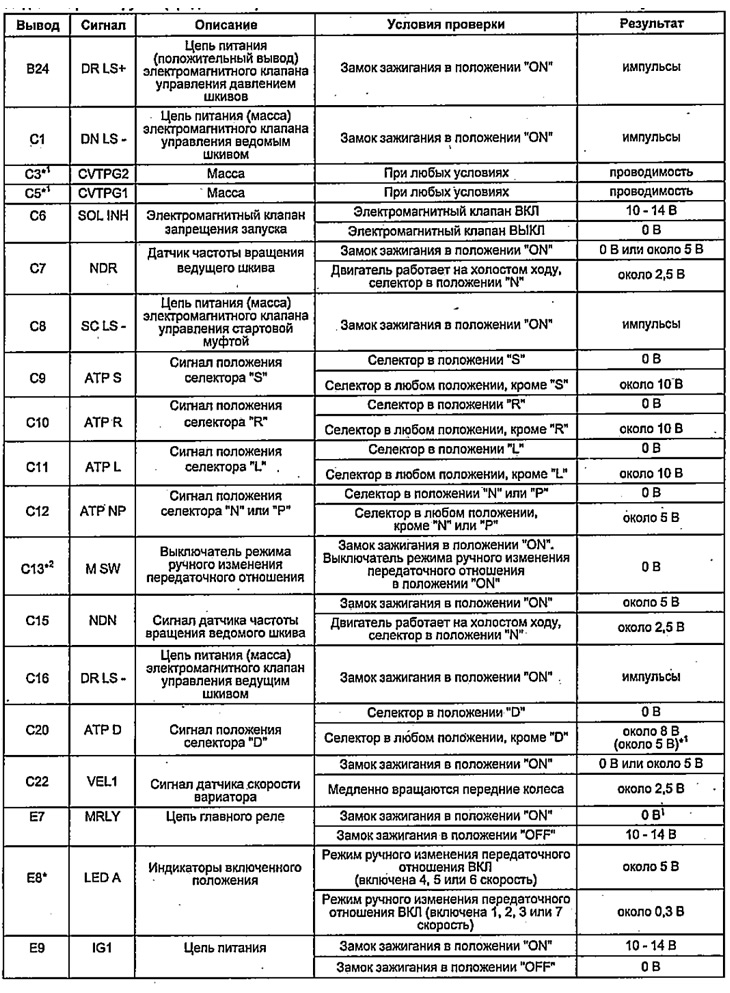
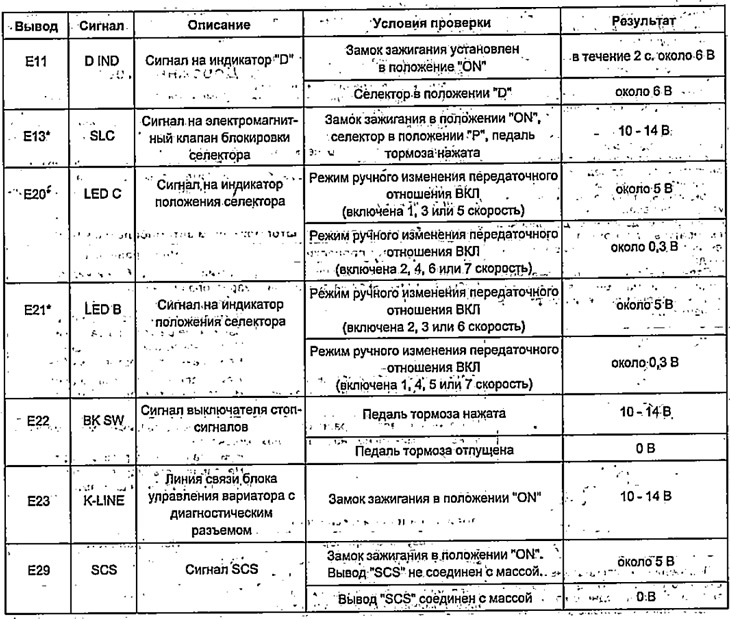
* - models from 09.2002.
*1 - models from 11.2002.
*2 - models from 06.2004.
[Article source on the website: hondabook.ru]