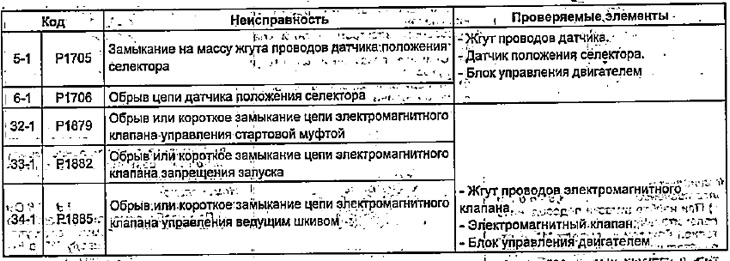
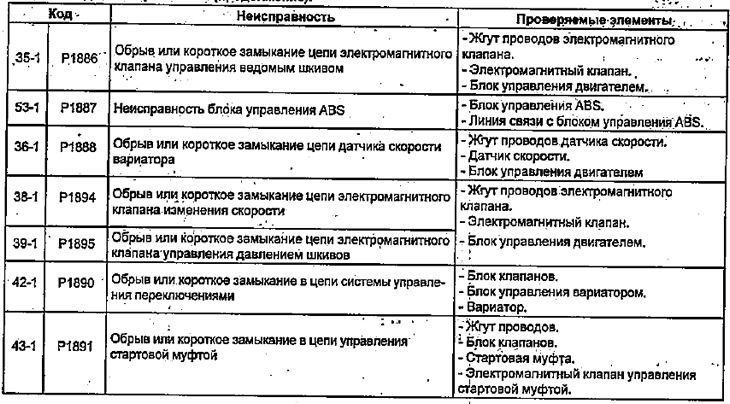
Reading fault codes
1. The self-diagnosis function is built into the electronic control unit. Using the "D" indicator, the system can warn the driver about a malfunction in the variator.
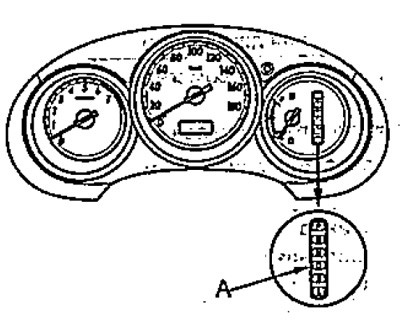
Models without manual gear ratio change mode
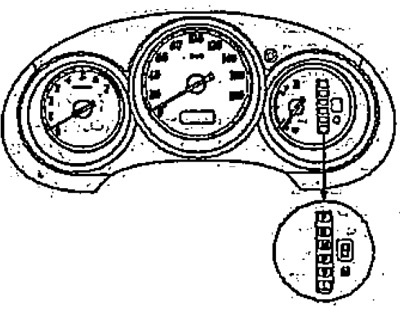
Models with manual gear ratio change mode
2. To determine the fault code, you need to connect the tester to the diagnostic connector and read the code.
a) Connect the tester to the diagnostic connector.
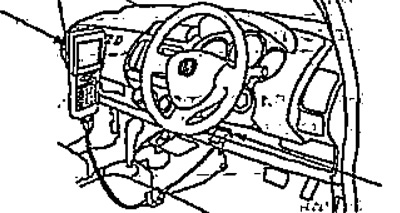
b) Turn on the ignition.
c) Read the fault codes. For detailed information on the procedure for reading fault codes, see the operating instructions for the diagnostic tool.
3. After reading the codes and troubleshooting, delete the codes (see the subsection "Deleting trouble codes").
4. Turn off the ignition and disconnect the diagnostic tool from the diagnostic connector.
Clearing fault codes
1. Connect the diagnostic tool and, with the engine off, clear the fault codes.
2. After clearing the fault codes, turn off the ignition.
3. Turn on the ignition for 30 seconds and then turn it off.
4. Disconnect the diagnostic tool.
Calibration of the starting clutch
Note: If one of the actions listed below has been performed, the starting clutch calibration procedure must be performed:
- The battery terminal was disconnected.
- The "ECU" fuse was removed.
- The starting clutch was replaced.
- The valve block was replaced.
- The gearbox was repaired or replaced.
- The engine was repaired or replaced.
1. Apply the parking brake and chock all wheels.
2. Warm up the engine to operating temperature.
3. Make sure that there are no faults with the variator (the "D" indicator does not blink). If the indicator blinks, carry out repairs.
4. Turn off the ignition.
5. Connect the special adapter to the diagnostic connector and install a jumper between terminals "4" and "9" of the adapter. Turn on the ignition.
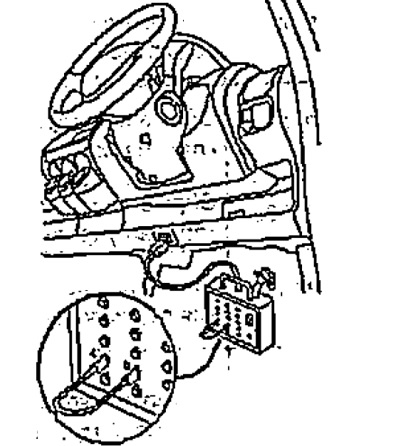
6. Press and hold the brake pedal.
7. Start the engine at idle speed and turn on the headlights.
8. Set the selector to the "N" position, then move it to the "D", "S" and "L" positions, then return it back to "S", "D", "N". Perform this operation within 20 seconds after starting the engine.
Note: The selector must stop in each position.
9. Repeat steps 8 twice.
10. Check that the "D" indicator comes on for one minute with the selector lever in the "N" position and then goes out.
11. If the indicator does not light up or lights up for less than a minute, turn off the ignition and repeat the procedures starting from step 5.
12. Move the selector to position "D" and check that the "D" indicator lights up for two minutes and goes out.
13. If the indicator does not light up or lights up for less than a minute, turn off the ignition and repeat the procedures starting from step 5.
14. Turn off the ignition.
Table. Error codes.