
2. Remove the air filter housing (see chapter "Maintenance and general inspection and adjustment procedures").
3. Disconnect a wire from the negative plug of the storage battery.
Note: before disconnecting the cable from the battery, make sure you know the radio access code. Otherwise, the radio will be blocked.
4. Remove the battery, battery bracket and deck.
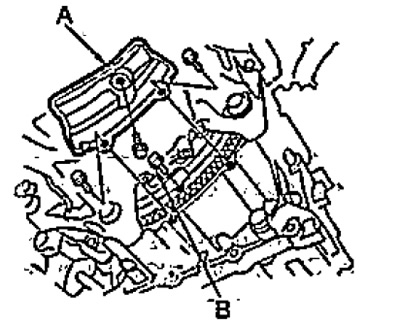
5. Remove the drain plug (A) and beat off the working fluid.
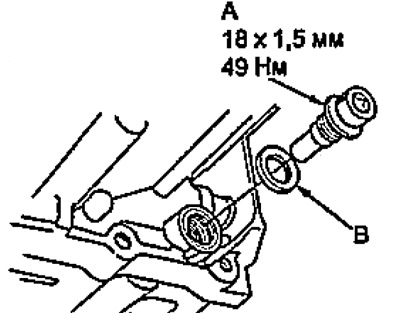
6. Remove gasket (IN) from the drain plug.
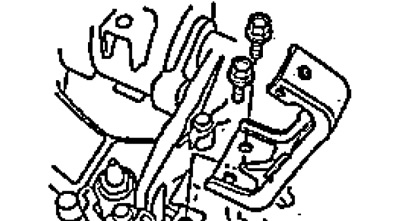
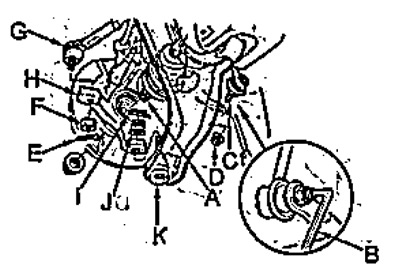
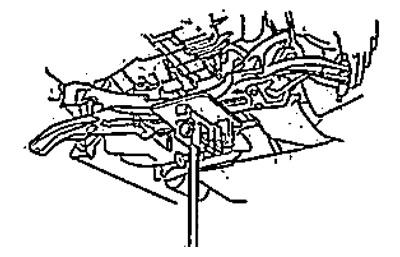
7. Disconnect the connectors of the e / m valves "A", "IN" And "WITH" pressure control.
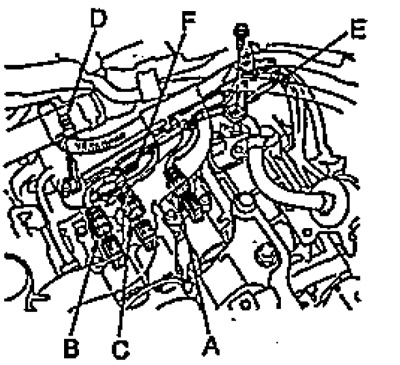
8. Remove the wire tie (D).
9. Turn away bolts of a casing of wires (E) and remove the fasteners (F).
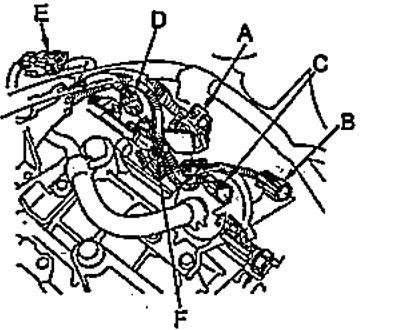
10. Disconnect connectors:
- start inhibit switch (A);
- pressure sensor in the clutch circuit (second gear (IN);
- gearbox input shaft speed sensor (WITH);
- gearbox output speed sensor (D).
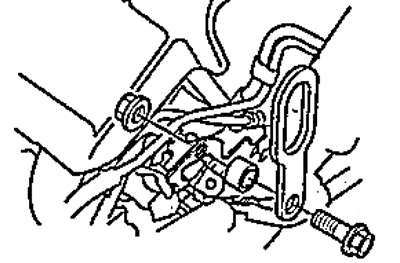
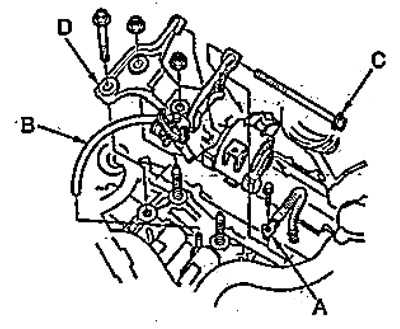
13. Remove the connector (E) from the bracket.
14. Remove the clamp (F) wires.
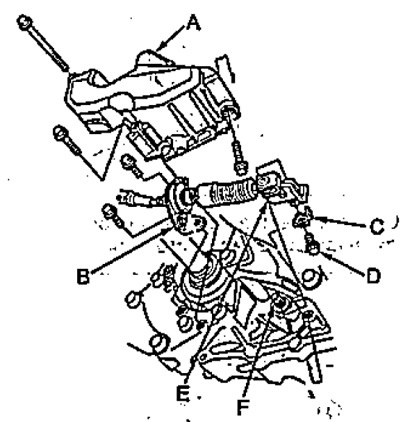
15. Disconnect the connector (A) e/m of valves of a gear change and a socket (B) pressure sensor of the working fluid in the circuit of the third gear clutch.
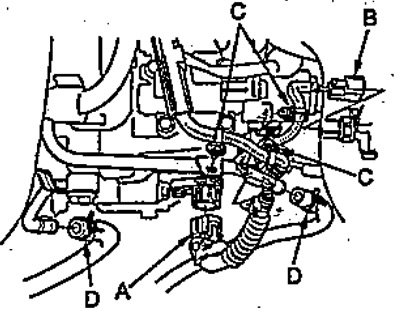
16. Remove clamps (WITH) wires.
17. Disconnect the hoses (D) automatic transmission cooling. Lift the ends of the hoses up to prevent fluid from escaping and install plugs on the hoses.
18. Remove the air filter bracket.
- Tightening torque - 22 Nm
19. Establish an earring for hanging out of the engine.
20. Install special equipment for hanging the engine.
21. Connect the hook (A) special devices to the earring and, turning the nut (IN), jack up the engine.
22. Turn away forward bolts of fastening-gearbox.
- Tightening torque - 64 Nm
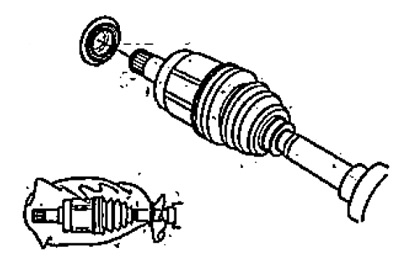
23. Unscrew the hub nut and, using a plastic hammer, knock out the drive shaft (A) from the hub.
24. Using a hex wrench (5 mm) (IN); to hold a finger (WITH) hinge, unscrew the nut (D) fastening of the stabilizer bar of the front suspension.
- Tightening torque - 29 Nm
25. Remove cotter pin (E), unscrew the nut (E) and disconnect the tie rod end (G) from the steering knuckle (H).
- Tightening torque - 43 Nm
26. Remove cotter pin (I), unscrew the nut (J) and disconnect the lower arm (TO) front suspension from the steering knuckle.
- Tightening torque - 49-59 Nm
27. Remove the cover (A) transmission control cable. And remove the bracket (IN) cable.
- Tightening torque - 12 Nm
28. Lift up the washer retainer (WITH), unscrew the bolt (D) and remove the puck. Disconnect cable (E) from the shaft (F) gearboxes.
- Tightening torque - 14 Nm
29. Remove drive shafts (see chapter "Drive shafts").
Note: To prevent contamination of the driveshaft joints, place the joints in bags.
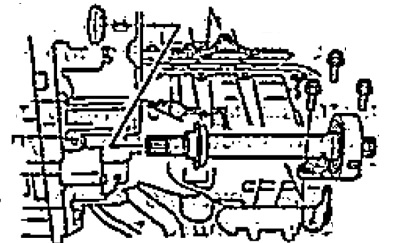
30. Remove the intermediate drive shaft, (see chapter "Drive shafts").
Note: To prevent contamination of the driveshaft joints, place the joints in bags.
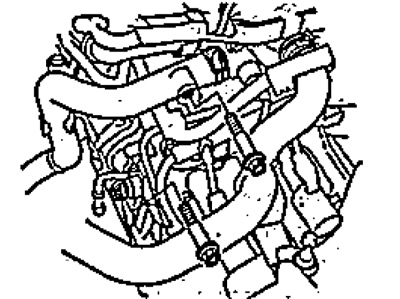
31. Turn away bolts and remove a cover (A). Rotating the crankshaft, unscrew the bolts (IN) torque converter drive plates.
- Tightening torque - 12 Nm
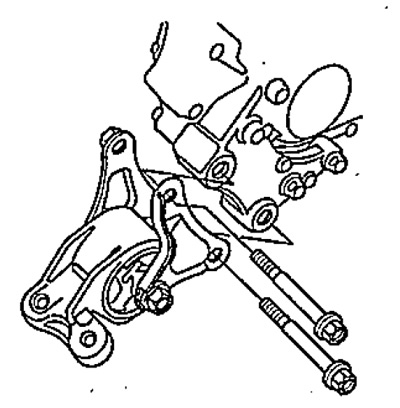
32. Turn away, bolts and remove an arm and a stiffening element.
- Tightening torque - 49-52 Nm
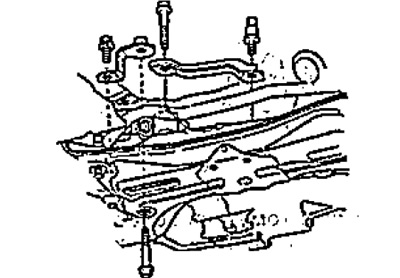
33. Turn away bolts and remove bracket of fastening of the steering mechanism.
- Tightening torque - 44 N
34. Turn away three bolts of a back support of a transmission.
- Tightening torque - 58 Nm
35. Suspend the steering mechanism from both sides to the body.
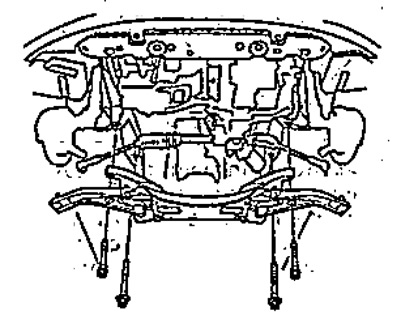
36. Jack up the front suspension beam.
37. Turn away bolts and remove a beam, a forward suspension bracket.
- Tightening torque - 93 Nm
38. Remove the casing of the headlight wires.
39. Turn away a bolt, and disconnect, a wire of weight (A) from the gearbox.
- Tightening torque - 12 Nm
40. Disconnect the ventilation hose (IN) from the fitting. Turn away bolts (WITH) and nuts, and remove the bracket (R) gearbox mounts.
- Tightening torque - 44-49 Nm
41. Jack up the gearbox.
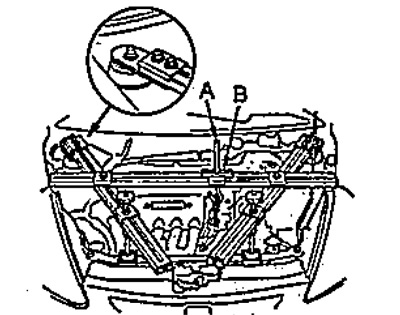
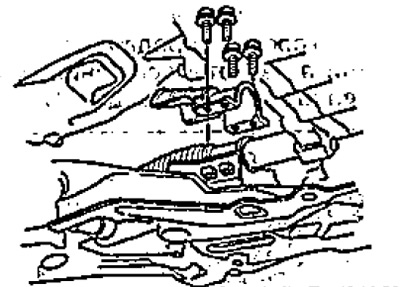
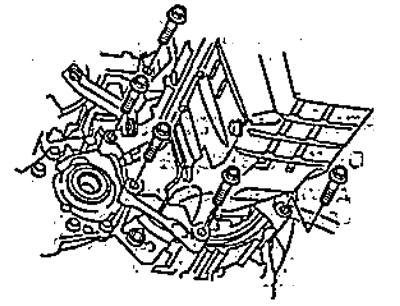
42. Turn away bolts of fastening of a transmission shown in drawing.
- Tightening torque - 64 Nm
43. Remove the gearbox.
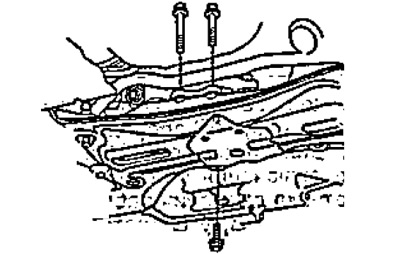
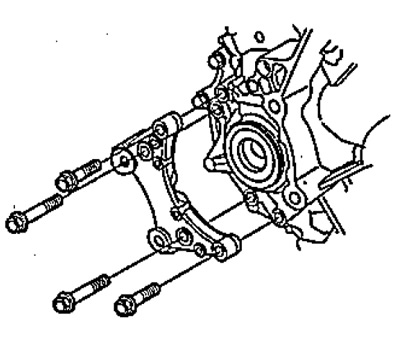
44. Remove the rear transmission support.
- Tightening torque - 59 Nm
45. Remove an arm of a back support of a transmission.
- Tightening torque - 64 Nm
46. Remove the torque converter and pins.
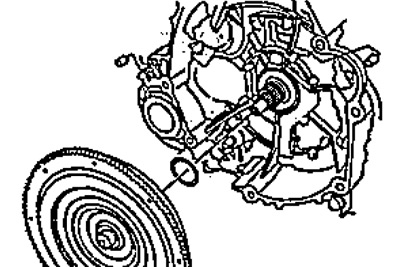
47. Check and, if necessary, replace the torque converter drive plate.
Note:
Installation is made in an order, the return to removal. After installation:
- pour fluid into the gearbox (see chapter "Maintenance and general checks and adjustments");
- check the operation of the gearbox;
- check the angles of the front wheels.