
Note. The lid is quite heavy, so it would be wise to enlist the help of an assistant.
Removal and installation
1. Open the trunk lid and lock it securely in the up position. Cover the painted luggage compartment edge panels with protective pads or old blankets.
2. Disconnect the electrical wiring connectors for the license plate lights, brake lights and lock actuator. Release the wires from the door assembly remove the lock activator (see Sections Removal and installation of a latch and the cylinder of the lock of a cover of a luggage compartment and Drive cables for releasing the locks of the luggage compartment lid and the fuel filler hatch door).
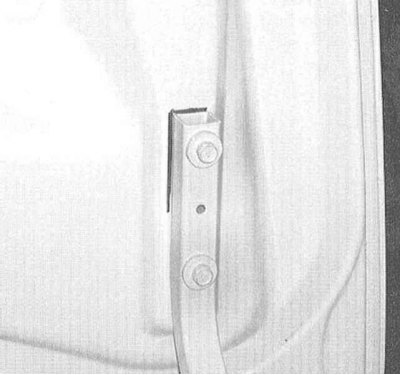
3. Circle the door hinge strips with a marker.
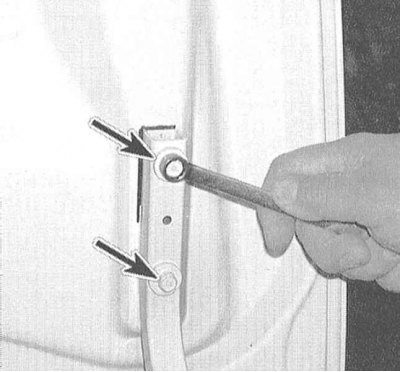
4. Turn out bolts of fastening of loops to door assembly and by means of the assistant remove the last.
5. Installation is carried out in the reverse order. Make sure that the hinge strips are planted in accordance with the marks made during the dismantling process.
Adjustment
1. When you have finished installing the door, close it and make sure that it is correctly positioned in the body opening. The door position is adjusted by loosening the hinge bolts and shifting the slats within the margin determined by the ovality of the bolt holes in them. After adjusting the position of the door, do not forget to tighten the fasteners.
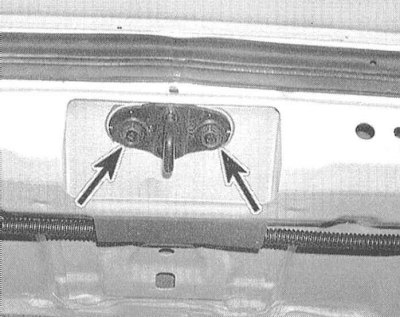
2. To adjust the height of the door assembly in the body opening, loosen the lock striker assembly mounting bolts, adjust the position of the latter accordingly, then re-tighten the fasteners.
Note. Trace the striker base plate with a marker before loosening the orientation bolts.
3. Finally, adjust the tightness of the door closing by adjusting the height of the stop rubber pads. In the closed position, the plane of the door must be flush with the surfaces of the surrounding body panels.