
Attention:
- Install the jack and supports under the vehicle only in designated areas.
- For safety, place the removed wheel under the side sill behind the jack.
- Do not damage the paintwork of the fender guard.
- Remove the automatic transmission slowly to avoid damaging the electrical wiring.
1. Disconnect the cables from the battery.
First, disconnect the cable from the negative terminal.
2. Remove the mounting bracket, battery and battery tray.
3. Remove the battery cable clamps from the base under the tray and move the negative cable to the side.
4. Remove the base under the battery tray.
5. Remove the air duct and air cleaner housing.
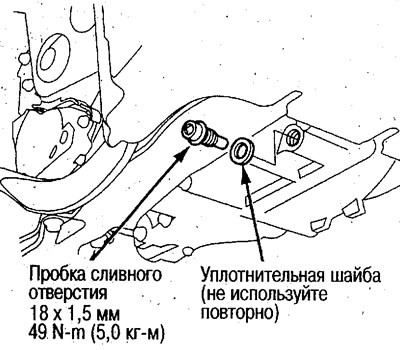
6. Unscrew the drain plug and drain the automatic transmission oil.
7. Replace the sealing washer and tighten the drain plug.
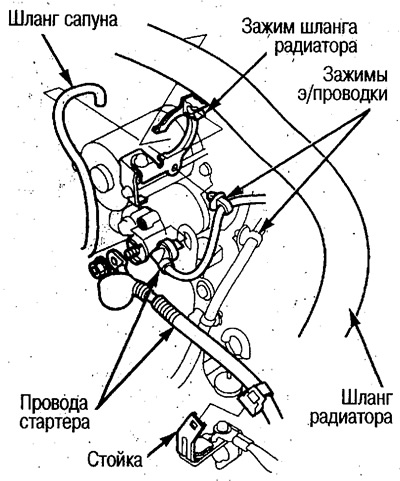
8. Disconnect the starter wires and release the breather hose and radiator hose from the clamps.
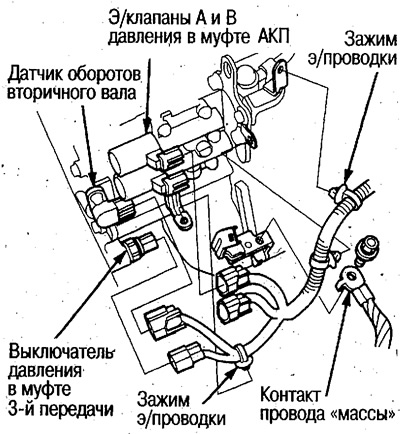
9. Disconnect the ground wire, as well as the connectors of solenoids A and B of the automatic transmission clutch pressure, the secondary shaft speed sensor and the 3rd gear clutch pressure switch. Release the electrical wiring from the clamp.
Do not allow water, oil, etc. to enter the connectors.
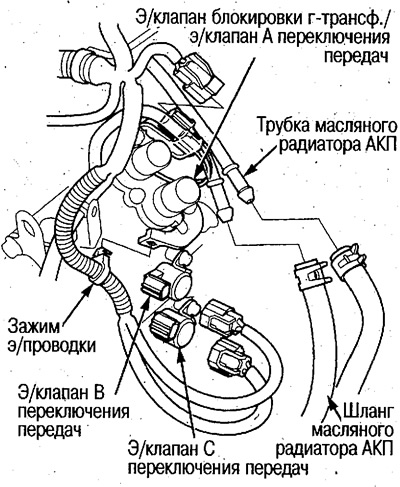
10. Disconnect the torque converter lock-up solenoid valve and shift solenoid valve A connector.
11. Disconnect the automatic transmission oil cooler hoses from the tubes, plug the hoses and tubes with plugs. Secure the hoses with the holes facing up to prevent oil from spilling.
12. Disconnect the connectors of the electronic gear shift valves B and C, remove the electronic wiring clamp.
13. Disconnect the intermediate shaft speed sensor connector and remove the electrical wiring clamp.
14. Remove from the rack and disconnect the automatic transmission selector lever switch connector.
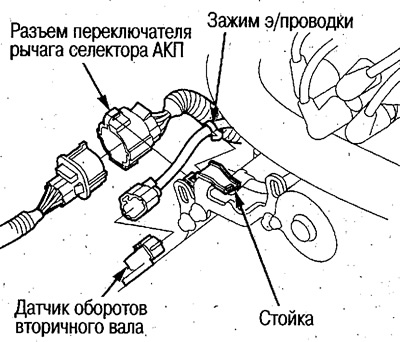
15. Disconnect the 2nd gear clutch pressure switch connector and remove the rack.
Do not allow water, oil, etc. to enter the connector.
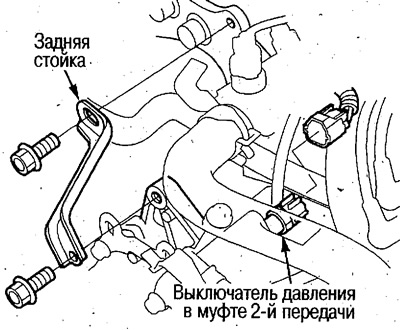
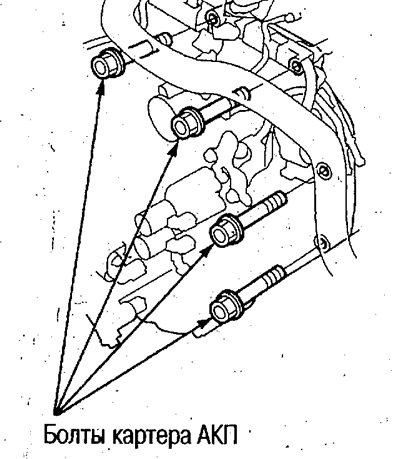
16. Unscrew the automatic transmission housing mounting bolts.
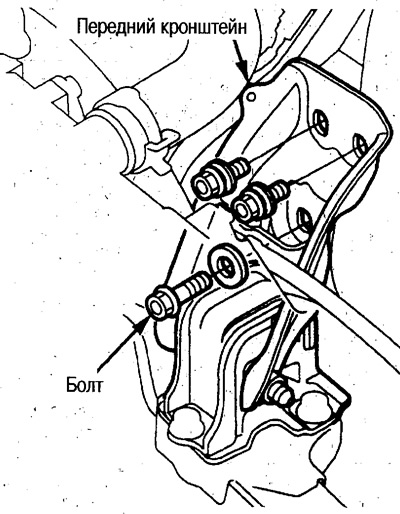
17. Unscrew the front bracket bolts.
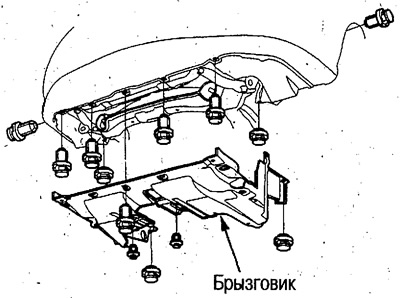
18. Remove the mudguard.
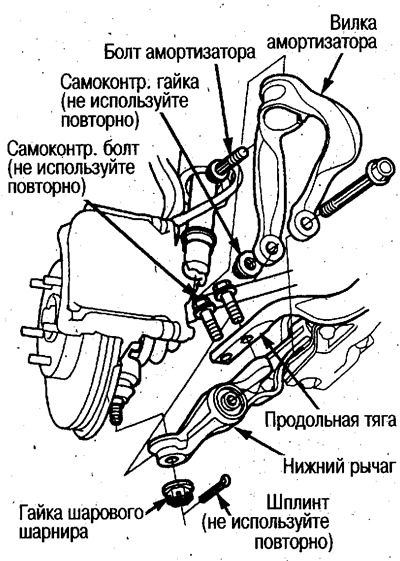
19. Remove the cotter pin and unscrew the ball joint nut. Unscrew the longitudinal tie rod bolts from the lower arm and remove it from the steering knuckle, see chapter Front and rear suspension.
20. Unscrew the shock absorber bolt and remove its fork, see chapter Front and rear suspension.
On 2WD models, remove the forks on the left and right sides.
On 4WD models, remove the fork on the right side.
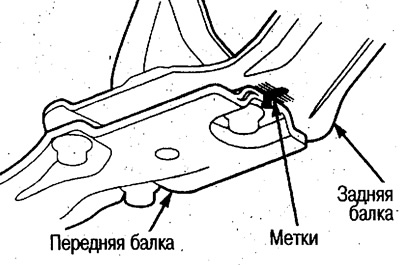
21. Apply alignment marks to the front and rear beam on the left and right sides.
 |
 |
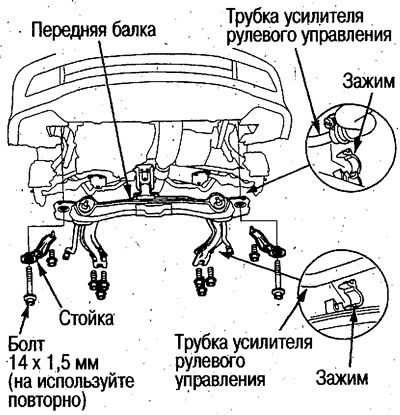
22. Release the power steering tubes from the clamps and remove the front beam struts and the beam itself.
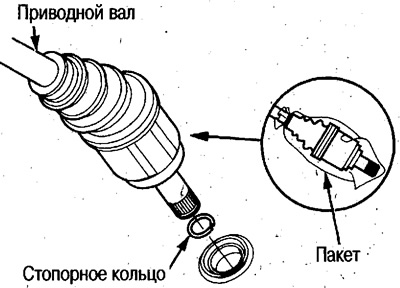
23. Disconnect the right and left drive shafts from the differential and intermediate shaft (4WD models).
Wrap the splined areas of the drive shafts with plastic bags to keep out oil and dirt.
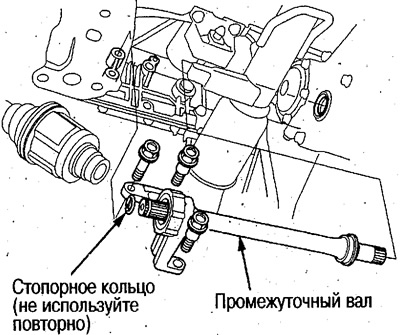
24. 4WD models: Remove the intermediate shaft.
Wrap the splined areas at both ends of the shaft with plastic bags to keep out oil and dirt.
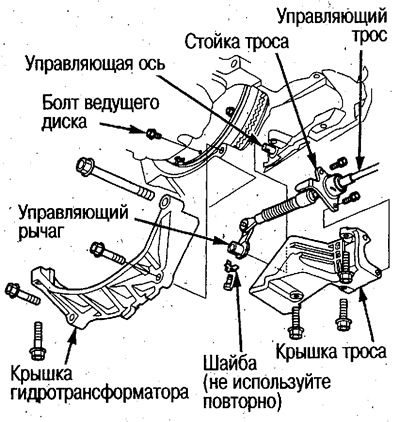
25. Remove the torque converter cover and control cable, unscrew the drive disk bolts.
2WD models
(1) Remove the torque converter cover.
(2) Unscrew the bolts of the rack, cable and remove its cover.
Before removing the cover, be sure to unscrew all the rack bolts.
(3) Remove the lever from the control shaft. Disconnect the cable from the shaft.
Do not bend the cable too much when removing.
(4) Turn the crankshaft pulley and unscrew the drive disk bolts.
4WD models
(1) Remove the torque converter cover.
(2) Remove the cable cover and unscrew the rack bolts.
(3) Remove the shift shaft, then remove the lever from the control shaft and disconnect the control cable.
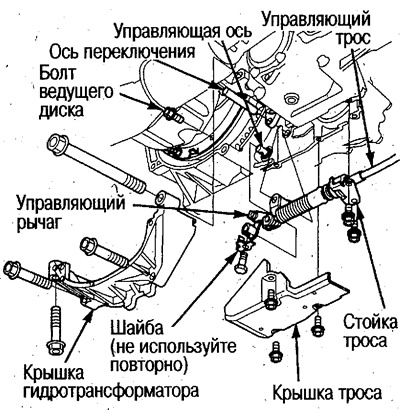
Do not bend the cable too much when removing.
(4) Turn the crankshaft pulley and unscrew the drive disk bolts.
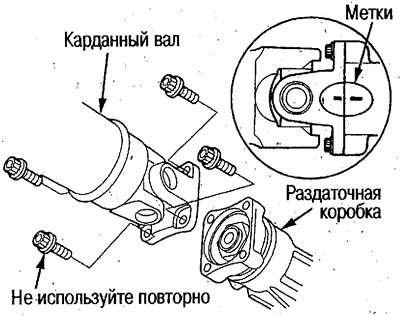
(5) Disconnect the propeller shaft from the transfer case.
Apply alignment marks to the driveshaft and transfer case.
26. Secure the hooks and lift the engine.
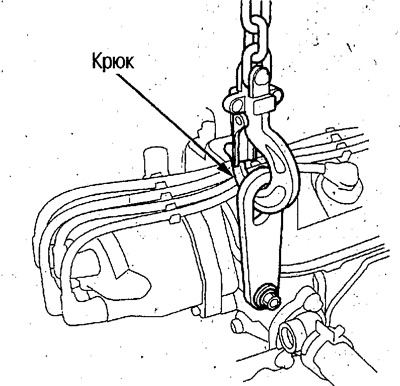
27. Support the automatic transmission with a jack.
28. Unscrew the bolts and nuts of the automatic transmission mounting brackets.
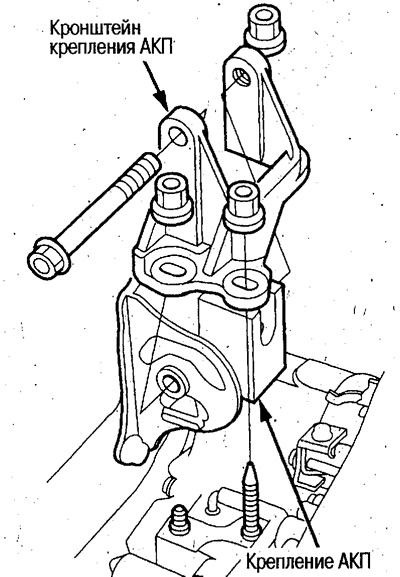
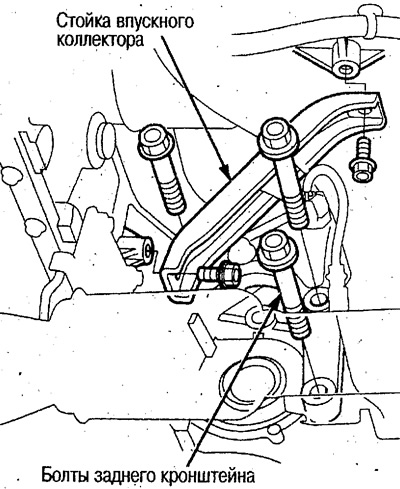
29. Loosen the intake manifold support mounting bolts.
30. Unscrew the rear bracket bolts.
31. Make sure that all pipes and electrical wiring are disconnected from the automatic transmission.
32. Support the automatic transmission with a jack, move it from the cylinder block so that the 14 mm long mounting pins come off, lower it and remove it from the bottom side.
33. Remove the torque converter from the automatic transmission.
34. Remove the starter from the automatic transmission.
(Original published on this resource: www.hondabook.ru)