
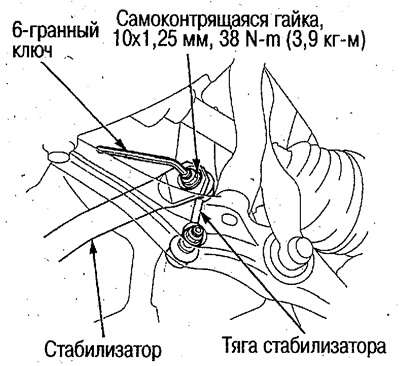
2. Disconnect drafts from the stabilizer.
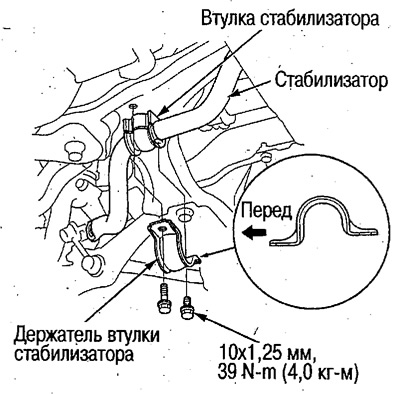
3. Remove the stabilizer bushing holders and remove the bushings from the stabilizer.
4. Install in the reverse order of removal.
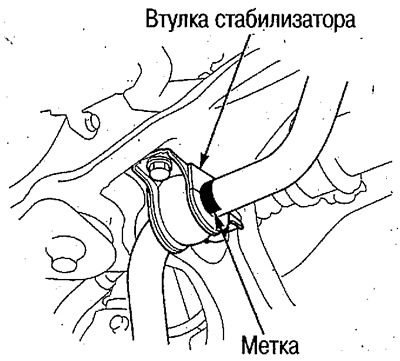
- During installation, align the ends of the bushings with the marks.
- When connecting the links to the stabilizer, see the section below «Removal and installation of stabilizer rods».
5. Check and adjust wheel alignment (see above).
Removal and installation of stabilizer rods
1. Remove the front wheels (see above).
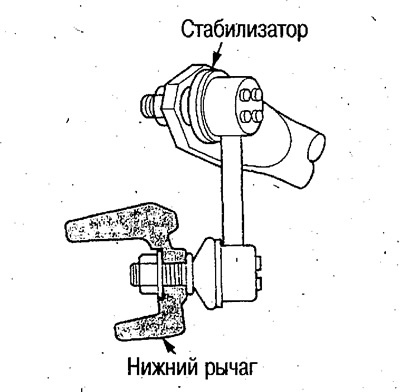
2. Disconnect the links from the stabilizer (see above).
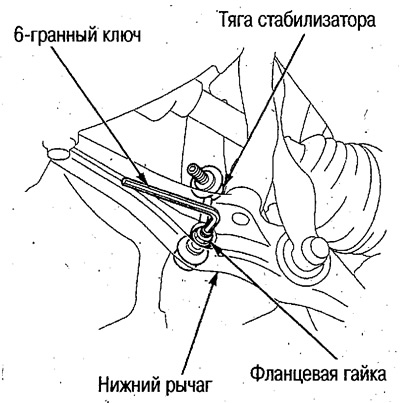
3. Disconnect the stabilizer links from the lower arm and remove them.
4. Install in the reverse order of removal.
Connect the rods with the stabilizer in the following order:
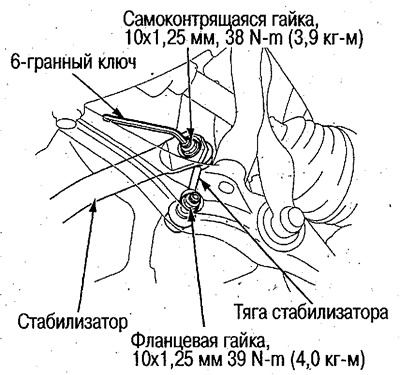
Bring the link ball joint pin to the center of its movement area, connect it to the stabilizer and lower arm and tighten the nuts by hand.
Transfer the weight of the car to the stabilizer by lifting the suspension with a jack.
Lock the ball joint pin with a hex wrench and tighten each nut to the correct torque.
After 5 min. After tightening the stabilizer self-locking nuts, re-tighten the stabilizer side nut to the correct torque.
Replacement of bushings of longitudinal draft
1. Remove the front wheels (see above).
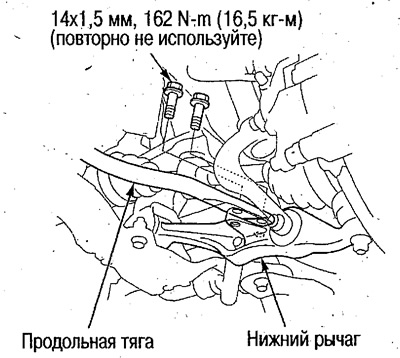
2. Disconnect the trailing link from the lower arm.
3. Loosen the self-locking nut (12 mm), remove the washer and front bushing.
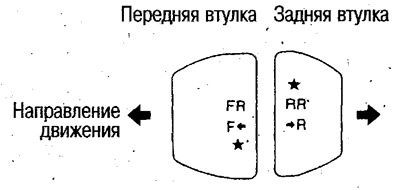
4. Remove rear bushing, washer, gasket and bushing.
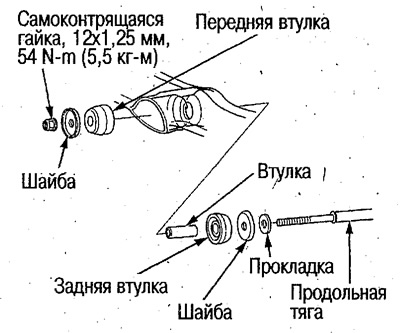
5. Install the tie rod in the reverse order of removal. Replace bushings with new ones.
Do not confuse the front hub with the rear.
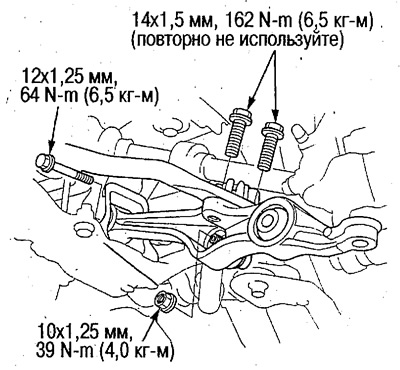
Removal and installation of the upper arm
1. Remove the front wheels (see above).
2. Remove the front shock absorbers (see below).
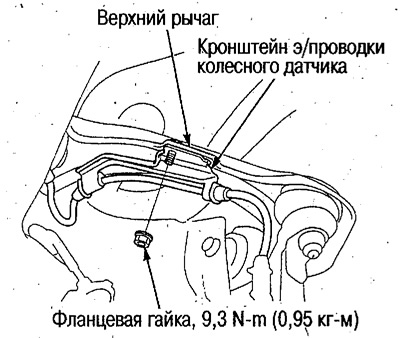
3. Disconnect an arm e/conducting of the wheel gauge from the top lever.
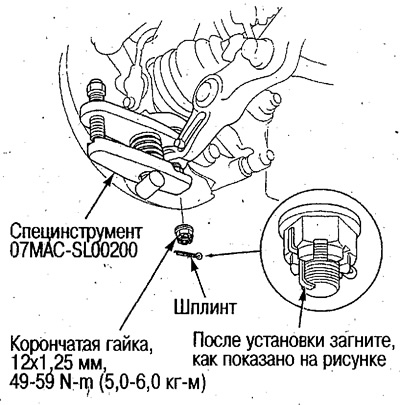
4. Disconnect the top lever from a rotary fist.

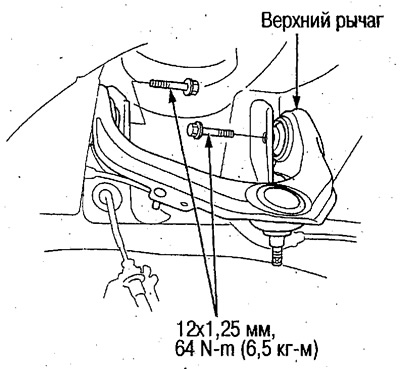
5. Turn off two flange bolts and remove the top lever.
6. Install the upper arm in the reverse order of removal.
When installing the upper control arm, tighten the suspension components in the following order:
- After installing each component, tighten the bolts/nuts by hand.
- Transfer the weight of the car to the suspension by lifting it with a jack.
- Tighten the bolts/nuts to the required torque.
7. Check and adjust wheel alignment (see above).
Removal and installation of the lower arm
1. Remove the front wheels (see above).
2. Remove the front shock absorber fork in the following order:
- Remove the shock absorber bolt from the fork.
- Loosen the locknut and remove the shock absorber fork bolt.
- Remove the fork from the shock absorber.
3. Disconnect the bottom lever from a rotary fist.
 |  |
4. Disconnect the longitudinal link from the stabilizer link and remove the lower arm.
5. Install the lower arm in the reverse order of removal.
When installing the lower control arm, tighten the suspension components in the following order:
- After installing each component, tighten the bolts/nuts by hand.
- Transfer the weight of the car to the suspension by lifting it with a jack.
- Tighten the bolts/nuts to the required torque.
6. Check and adjust wheel alignment (see above).