Attention. When connecting, do not confuse the tubes and e / wiring. Do not touch components and wiring in the installation area.
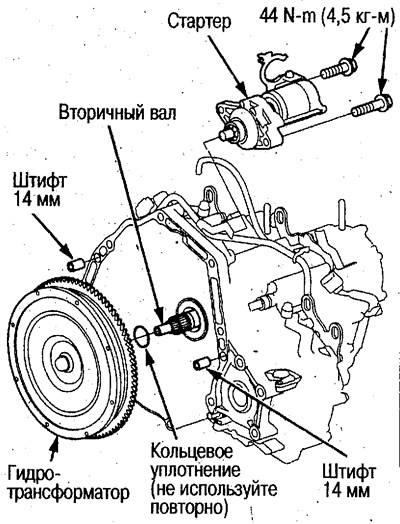
1. Install a new O-ring on the torque converter and install it on the output shaft.
2. Install pins (14 mm) into the hydrotransformer. Install the starter on the automatic transmission housing.
3. Support the automatic transmission with a jack and install it on the cylinder block.
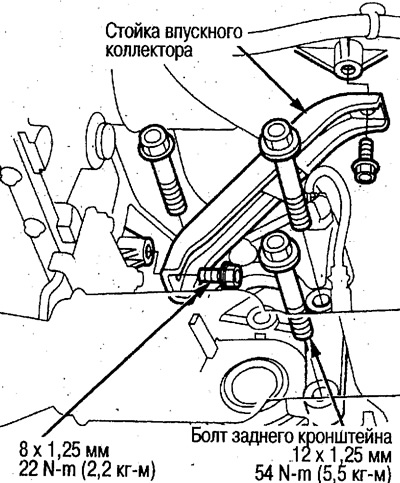
4. Tighten the rear bracket bolts. Then bolt on the intake manifold strut.
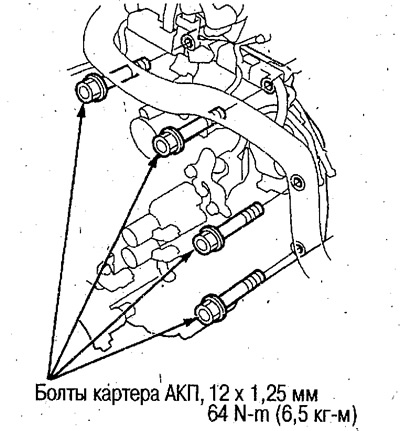
5. Tighten the gearbox housing bolts.
 |  |
6. Position the breather hose with the label up.
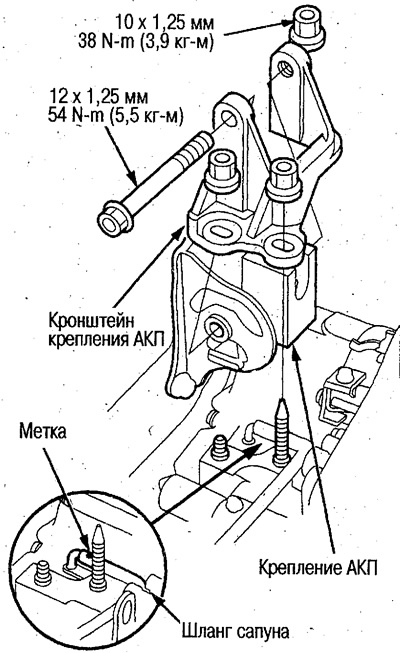
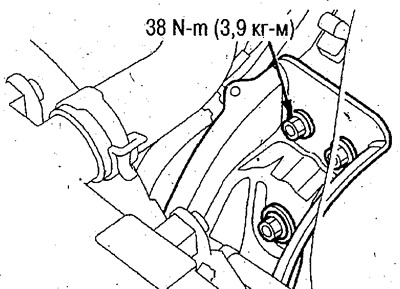
7. Install the automatic transmission mounting bracket, tighten the bolt by hand. Then tighten the nut, then tighten the bolt to the required torque.
8. Remove the jack and lift hooks.
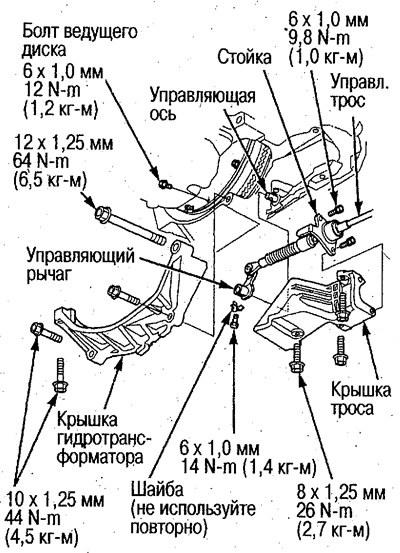
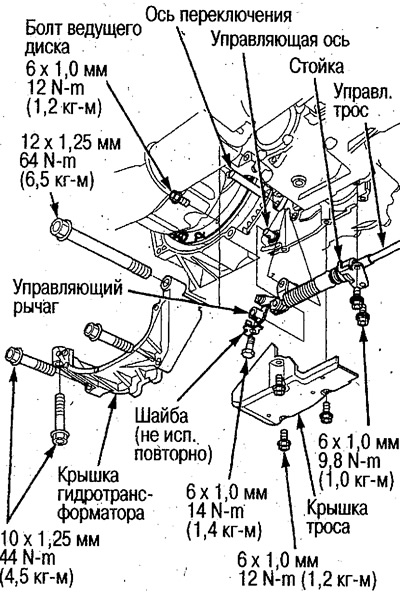
9. Tighten the drive plate bolts, install the control lever and the torque converter cover.
2WD Models
(1) Rotate the crankshaft pulley and tighten the drive plate bolts. Connect drive plate and torque converter.
(2) Tighten the crankshaft pulley bolts, see Ch. The mechanical part of the engine.
(3) Install the lever on the steering axle and caulk the washer.
Do not bend the cable too much during installation.
(4) Install the torque converter cover.
(5) Install the cable cover, then install the stand into it.
After installing the cover, fasten the stand firmly to protect the cable and arm mounting.
4WD Models
(1) Rotate the crankshaft pulley and tighten the drive plate bolts. Connect drive plate and torque converter.
(2) Tighten the crankshaft pulley bolts, see ch. Mechanical part of the engine.
(3) Install the lever on the steering axle, install the shift axle and caulk the washer.
Do not bend the cable too much during installation.
(4) Install the torque converter cover.
(5) Install the cable stand, then install the cable cover.
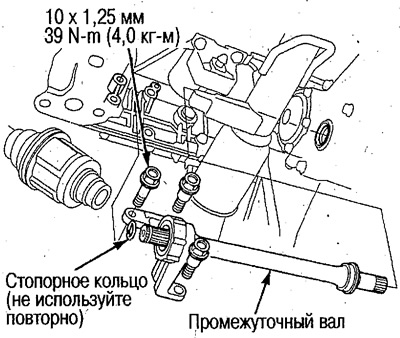
10. 4WD Models: Attach a new circlip to the intermediate shaft and install it.
Keep out foreign particles.
Clean the contact points between intermediate shaft and differential with cleaning oil, then dry with compressed air, check that there are no foreign particles, lubricate with automatic transmission oil and install the shaft.
11. Install new circlips on the drive shafts and install them in the differential and countershaft (4WD models).
Keep out foreign particles.
Clean the contact points of the driveshaft and differential with cleaning oil, dry with compressed air, check for foreign particles, lubricate with automatic transmission oil and install the shaft.
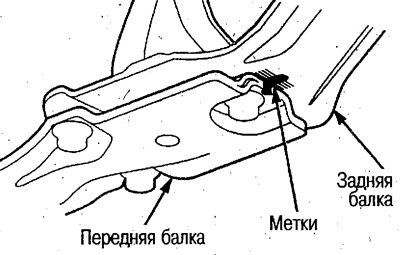
12. Establish a forward beam and its racks, having combined labels put before removal.
Clamp the power steering tubes.
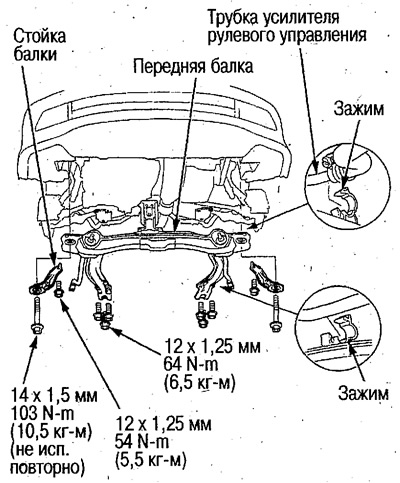 |  |
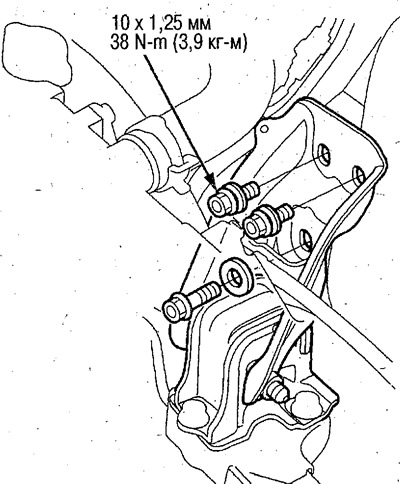
13. Tighten the front bracket bolts.
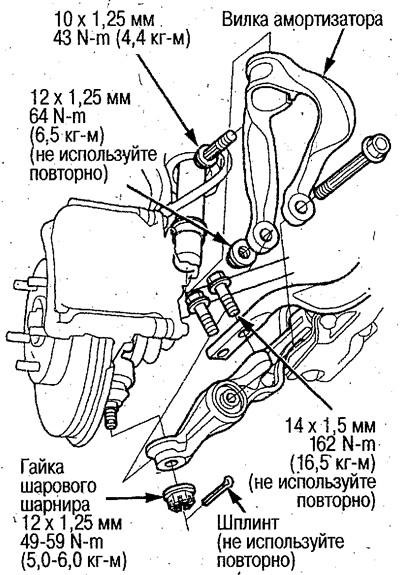
14. Install the shock absorber fork and tighten its bolt.
15. Install the ball joint nut and secure it with a new cotter pin, see ch. Front and rear suspension.
16. Install the damper fork and trailing link on the lower arm.
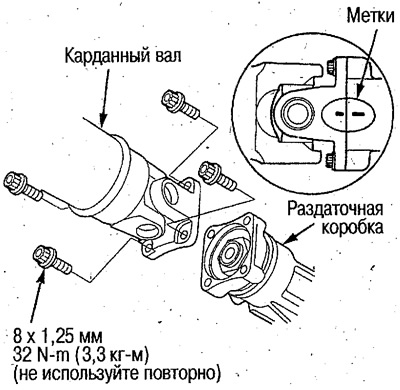
17. 4WD Models: Install the propeller shaft into the transfer case.
Align the marks made before removal.
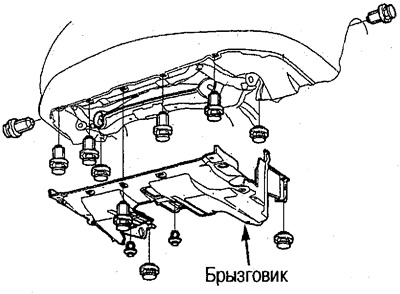
18. Install mudguard.
19. Connect the 2nd clutch pressure switch connector and install the strut.
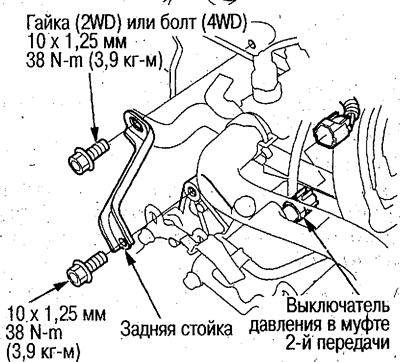
Do not let water, oil, etc. get inside the connector. Fasten the connector firmly.
20. Connect a socket e/valves In and With a gear change and establish a clip of conducting in a rack of a clip.
21. Attach the automatic transmission oil cooler hoses to the tubes, see the relevant section above.
22. Connect sockets of the e/valve of blocking of the hydrotransformer and e/valve A of a gear change.
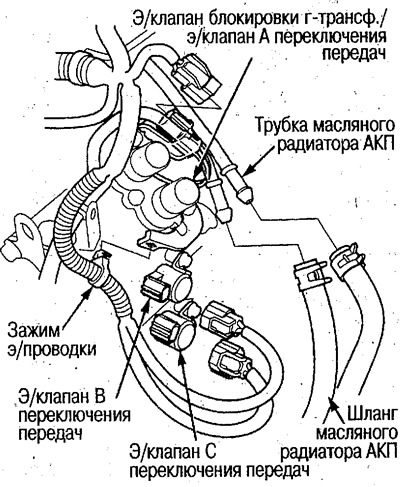
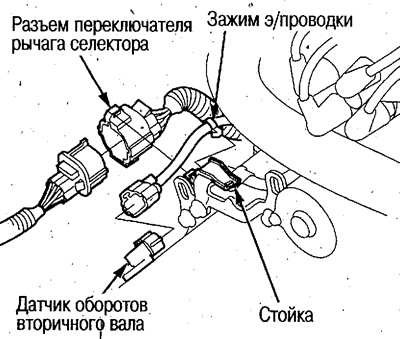
23. Connect the intermediate shaft speed sensor and selector lever switch connectors. Install the selector lever switch connector to the strut. Fix on it a clip e/conducting.
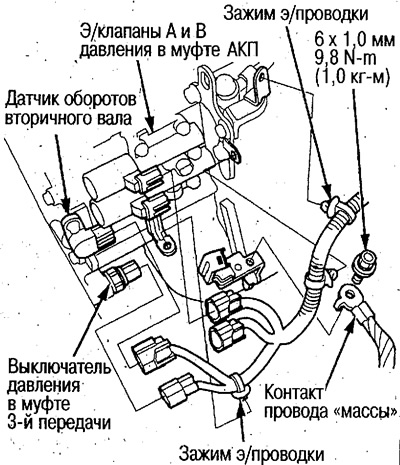
24. Fix the wire «masses».
25. Connect the connectors of the output shaft speed sensor, e / valves A and B of pressure in the automatic transmission clutch and the pressure switch in the 3rd gear clutch. Fix on a rack clips e/conducting.
Keep water, oil, etc. out of the connectors.
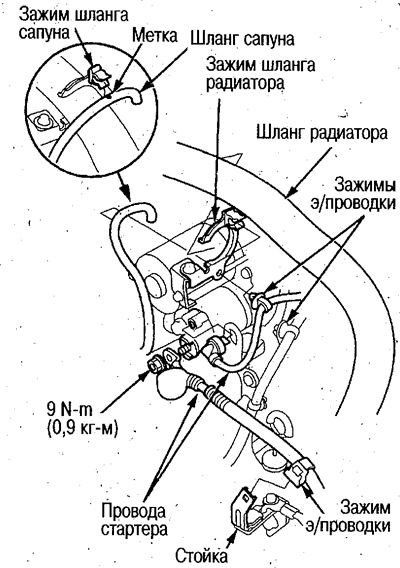
26. Establish starter wires and fix a clip e/conductings on a rack.
Position the lug terminal towards the nut.
27. Clamp the radiator and breather hoses.
Position the breather hose with the mark up.
28. Install the base under the tray and battery, secure the mounting plate.
29. Fasten the battery cable clips to the base, fasten «mass».
30. Install the air duct and air cleaner housing.
31. Fill with automatic transmission oil, see the relevant section above.
32. Connect the battery contacts.
Clean the battery terminals with sandpaper and apply lubricant after installation.
33. Apply the parking brake and start the engine. Move the selector lever to all positions and check that the control cable is properly adjusted.
34. Check up corners of installation of forward wheels, gl. Front and rear suspension.
35. Warm up the engine, turn it off and check the automatic transmission oil level.
36. Road test and final check the operation of the automatic transmission on the car (see above).
37. After checking, loosen the front bracket bolts and re-tighten them to the required torque.