HondaBook.ru
Auto companies Volkswagen Auto companies Ford Auto companies Lada Auto companies Skoda Auto companies BMW Auto companies Mazda Auto companies Peugeot
English Русский
Български
Беларускі
Український
Српски
Hrvatski
Română
Polski
Slovenský
Magyar
Bookmark Contacts Sitemap   


Accord Civic Fit / Jazz CR-V HR-V Others Articles
Accord 3 (1985-1989) Accord 6 (1997-2002)

Removal and installation the air conditioner condenser (Honda Accord 6)

  • Main
  • Honda Accord
  • 6 (1997-2002)
  • Power unit
  • Heater and air conditioner
  • Removal and installation the air conditioner condenser
0
Contents: Removal ⇊ Installation ⇊
Warning! The air conditioning system is under constant high pressure. Never disconnect refrigeration lines or remove any system components without first discharging the system. Discharging the air conditioning system must be done by an experienced technician in a car service workshop. Always wear safety glasses when disconnecting refrigeration lines!


When replacing air conditioning system components, a certain amount of replacement refrigeration oil will be required to fill the volume of the new unit. Use only oil suitable for use in R-134a systems (check the container label carefully).

Removal


1. Discharge the air conditioning system in a specialized workshop.

2. Disconnect the negative cable from the battery.

Warning! If the car stereo system is equipped with a security code, make sure you have the correct combination to activate the audio system before disconnecting the battery!


3. Remove the expansion tank of the cooling system (see Section Removal and installation the radiator and expansion tank of the cooling system).

4. Disconnect the electrical wiring from the cooling and air conditioning fans (see Section Checking the condition of the cooling system fans and their switching circuits; replacement of fans). Remove the radiator with the fan assemblies attached to it with their shrouds.

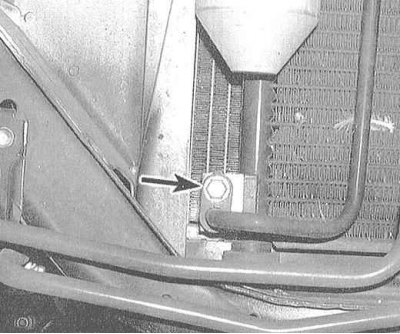
5. Remove the bolts and disconnect the condensing and discharge lines from the condenser. Immediately plug the open ends of the lines and fittings to prevent dirt and moisture from entering the system.
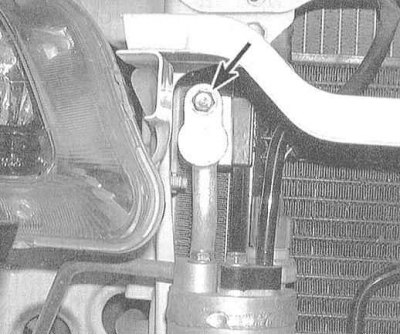


5. Remove the bolts and disconnect the condensing…

5. Remove the bolts and disconnect the condensing…


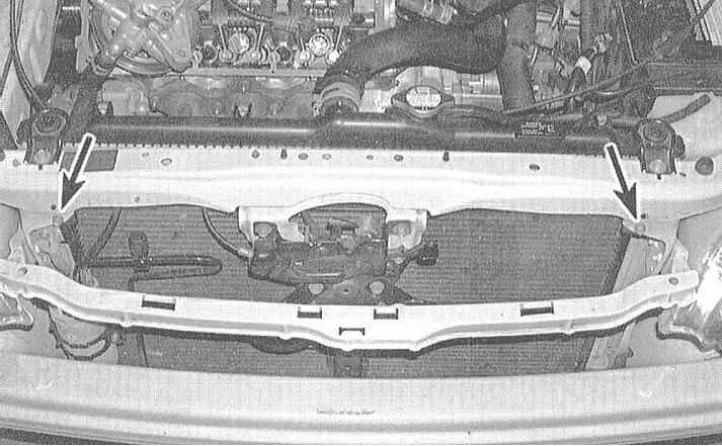
6. Remove the condenser mounting bolts.

7. Remove the capacitor.

Installation


1. Installation is carried out in reverse order.

Note: The sealing rings must be replaced without fail (before installation, lightly lubricate the new rings with R-134a refrigeration oil).


2. Charge the system and check for leaks in a specialized workshop. When replacing the capacitor, add about 25 ml of refrigeration oil to the system.
This article is available at: russian, bulgarian, belarusian, ukrainian, serbian, croatian, romanian, polish, slovak, hungarian
This information has been verified: Timofey Goryachev
Share with friends:
◀ Previous
Accord 6: Heater and air conditioner
Next ▶

Removal and installation the air conditioning compressor
Removal and installation the air conditioner receiver-dryer
Checking the electrical circuit of the air conditioning compressor clutch
Checking the health and maintenance of heating and air conditioning systems
Removal and installation the heater heat exchanger
Removal and installation of the evaporator K/V with expansion valve
See also other articles from Honda manuals:
Air Conditioner Condenser — Removal and Installation Honda Civic 3 and 4 (1983-1991)
Removal and installation the air conditioner condenser dryer Honda Fit 1 (2001-2008)
Air Conditioner — Maintenance Honda CR-V 1 (1995-2001, petrol)
Automatically controlled heater and air conditioner Honda HR-V 1 (1998-2006, petrol)
Adjusting the air conditioner deflectors Honda Avancier 1 (1999-2003, petrol)
Link in different formats to this article
Comments and feedback from visitors
No comments yet


How much will 27 + 49 ?


Accord 6 (1997-2002) 
  • General information
  • Introduction to the guide
  • User manual
  • Maintenance
  • Power unit
  • Four-cylinder engines
  • Six-cylinder engines
  • Engine overhaul
  • Cooling system
  • Heater and air conditioner
  • Power and exhaust systems
  • Engine electrical equipment
  • Engine management
  • Transmission
  • Mechanical gearbox
  • Automatic gearbox
  • Clutch and drive shafts
  • Chassis and running gear
  • Brake system
  • Car suspension
  • Steering
  • Body and interior
  • Exterior (external elements)
  • Interior (internal elements)
  • Electrical equipment
  • Equipment and devices
  • Electrical circuits
Accord 3 (1985-1989) 
  • General information
  • Maintenance
  • Power unit
  • Engine adjustment
  • Engine repair
  • Engine electrics
  • Emission management
  • Engine management (carburetor)
  • Electronic injection
  • Programmable injection
  • Schematic of emission system
  • Fuel system
  • Feedback management
  • Transmission
  • Manual gearbox
  • Automatic gearbox
  • Clutch
  • Chassis and running gear
  • Front suspension
  • Rear suspension
  • Steering
  • Brake system
  • Electrical equipment
  • Ventilation and heating
  • Air conditioner
  • Cruise control system
  • Equipment and devices
HondaBook.ru © 2018–2026 • Mobile version • Sitemap: EN BG BY UA RS HR RO PL SK HU • Feedback • Driver Information • Search system • Bookmark
Accord 3 (1985-1989) • Accord 6 (1997-2002) • Civic 3 and 4 (1983-1991) • Civic 5 and 6 (1991-2000) • Civic 6 (1995-2000) • Civic 7 (2000-2005) • Civic 8 (2005-2011) • Fit 1 (2001-2008) • CR-V 1 (1995-2001) • CR-V 2 (2002-2006) • HR-V 1 (1998-2006) • Avancier 1 (1999-2003) •
 
This website uses cookies to ensure proper functioning. By clicking "OK," you agree.