HondaBook.ru
Auto companies Volkswagen Auto companies Ford Auto companies Lada Auto companies Skoda Auto companies BMW Auto companies Mazda Auto companies Peugeot
English Русский
Български
Беларускі
Український
Српски
Hrvatski
Română
Polski
Slovenský
Magyar
Bookmark Contacts Sitemap   


Accord Civic Fit / Jazz CR-V HR-V Others Articles
Accord 3 (1985-1989) Accord 6 (1997-2002)

Checking the condition and replacing the spark plug wires, cover and distributor rotor (Honda Accord 6)

  • Main
  • Honda Accord
  • 6 (1997-2002)
  • General information
  • Maintenance
  • Checking the condition and replacing the spark plug wires, cover and distributor rotor
0
(every 48,000 km [30,000 miles] or every 24 months)

1. The condition of the high-voltage wires must be checked every time the spark plugs are replaced.

2. The check begins with an external inspection of the wire insulation with the engine running. Drive the car into a dark room, start the engine and make sure there is no sparking on the wires. Sparking is a sign of insulation breakdown. Try not to touch moving components in the engine compartment. Make the necessary notes on replacing defective wires, then let the engine cool down and proceed to check the condition of the cover and distributor rotor.

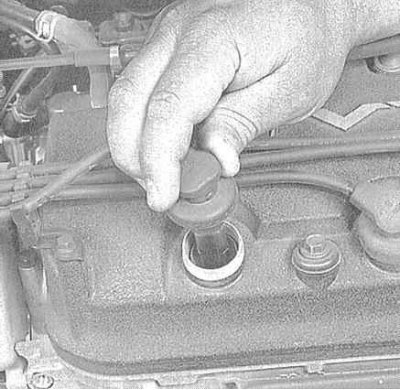
3. Check the spark plug wires one by one to avoid violating the order of their connection during assembly. Usually, there is a corresponding marking on the insulation of branded wires. If there is none, apply it yourself using tape and a marker.

3. Check the spark plug wires one by one to avoid…


4. Disconnect the high-voltage wire from the spark plug (it is best to use a special tool). Do not pull on the wire itself, only on its tip.

5. Inspect the inside walls of the tip. Corrosion usually appears as a brittle, crusty white deposit.

6. Pull the tip back onto the spark plug tail, making sure it fits tightly. If necessary, remove the tip again and bend the terminals inside the rubber boot.


7. Wipe the entire length of the wire with a clean cloth, completely removing traces of dirt and grease from the surface of the insulation. Inspect the wire insulation for cracks, burn marks, and other damage. Try not to bend the wire at sharp angles to avoid damaging the integrity of the conductor cores inside the insulation.

8. Disconnect the wire from the distributor (again, pull only the tip, not the wire). Check the tip for signs of corrosion, assess the tightness of its fit on the terminal. Reconnect the wire to the distributor.

9. Proceeding in a similar manner, check the condition of all remaining spark plug wires one by one. Make sure that they are securely connected to the spark plugs and distributor terminals.

10. If it is necessary to replace the high-voltage wires, make sure that the replacement wires correspond in size to the parameters of your car's engine. In the branded stores of automobile accessories and service centers of the Honda company you can always buy ready-to-use sets of high-voltage wires, cut to length and equipped with tips. Remove and replace the wires one by one to avoid disruption of the ignition order.

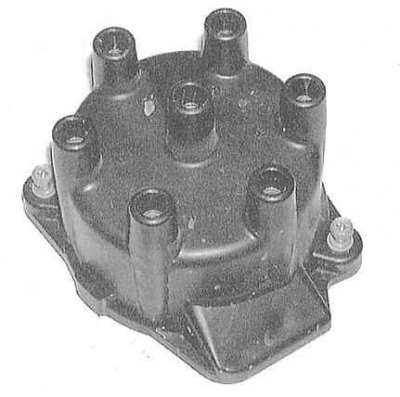
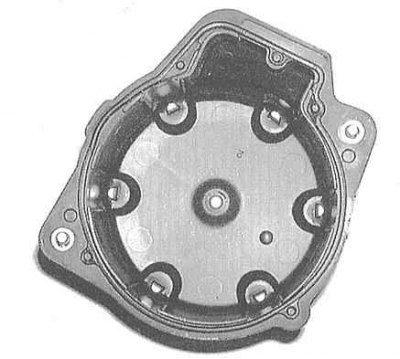
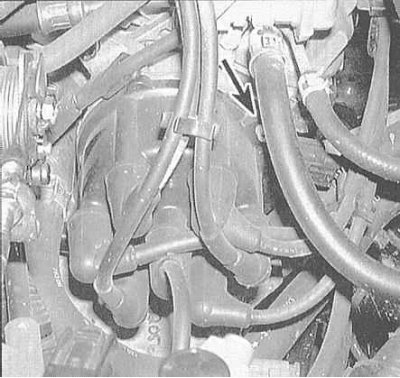
11. Remove the distributor cap by unscrewing the fastening screws. Carefully inspect the cap both from the outside and from the inside for cracks, carbon tracks, burn marks, loose contact connections and other damage.
11. Remove the distributor cap by unscrewing the…

11. Remove the distributor cap by unscrewing the…


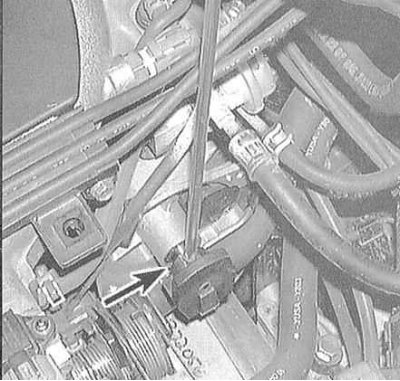
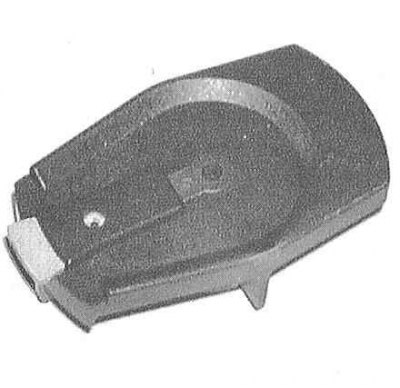
12. Loosen the mounting screw and remove the rotor from the distributor shaft and inspect it for cracks and carbon tracks. Replace any defective components.


12. Loosen the mounting screw and remove the…

13. It is good practice to replace the distributor cap and rotor, regardless of their condition, every time new high-voltage wires are installed. When using old components, carefully clean the contact surfaces of their terminals and measure the resistive resistance of the wires and the cap (see Specifications to this Chapter).

14. When installing a new distributor cap, transfer the high-voltage wires from the old one to it, connecting them strictly in the same order - try not to disconnect all the wires at the same time, transfer them one by one.

Note: The firing order is shown in the Specifications at the beginning of this Chapter. On most models, the protective tab on the No.1 spark plug wire connection terminal on the distributor cap is marked accordingly.


The text of the article is available on the website HondaBook.ru
This article is available at: russian, bulgarian, belarusian, ukrainian, serbian, croatian, romanian, polish, slovak, hungarian
This information has been verified: Timofey Goryachev
Share with friends:
◀ Previous
Accord 6: Maintenance
Next ▶

Checking the condition and replacing spark plugs
Checking the condition of the exhaust system components
Inspection of suspension and steering components, checking the condition of the…
Checking the transmission oil level of the manual transmission
Checking the condition of the power supply system components
Checking and replacing the PCV valve
Checking and adjusting idle speed
Maintenance of the cooling system (emptying, flushing and filling)
Replacing brake fluid
Automatic Transmission Fluid Replacement (AT/CVT)
See also other articles from Honda manuals:
Checking the condition and replacing the spark plug wires, cover and… Honda Civic 6 (1995-2000)
Checking tire pressure and condition Honda Fit 1 (2001-2008)
Spark plugs — checking and replacing Honda CR-V 1 (1995-2001, petrol)
Checking and testing the starter rotor Honda HR-V 1 (1998-2006, petrol)
Cleaning, checking and adjusting the spark plug gap Honda Avancier 1 (1999-2003, petrol)
Link in different formats to this article
Comments and feedback from visitors
No comments yet


How much will 20 + 34 ?


Accord 6 (1997-2002) 
  • General information
  • Introduction to the guide
  • User manual
  • Maintenance
  • Power unit
  • Four-cylinder engines
  • Six-cylinder engines
  • Engine overhaul
  • Cooling system
  • Heater and air conditioner
  • Power and exhaust systems
  • Engine electrical equipment
  • Engine management
  • Transmission
  • Mechanical gearbox
  • Automatic gearbox
  • Clutch and drive shafts
  • Chassis and running gear
  • Brake system
  • Car suspension
  • Steering
  • Body and interior
  • Exterior (external elements)
  • Interior (internal elements)
  • Electrical equipment
  • Equipment and devices
  • Electrical circuits
Accord 3 (1985-1989) 
  • General information
  • Maintenance
  • Power unit
  • Engine adjustment
  • Engine repair
  • Engine electrics
  • Emission management
  • Engine management (carburetor)
  • Electronic injection
  • Programmable injection
  • Schematic of emission system
  • Fuel system
  • Feedback management
  • Transmission
  • Manual gearbox
  • Automatic gearbox
  • Clutch
  • Chassis and running gear
  • Front suspension
  • Rear suspension
  • Steering
  • Brake system
  • Electrical equipment
  • Ventilation and heating
  • Air conditioner
  • Cruise control system
  • Equipment and devices
HondaBook.ru © 2018–2026 • Mobile version • Sitemap: EN BG BY UA RS HR RO PL SK HU • Feedback • Driver Information • Search system • Bookmark
Accord 3 (1985-1989) • Accord 6 (1997-2002) • Civic 3 and 4 (1983-1991) • Civic 5 and 6 (1991-2000) • Civic 6 (1995-2000) • Civic 7 (2000-2005) • Civic 8 (2005-2011) • Fit 1 (2001-2008) • CR-V 1 (1995-2001) • CR-V 2 (2002-2006) • HR-V 1 (1998-2006) • Avancier 1 (1999-2003) •
 
This website uses cookies to ensure proper functioning. By clicking "OK," you agree.