
Contents: Front seats ⇊ Back seat ⇊
Front seats
In Section Elements of vehicle safety systems provides important information on safety issues and the correct adjustment of seats, their backs and headrests.
Adjust the seat position before starting to move.
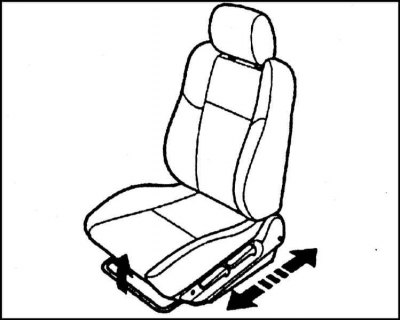
To adjust the seat position in the longitudinal direction, lift the locking lever located at the front under the seat cushion and, holding it in the raised position, move the seat assembly forward or backward to a comfortable position for you, then release the lever. To check the reliability of the seat lock, try to move it forward and backward.
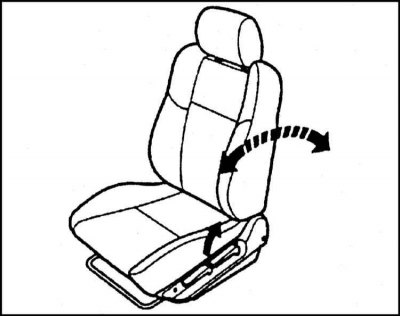
To change the angle of the seat back, lift the locking lever located on the side of the seat cushion base on the door side and, holding it in the raised position, bring the back to a comfortable position, then release the lever. The back will lock in the new position automatically.
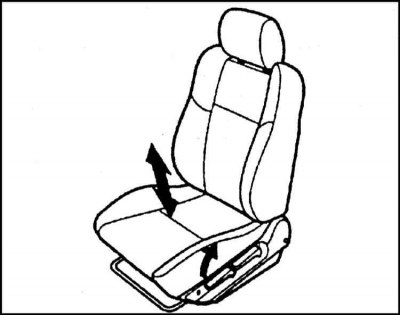
Some versions of the car provide the ability to adjust the height of the seat cushion. The adjustment is made using the locking lever, which is located on the left side of the seat cushion base. Pull the lever up, bring the seat cushion to a comfortable position, then lower the lever. The cushion is fixed in the new position automatically.
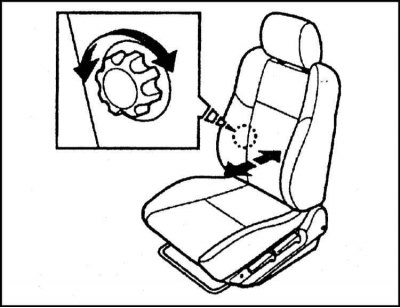
On some models, the driver's seat backrest design also allows for adjustment of the lumbar section. Adjustment is made using a rotating handle located on the side surface of the seat backrest, on its inner side. On R-class models, the driver's seat backrest lumbar section is adjusted by pumping. Pumping is accomplished by compressing the spring of a special air pump; to release air, press the release button.
 |
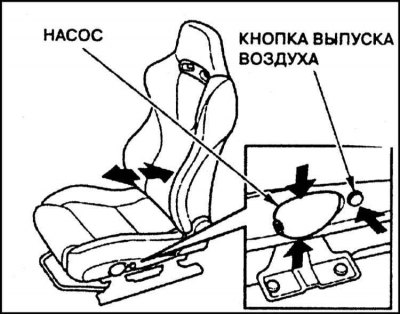 |
Models with electric adjustment of the driver's seat
Some models are equipped with an electric drive for adjusting the driver's seat. The control panel for the electric drive with two switches is located on the left side of the seat cushion base. A combined extended slide switch is used to adjust the seat position in the longitudinal and vertical directions. The smaller switch adjusts the backrest tilt.
The seat adjustment can be made with the key in any position in the ignition switch and must be done before driving.
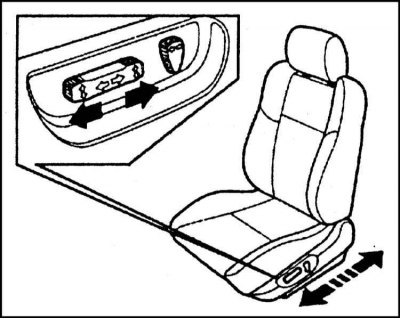
To adjust the seat position in the longitudinal direction, move the extended slide switch on the electric drive control panel to the appropriate side.
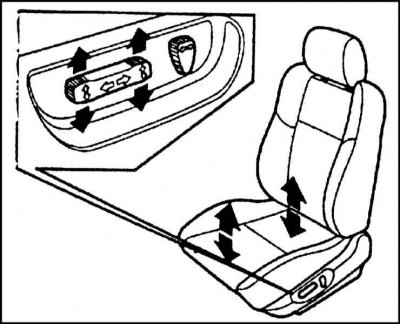
The height adjustment of the front and rear edges of the seat cushion is carried out by pressing the front or rear ends of the slide switch in the appropriate direction.
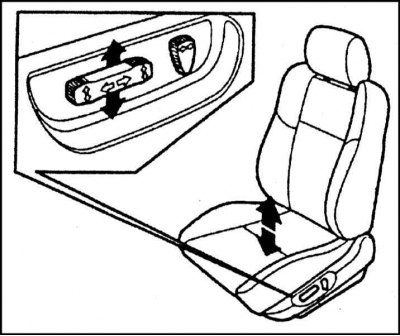
The height adjustment of the cushion assembly is made by moving the entire slide switch up or down.
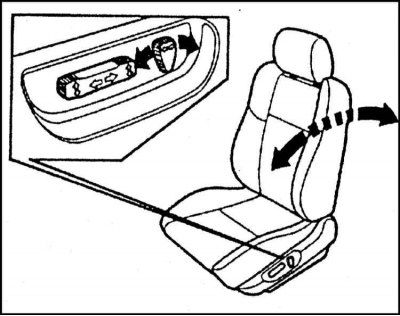
The backrest tilt is adjusted using a smaller switch located behind the first extended switch.
Headrests
Head restraints help prevent neck and head injuries in a rear-end collision. In order for head restraints to effectively perform their protective functions, they must be adjusted properly.
Adjust the height of the head restraints so that the top of the head restraint cushion is level with the top of the ear. If tall passengers cannot achieve this, the head restraint should be set to the highest position.
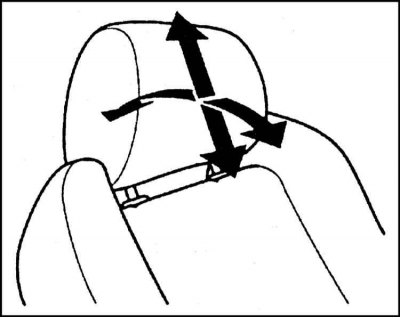
Some vehicle modifications have the ability to adjust the headrests in height and angle. The headrest position is adjusted with both hands at the same time, so do not try to adjust the headrest while the vehicle is moving. To raise the headrest, simply pull it up; to lower it, press it down; the angle of the headrest is changed by bending it to the appropriate position.
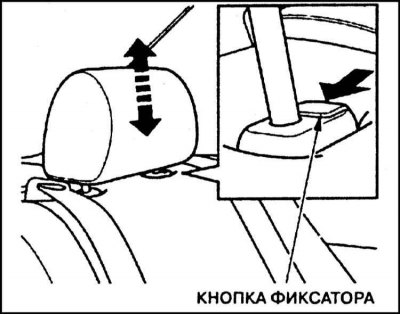
Some versions of the car provide for the presence of a push-button headrest lock. With this design, in order to raise the headrest, it is enough to simply pull it up, and lowering it can only be done after pressing the lock button. Dismantling the headrest for cleaning or replacement is done as follows: lift the headrest up to the stop, then press the lock button and remove the headrest from the seat back.
Electric heated seats
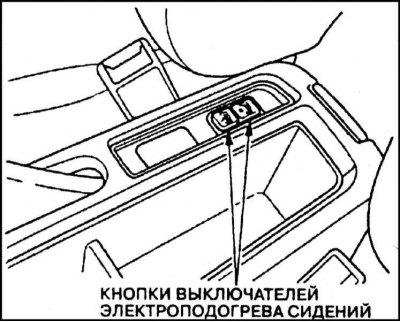
Some models have the option of heating the front seats. Both front seats are equipped with electric heaters that only work when the ignition is on (ignition key turned to the "ON" [II] position). The heating is switched on using the corresponding push-button switch - the indicator lamp built into the button should light up. The heating is switched off by pressing the button again.
Note: Do not turn on the heated seats when the engine is not running, and try not to use them for long periods of time when the engine is idling to avoid draining the battery.
Back seat
Rear seat center armrest
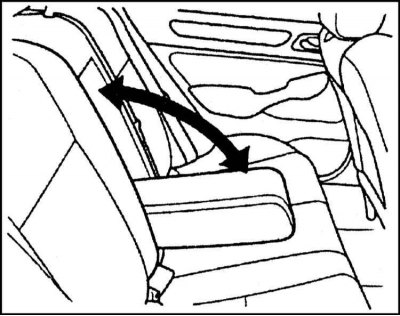
On some models, the rear seat is equipped with a central armrest. The armrest is located in the central part of the seat and is folded out by removing it from a niche in the backrest and lowering it to a horizontal position!
Folding the rear seat backs
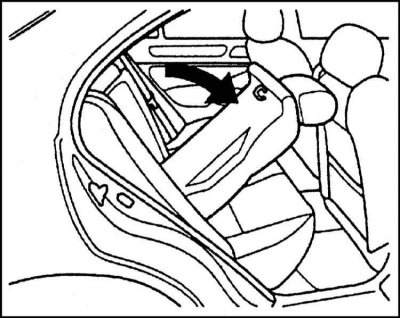
The rear seat back is a split design and consists of two parts that can be folded forward, opening direct access to the luggage compartment and providing the ability to transport long items.
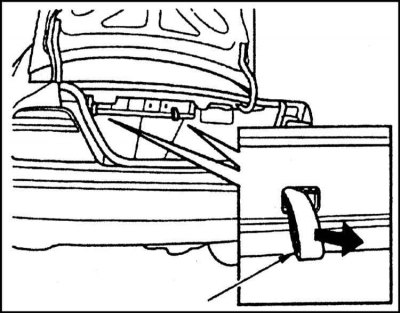
Each of the two sections of the rear seat back can be folded forward independently of the other. To fold one of the sections, open the luggage compartment lid and pull the loop of the corresponding lock towards you.
To fix the seat back in a vertical position, press it against the rear storage shelf, make sure that the back is securely fixed in a vertical position by pulling it towards you by the upper edge.
Make sure that the rear seat belts are in their normal positions when the seatbacks are raised.
Make sure that all items located in the luggage compartment and protruding into the passenger compartment are securely fastened. Remember that sudden braking may cause unsecured cargo to shift spontaneously.
Avoid operating the vehicle with the rear seatbacks folded down and the trunk lid open to prevent exhaust gases containing toxic carbon monoxide (CO) from entering the vehicle interior.
Electric window lifters
On appropriately equipped models, the electric window lifts only operate when the ignition is on.
Each door of the car has a switch designed to control the electric drive of the window regulator of that door. In order to lower the glass, press down on the switch key and hold it down until the glass reaches the desired position, stopping when the key is released. The glass is raised by pressing the switch key up.
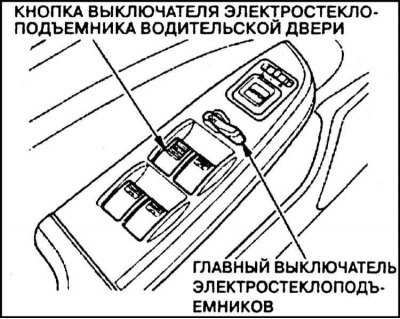
On the left side of the driver's door armrest is the central control panel for the electric window lifters of all the car's doors. To lower the window of any of the passenger doors, press the corresponding switch button down and hold it down until the window reaches the desired position. Raising the window is done by pressing the button up. To raise the window, slide the corresponding button up and hold it in this position. When the window reaches the desired position, release the switch button.
Warning! Be careful not to pinch anyone's fingers or heads when closing the windows! The driver can use the main switch to turn off the power supply to the electric window drive circuits of all passenger doors, thereby blocking control from individual door switches. The main switch and the lock do not affect the electric window drive of the driver's door. When transporting children, it is wise to block the passenger window drives.
It is possible to completely lower the driver's door window (and on some models - completely close it) by pressing the corresponding switch button once (automatic mode). To lower or raise the window in automatic mode, press the switch button in the corresponding direction with force. Stopping can be done at any time by pressing the opposite side of the button.
Partial lowering or raising of the driver's door window is done by lightly pressing the corresponding side of the switch button and holding it down. The window will stop as soon as the button is released.Auto-reverse mode (automatic return of the window to its original position)
If the driver's door window is raised in automatic mode and any obstacle is encountered in its path, the window lifter is automatically locked, after which the window will begin to lower down to its original position.
Even if this feature is available, before using the windows, you must make sure that none of the passengers have their hands or head out of the window.
As a result of an accident, the auto-reverse mode may be switched on spontaneously, which may result in the electric drive failing. In such a situation, the car should be taken to a service station for appropriate repair work.
If the automatic mode fails (for example, due to a discharged battery or its failure), the following actions must be taken with the engine running:
- a) Press and hold the driver's door window switch to further lower the window;
- b) Move the driver's door window switch up and hold it in this position until the window is completely closed, plus a few more seconds;
- c) Make sure that the window lifts operate properly in automatic mode.
(The original is located on the website: HONDABOOK)