
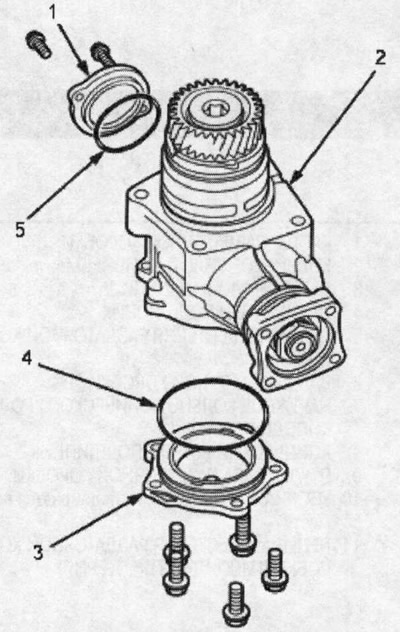
1. COVER A OF THE TRANSFER CASE
2. TRANSFER CASE CASE
3. COVER IN THE TRANSFER CASE
4. O-RING. Replace
5. O-RING. Replace
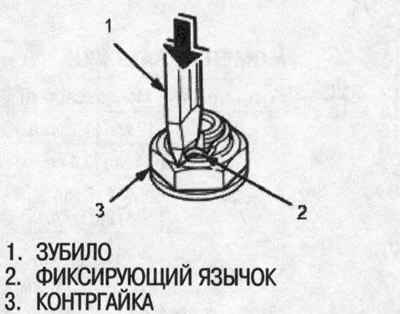
2. Cut off the lock nut retaining tabs using a chisel.
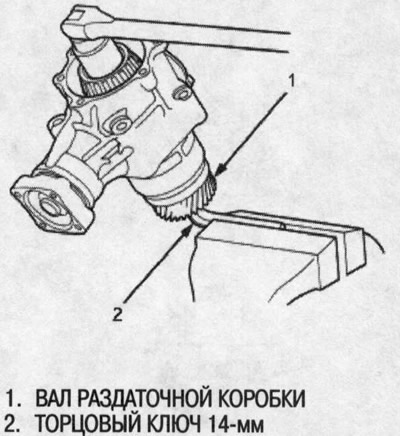
3. Place a 14mm socket wrench on the transfer case shaft from the gear side, then secure the wrench in a vice.
4. Loosen the lock nut on the transfer case shaft. The lock nut on the transfer case shaft has a left-hand thread.
5. Remove the transfer case shaft assembly, transfer case pinion gear, 25mm thrust washer, transfer case shaft bushing and tapered roller bearing from the transfer case housing.
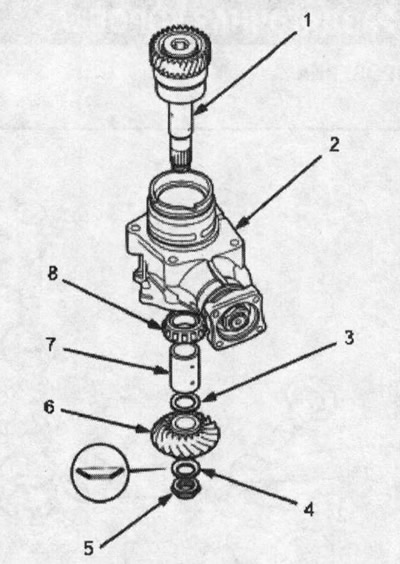
1. TRANSFER CASE SHAFT ASSEMBLY
2. TRANSFER CASE CASE
3. THRUST GASKET, 25 mm, selected on site
4. CONICAL SPRING WASHER Replace
5. LOCK NUT. Replace
6. TRANSFER CASE DRIVE GEAR
7. TRANSFER CASE SHAFT BUSHING
8. TAPERED ROLLER BEARING
6. Secure the transfer case housing in a vice with soft jaws. To avoid damaging the transfer case housing, always secure it in a vice with soft jaws or insert a spacer between the vice and the transfer case.
7. Install the special tool on the coupling flange, then loosen the lock nut on the transfer case driven gear shaft.
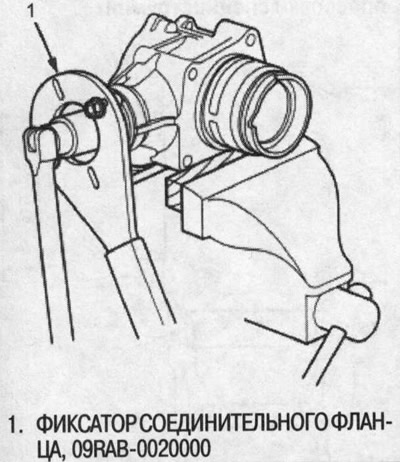
8. Loosen the lock nut on the transfer case driven gear shaft, remove the conical spring washer, protective ring, O-ring seal and connecting flange.
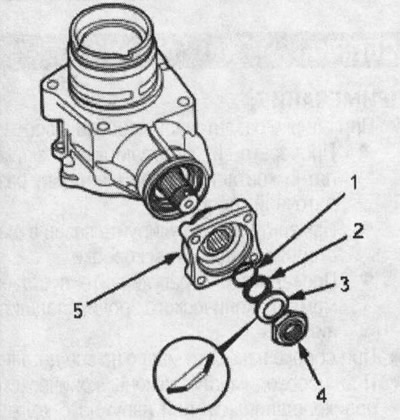
1. O-RING. Replace
2. PROTECTIVE RING
3. CONICAL SPRING WASHER Replace
4. TRANSFER CASE DRIVE GEAR SHAFT LOCK NUT. Replace
5. CONNECTING FLANGE
9. Remove the transfer case driven gear shaft, then remove the sleeve from the driven gear shaft.
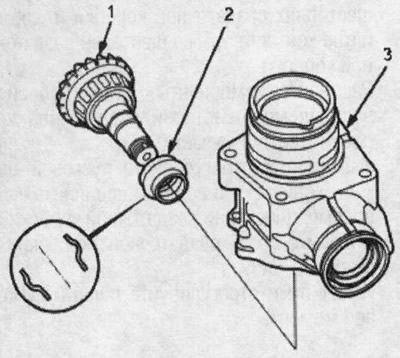
1. TRANSFER CASE OUTPUT GEAR SHAFT
2. TRANSFER CASE BUSHING. Replace
3. TRANSFER CASE CASE
10. Remove the oil seal and tapered roller bearing from the transfer case housing.
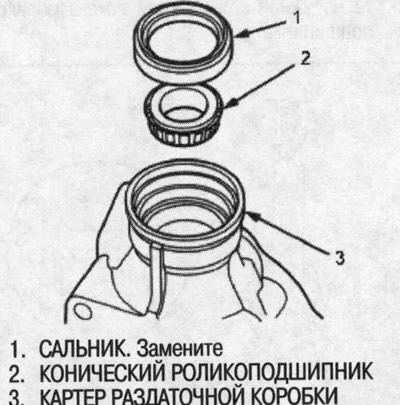
1. SEAL. Replace
2. TAPERED ROLLER BEARING
3. TRANSFER CASE CASE
[The original is located on the website «hondabook.ru»]