
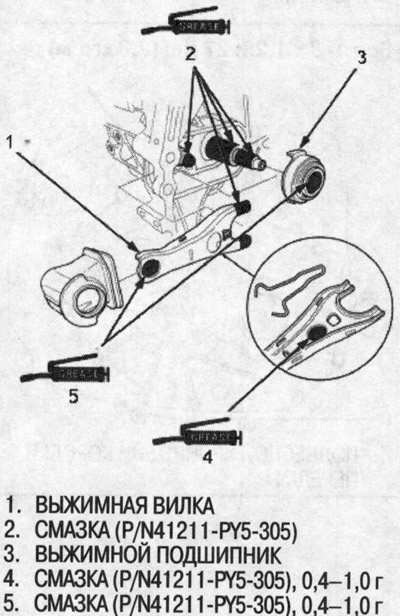
2. Apply HONDA Genuine Urea Grease UM264 (P/N 41211-PY-305) to the release fork, release fork bolt, release bearing and release bearing guide.
3. Install the release bearing, release fork and release fork boot onto the gearbox.
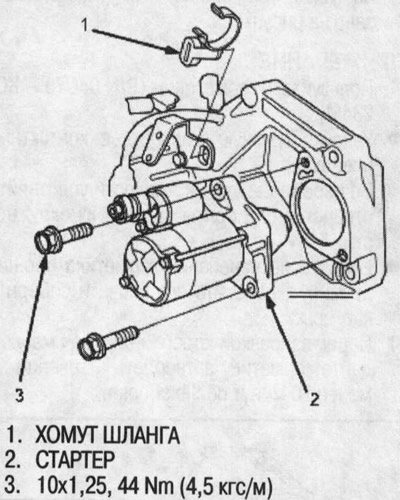
4. Install the starter and hose clamp.
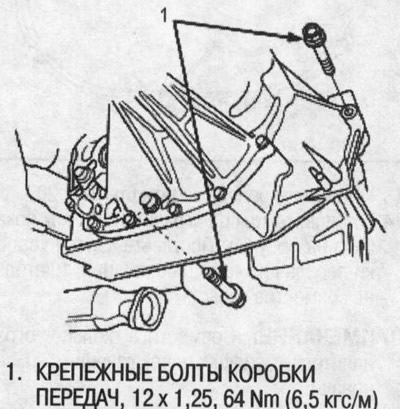
5. Place the gearbox on a jack and raise it to engine level.
6. Install the two lower transmission mounting bolts.
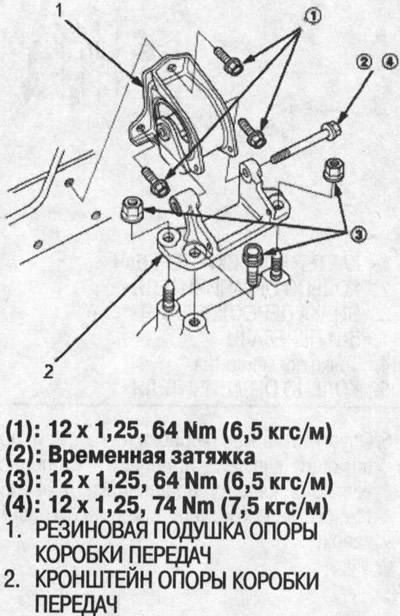
7. Raise the gearbox, then install the support bracket and gearbox support rubber cushion.
- Tighten the mounting bolts and nuts in the sequence shown.
- Make sure the bushings are not twisted or misaligned.
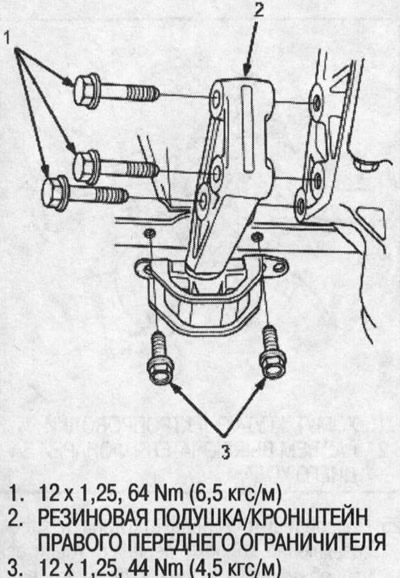
8. Install the right front stop rubber pad/bracket.
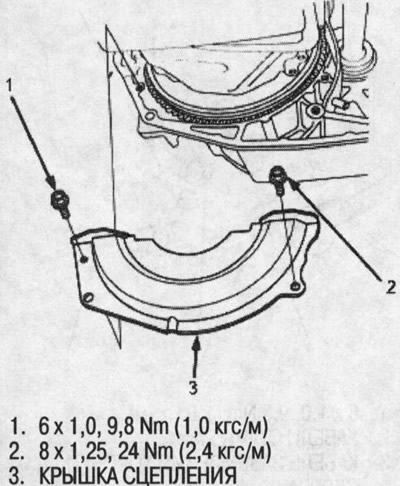
9. Install the clutch cover.
10. Install the engine stiffeners.
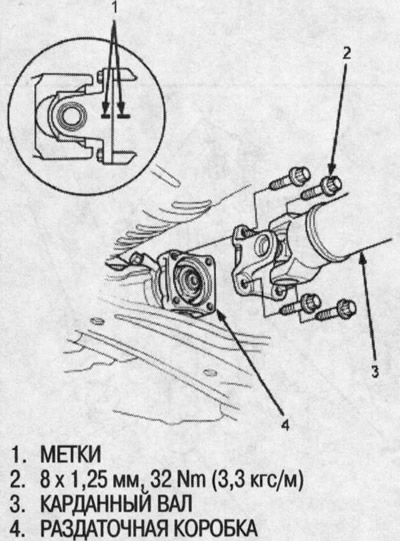
11. Attach the propeller shaft to the transfer case assembly, aligning the marks on the flanges (only on the SEPM model manual transmission).
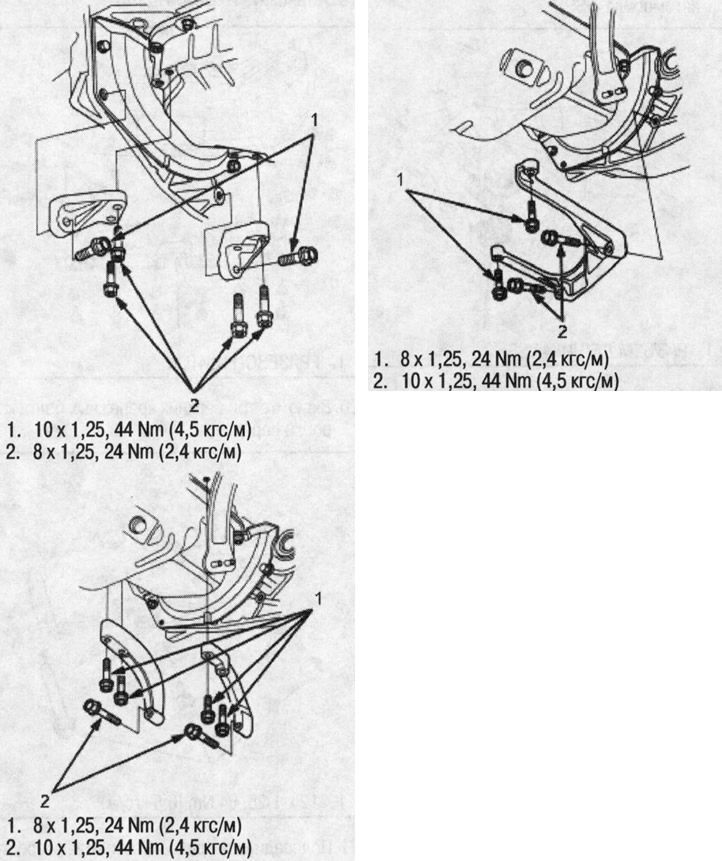
12. Install the rear engine mount bracket/rubber cushion to the clutch housing.
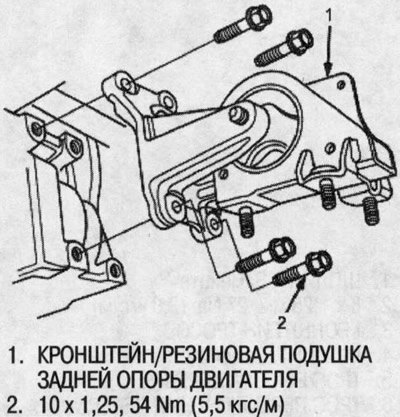
Manual transmission
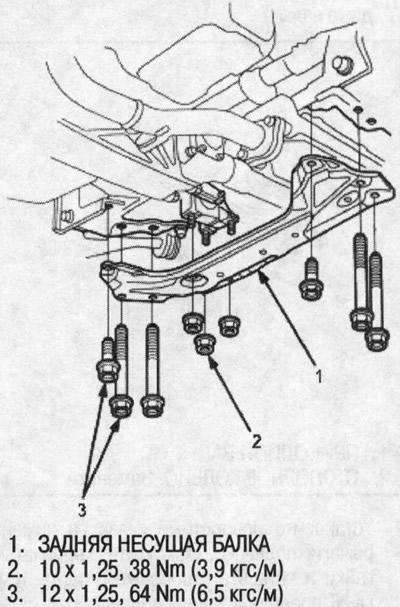
13. Install the rear beam.
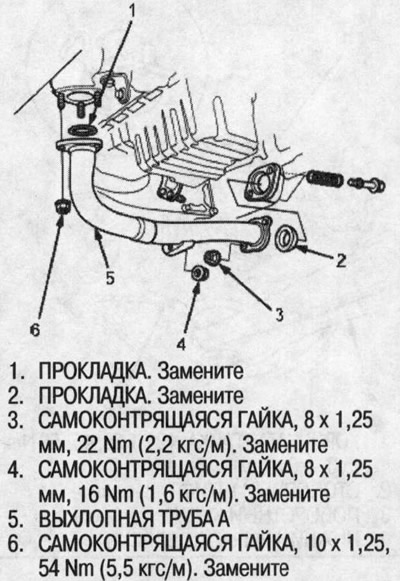
14. Install the exhaust pipe A.
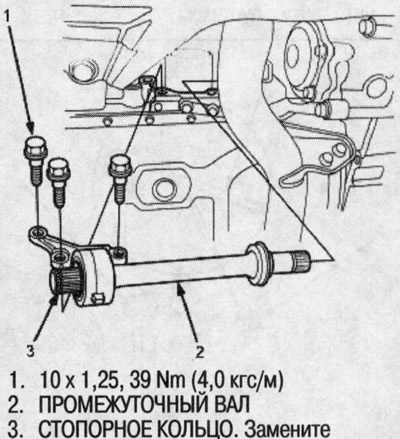
15. Install the intermediate shaft (see chap. "Drive shafts").
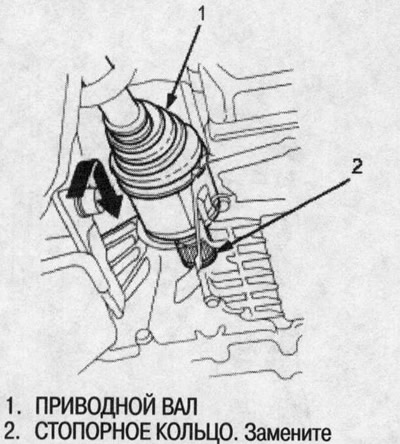
16. Install the drive shafts, using new retaining rings (see chap. "Drive shafts").
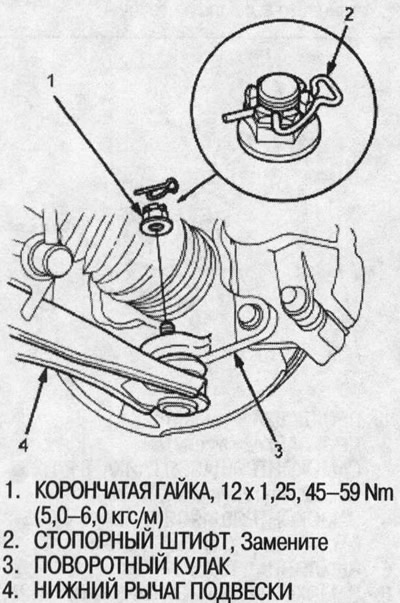
17. Install the steering knuckle onto the lower suspension arms, tighten the castle nuts and insert the locking pins (see chap. "Front and rear suspension").
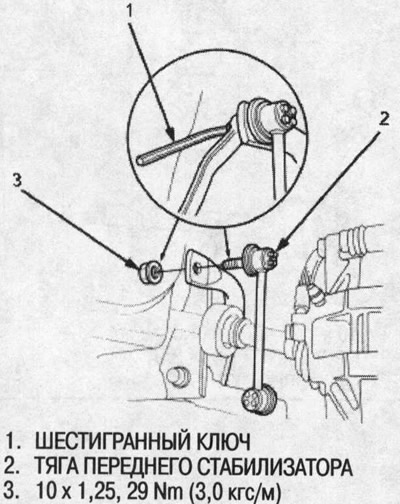
18. Connect the front stabilizer link and the front stabilizer bar, then fix the stabilizer link ball joint pin with an Allen key and tighten the flange nut.
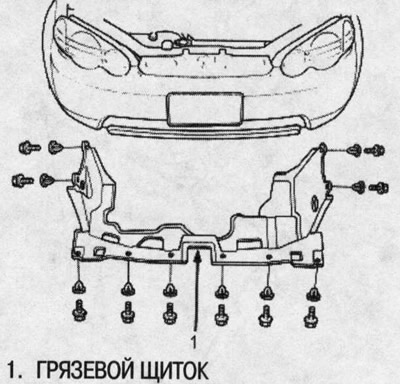
19. Install the mudguard.
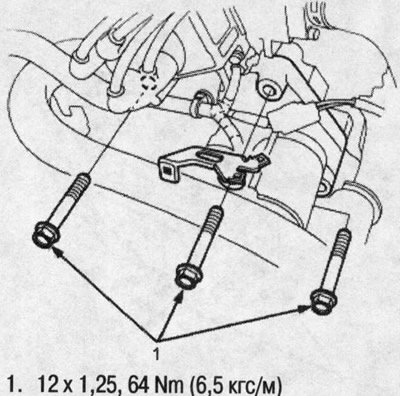
20. Install the three upper gearbox mounting bolts.
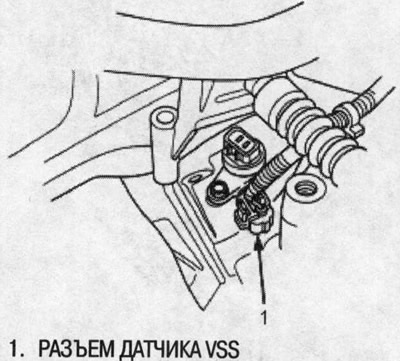
21. Connect the vehicle speed sensor (VSS) connector.
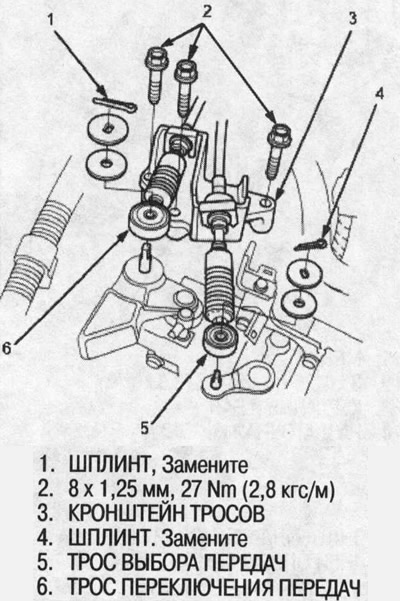
22. Install the cable bracket and cables, turn the shift lever boot so that the hole is facing down.
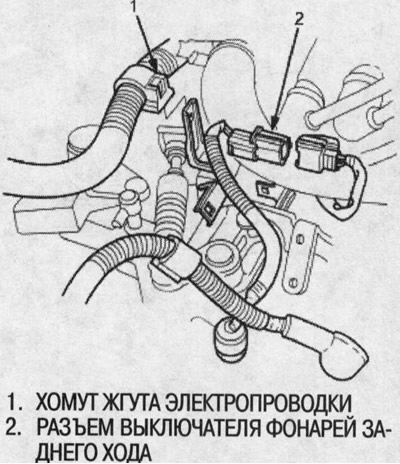
23. Connect the reversing light switch connector.
24. Install the wiring harness clamp.
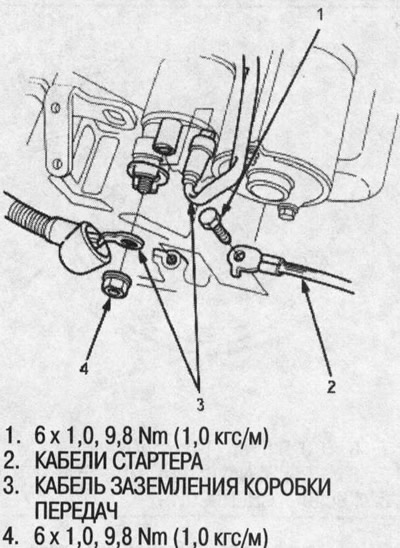
25. Connect the starter cable and transmission ground cable. Make sure the crimped side of the cable lug faces outward.
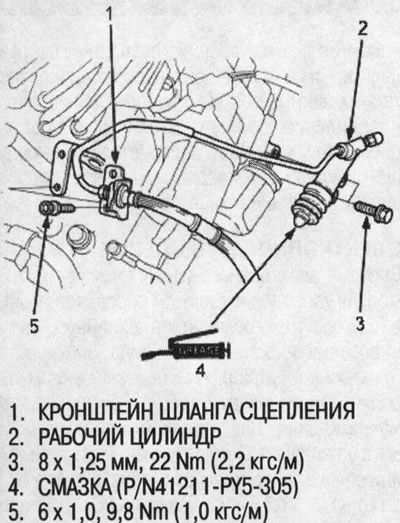
26. Apply HONDA Genuine Urea Grease UM264 (P/N 41211 -PY-305) to the end of the slave cylinder rod. Install the slave cylinder and clutch tube clamp so as not to bend the tube.
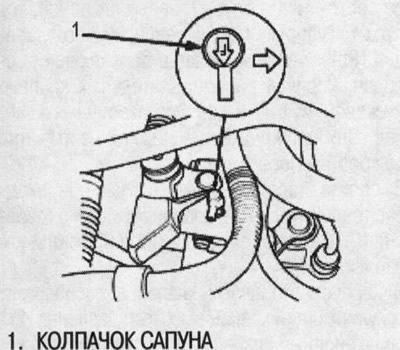
27. Turn the breather cap so that the "F" mark is facing the front of the vehicle.
28. Install the battery. First connect the positive (+) cable, then the negative (-) cable to the battery.
29. Fill with MTF transmission fluid (see above).
30. Road test the car.
31. Check the operation of the clutch.
32. Make sure the gearbox operates quietly and smoothly.
33. Check the front wheel alignment angles (see chap. "Front and rear suspension").