
Examination
1. Remove the air filter housing (see chapter "Maintenance and general check and adjustment procedures").
2. Disconnect the start inhibit switch connector.
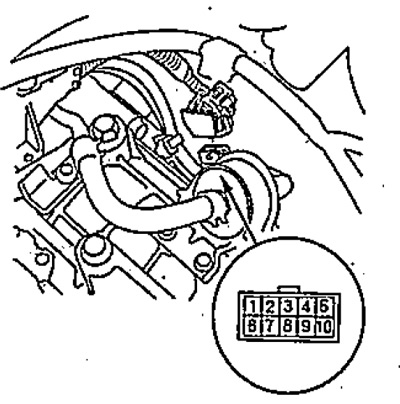
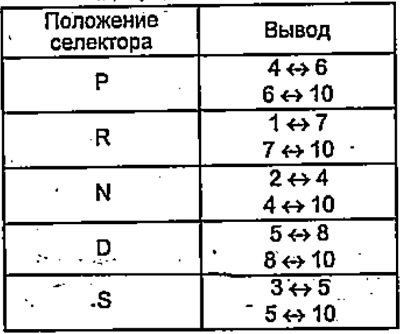
3. Check for continuity between the terminals indicated in the table below, with the selector in the corresponding positions.
Models without manual gear shift mode.
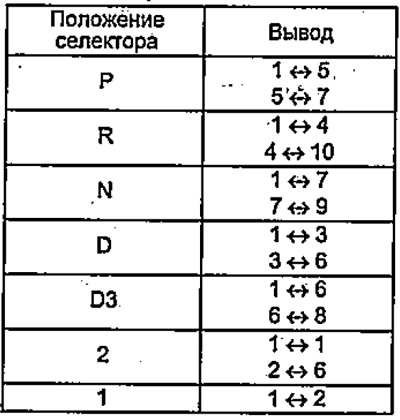
Models with manual gear shift mode.
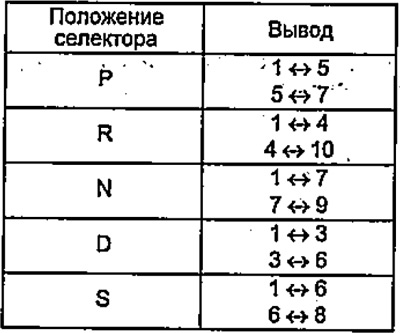
If the conductivity does not correspond to the specified value, then check the conductivity at the terminals of the start inhibit switch.
4. Pull out the parking brake lever, place chocks under the rear wheels and jack up the front of the car.
5. Loosen the start inhibit switch cover bolts and remove the cover.
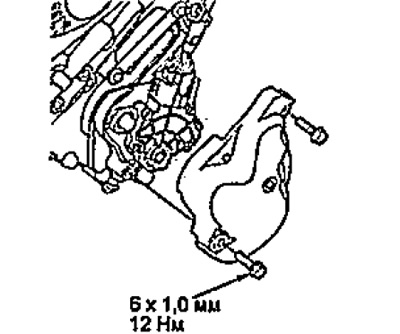
6. Disconnect the connector from the start inhibit switch.
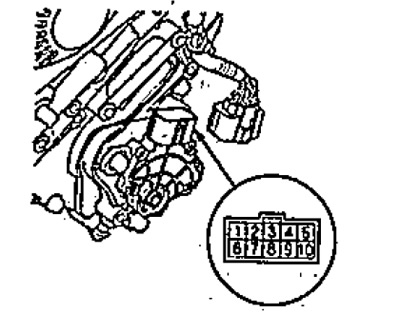
7. Check for continuity between the terminals indicated in the table below, with the selector in the corresponding positions.
Models without manual gear shift mode.
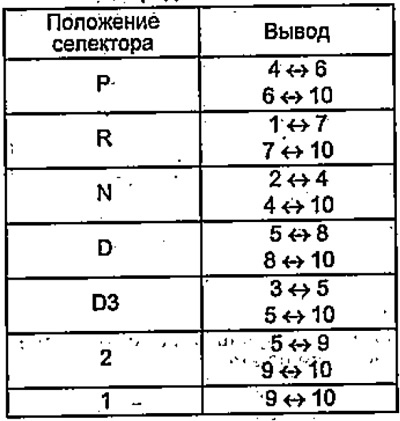
Models with manual gear shift mode.
If the conductivity is normal, replace the wiring harness.
If the conductivity is not normal, check the start inhibit switch shaft.
8. Remove the start inhibit switch and measure the shaft dimensions shown in the figure.
- Size "B" - 6.1 - 6.2 mm
- Size "C" - 1.8 - 2.0 mm
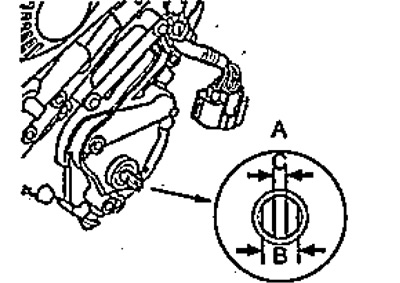
If the dimensions are not within the standard, repair or replace the starter inhibit switch shaft.
If the dimensions are normal, replace the start inhibit switch,
9. Install the removed parts back into place.
Adjustment
1. Pull out the parking brake lever, place chocks under the rear wheels and jack up the front of the car.
2. Set the selector to the "N" position.
3. Loosen the bolts and remove the start inhibit switch cover.
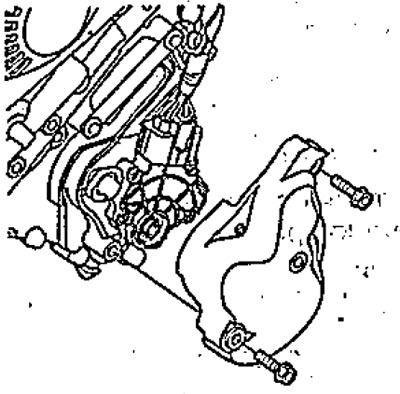
4. Loosen the starter inhibit switch bolts.
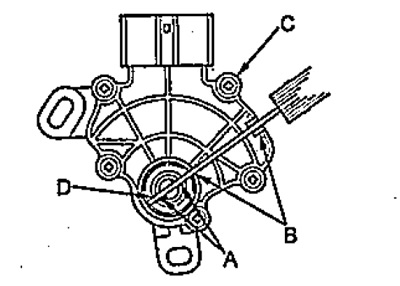
5. Rotate the housing (B) of the start inhibit switch (C), and insert the 2 mm thick feeler gauge (D) into the slots (A) of the start inhibit switch, as shown in the figure.
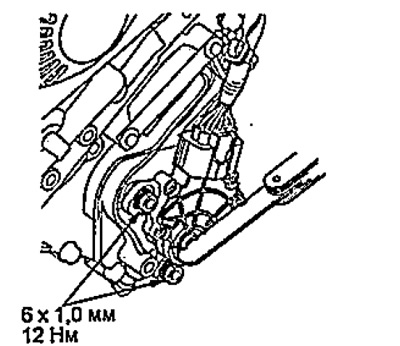
6. Tighten the starter inhibit switch bolts, then remove the probe and connect the connector.
- Tightening torque - 12 Nm
7. Check the connector for rust, dirt and oil, then connect the connector to the starter inhibit switch.
8. Turn on the ignition and, by moving the selector to each position, make sure that the indicator readings correspond to the selector position.
9. Make sure that the engine only starts when the selector is in the "P" or "N" positions.
10. Make sure that the reversing lights only come on when the selector is in the "R" position.
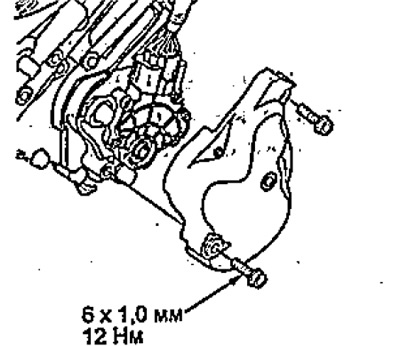
11. Install the starter inhibit switch cover and tighten the bolts.
- Tightening torque - 12 Nm
Replacement
1. Pull out the parking brake lever, place chocks under the rear wheels and jack up the front of the car.
2. Set the selector to the "N" position.
3. Loosen the bolts and remove the start inhibit switch cover.
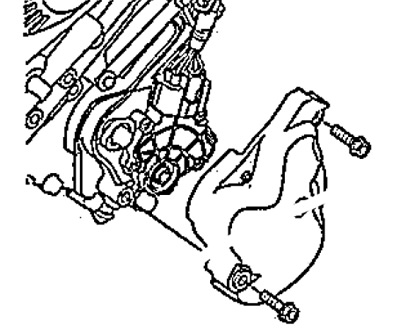
4. Disconnect the start inhibit switch connector, loosen the bolts and remove the start inhibit switch.
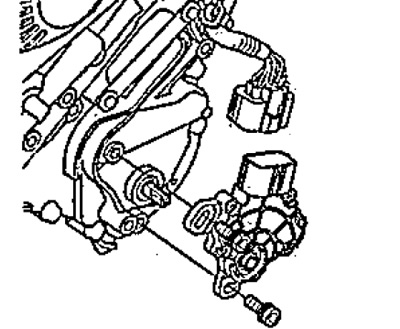
5. Using the diagram as a guide, set the start inhibit switch shaft to the "N" position.
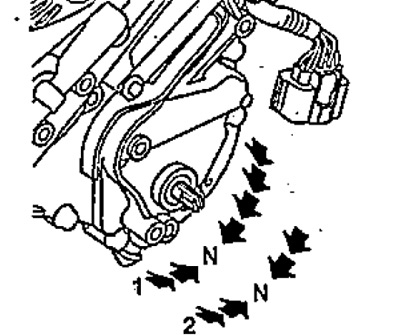
1 - models without manual gear shift mode,
2 - models with manual gear shifting mode.
6. Rotate the housing (B) of the new start inhibit switch (B), and install the 2 mm thick feeler gauge (D) into the slots (A) of the start inhibit switch as shown in the figure.
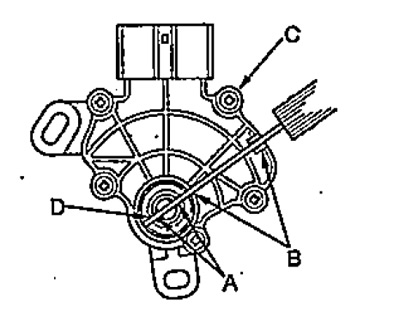
7. Without removing the dipstick (C), install the start inhibit switch (A) on the shaft (B).
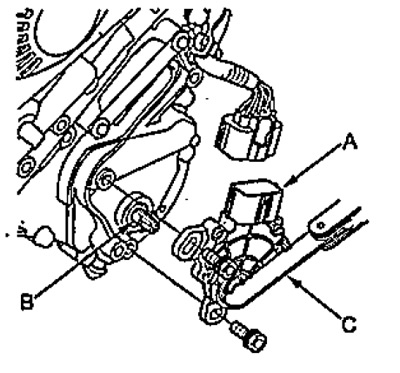
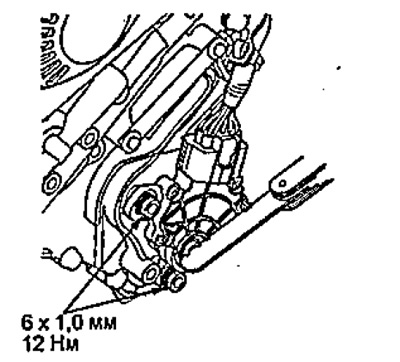
8. Tighten the starter inhibit switch bolts, then remove the probe and connect the connector.
- Tightening torque - 12 Nm
9. Check the connector for rust, dirt and oil, then connect the connector to the starter inhibit switch.
10. Turn on the ignition and, by moving the selector to each position, make sure that the indicator readings correspond to the selector position.
11. Make sure that the engine only starts when the selector is in the "P" or "N" positions.
12. Make sure that the reversing lights only come on when the selector is in the "R" position.
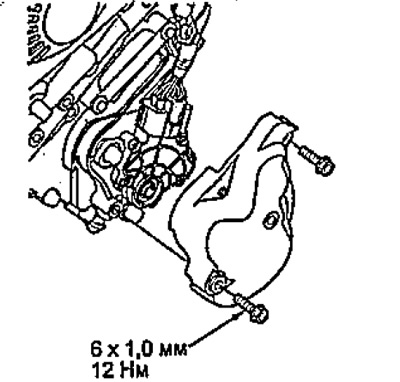
13. Install the starter inhibit switch cover and tighten the bolts.
- Tightening torque - 12 Nm
The original text of the article is located on the website HONDABOOK