
2. Apply some engine oil to the bearing shells.
3. Install the crankshaft into the cylinder block with the #2 and #3 crankpins up.
4. Establish persistent half rings on the fourth radical support of the block of cylinders.
5. Apply fresh engine oil to the threads and flanges of the connecting rod bolts.
6. Install the #1 and #4 cylinder connecting rods on the crankpins. Align the marks on the connecting rod and connecting rod caps, hand-tighten the bolts.
7. Turn the crankshaft clockwise. Install the #2 and #3 cylinder connecting rods to the crankpins. Align the marks on the connecting rod and connecting rod caps, hand-tighten the bolts.
8. Tighten the connecting rod bolts.
Torque:
- stage 1 - 10 Nm
- step 2 - turn 90°
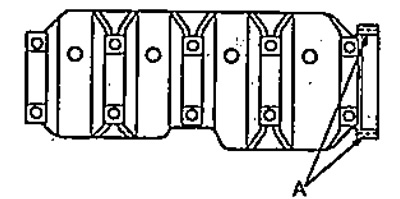
9. Remove the old sealant from the contact surface of the bridge of the main bearing caps,
10. Apply a 1.5 mm diameter bead of sealant along the dotted line.
Note: parts must be installed within the time specified in the instructions for use of the sealant. Otherwise, the sealant must be removed and reapplied.
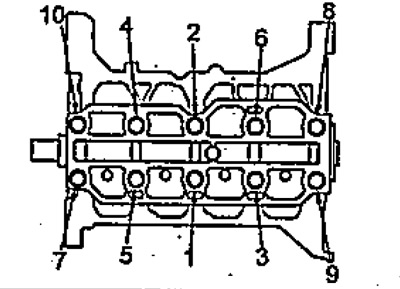
11. Establish the bridge, radical bearings on the block of cylinders.
12. Apply fresh engine oil to the bolt threads and flanges.
13. Tighten bolts of fastening of covers, radical support.
Torque:
- stage 1 - 25 Nm
- step 2 - turn 40°
14. Remove excess sealant from the cylinder block.
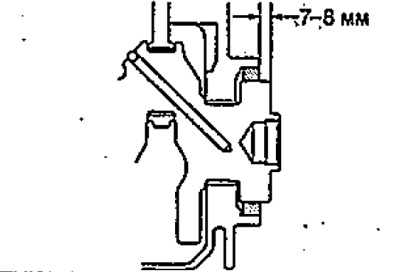
15. Using a sender and a hammer, install the crankshaft rear oil seal into the cylinder block to the required depth.
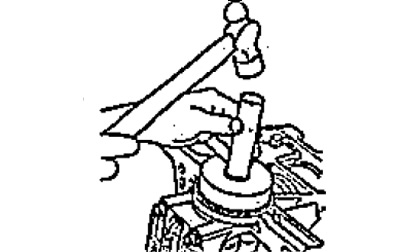
16. Measure a backlash between a cranked shaft and an epiploon.
- The installation height of the crankshaft rear oil seal is 7-8 mm
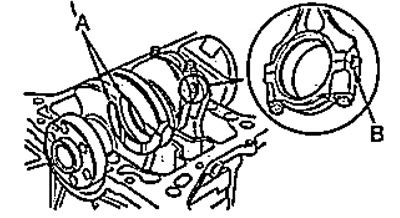
17. Install the pins and new O-ring on the oil pump, align the rotor with the crankshaft and install the oil pump.
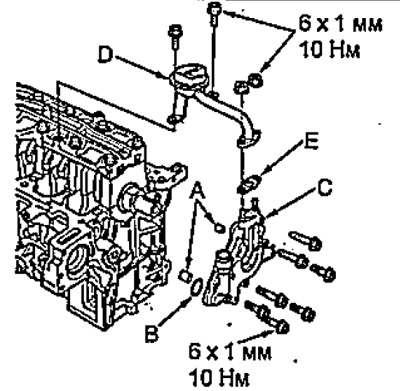
18. Install the oil receiver with a new gasket.
19. Install the cylinder head.
20. Install the timing chain.