
From the inner hinge side
1. Remove the snap ring from the inner joint.
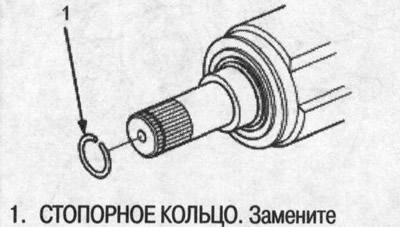
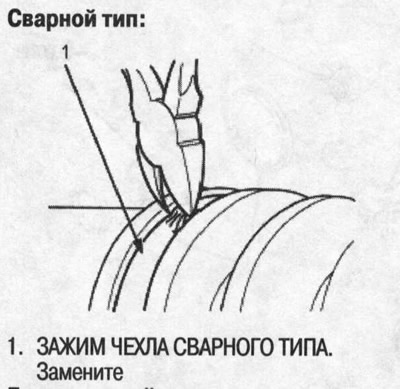
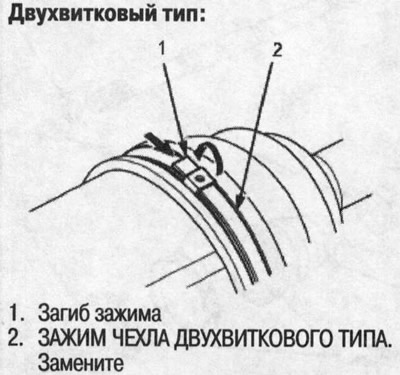
2. Remove the clips from the covers. Be careful not to damage the cover and the dynamic shock absorber.
- If the clamps of the covers are of the welded type, cut them off.
- If the boot clamps are of the two-turn type, bend them back.
 |
 |
3. Mark each roller and the inner joint, indicating the position of the rollers and the grooves in the inner joint. Then remove the inner joint and place it on a napkin. Be careful not to drop the rollers when separating them from the inner joint.
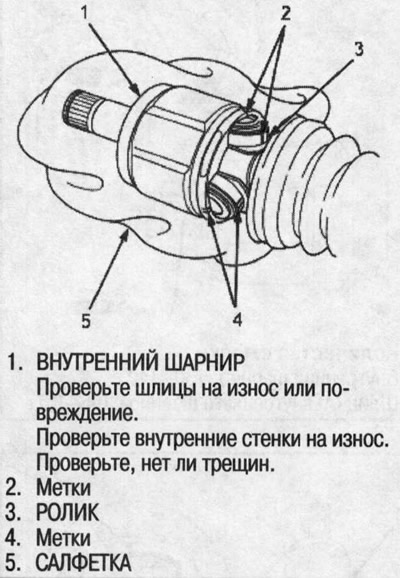
4. Mark the rollers and crosspiece to indicate the position of the rollers on the crosspiece, then remove the rollers.
5. Remove the ring clamp.
6. Place a mark on the crosspiece and drive shaft to indicate the position of the crosspiece on the shaft.
7. Using a bearing puller (available commercially), remove the crosspiece.
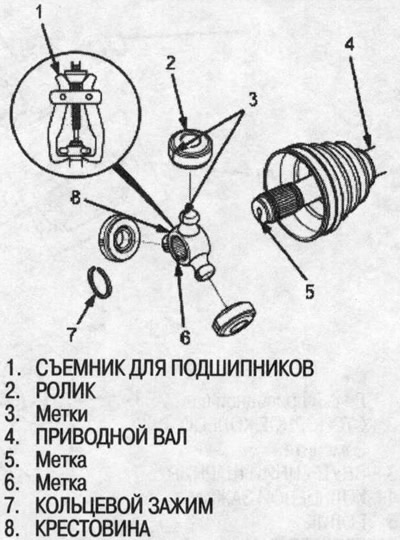
8. To avoid damaging the inner boot and dynamic shock absorber, wrap the drive shaft splines with vinyl tape.
9. Remove the inner cover and dynamic shock absorber. Do not damage the cover and dynamic shock absorber.
10. Remove the vinyl tape.
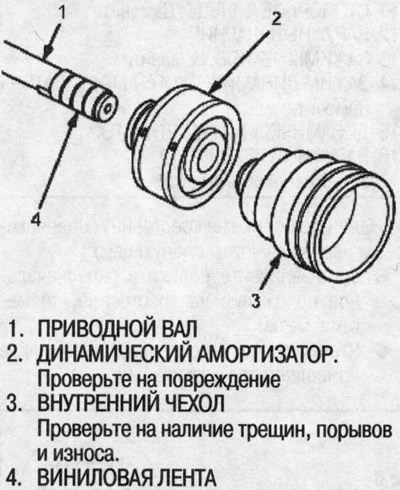
From the outer hinge side
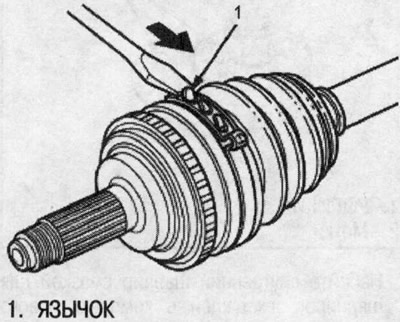
1. Bend the three tabs with a screwdriver, then remove the cover clips. Do not damage the cover and the dynamic shock absorber.
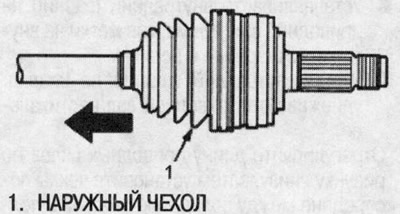
2. Slide the outer cover towards the inner cover. Do not damage the cover.
3. Wipe off grease from the drive shaft and the inner ring of the outer joint.
4. Apply a paint mark to the drive shaft to indicate the position of the outer joint end.
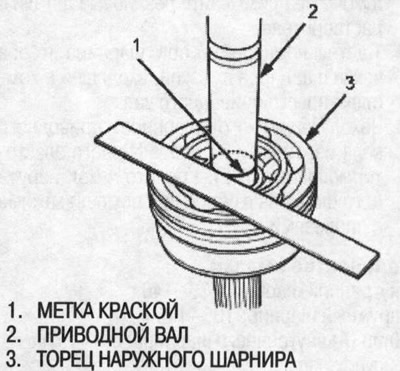
5. Carefully secure the drive shaft in a vice.
6. Using a special tool, remove the outer joint.
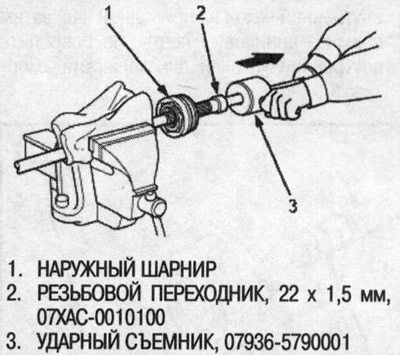
7. Remove the drive shaft from the vice.
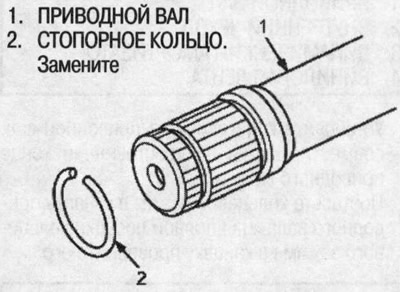
8. Remove the retaining ring from the drive shaft.
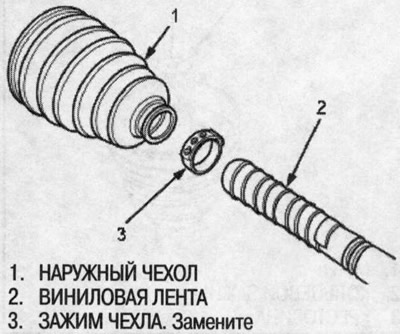
9. To avoid damaging the outer boot, wrap the drive shaft splines with vinyl tape.
10. Remove the outer cover. Be careful not to damage the cover.
11.Remove the vinyl tape.
(The text can be found on the website HondaBook.ru)