


Contents: Gear shift cables ⇊ Gear shift lever ⇊
Warning! The models of vehicles covered in this manual are equipped with a supplemental restraint system (SRS). Before performing any work near the air bag unit, steering column or instrument panel, turn off the SRS to avoid injury from accidental deployment (see Chapter On-board electrical equipment). The SRS circuit wiring is easily identified by the yellow color of the insulation.
Gear shift cables
Note: Even if only one of the drive cables breaks, they are replaced as a complete set (gear selection and shift drive cables are not supplied individually).
1. Unscrew the plastic handle and remove it from the gear shift lever.
2. Remove the console assembly (see Chapter Body).
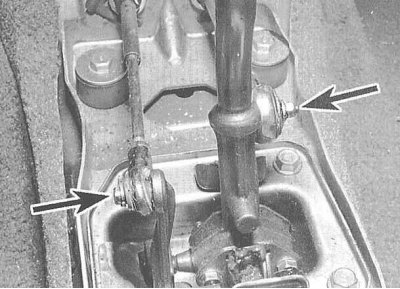
3. Remove the cotter pin, remove the washer and disconnect the drive cable from the shift rod, then loosen the self-locking nut and disconnect the second cable from the base of the gear shift lever.
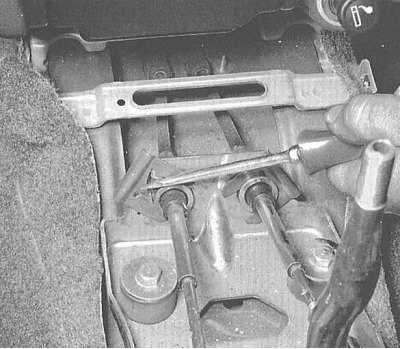
4. Remove the lock washers and release the cables from the gear shift lever mounting bracket.
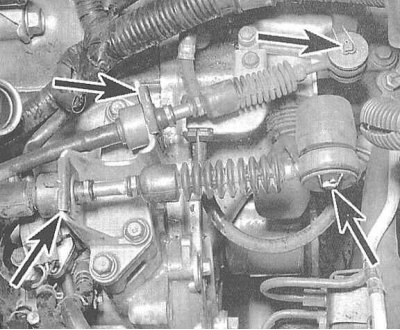
5. Open the hood and locate the front ends of the drive cables). Disconnect the cables from the gear selection and shift actuator levers (the first is located on top of the shift mechanism cover, the second is the assembly). Remove the lock washers and release the cables from the support brackets.
6. Follow the cables back to the engine compartment bulkhead and release the bushings from the latter.
7. Pull the cables out.
8. Installation is carried out in the reverse order. When connecting the front ends of the cables, make sure that the plastic washer is installed between the cable tip and the steel washer (gear selector cable) and between the steel washer and the cotter pin (gear shift cable).
Gear shift lever
1. Unscrew and remove the plastic handle from the gear shift lever.
2. Remove the console assembly (see Chapter Body).
3. Disconnect the gear selection and shift cables from the base of the lever (see paragraphs 1 through 7 above).
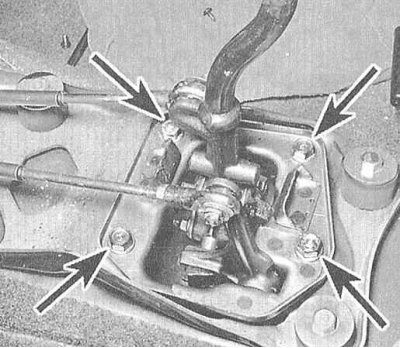
4. Remove the bolts securing the lever base mounting bracket.
5. Remove the shift lever assembly.
6. Installation is carried out in reverse order.
[Original material on the website «www.HondaBook.ru»]