
Contents: Removal ⇊ Installation ⇊
Removal
1. Loosen the nuts of the corresponding wheel. Jack up the front of the car and place it on supports. Remove the wheel.
2. Hold the rod end from turning with the second key and release the lock nut. Unscrew the nut enough to make it possible to mark the position of the end on the exposed threads of the rod.
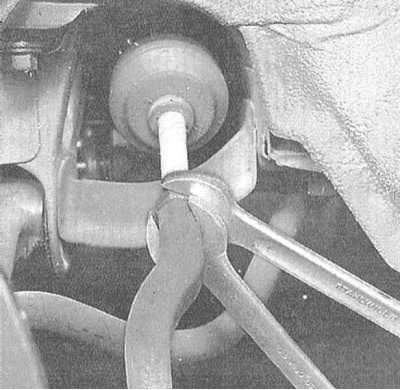 |
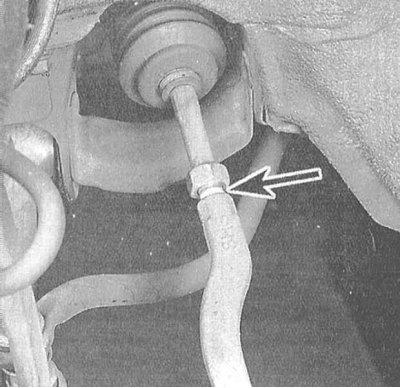 |
3. Remove the cotter pin and loosen the ball joint nut. Do not remove the nut completely yet.
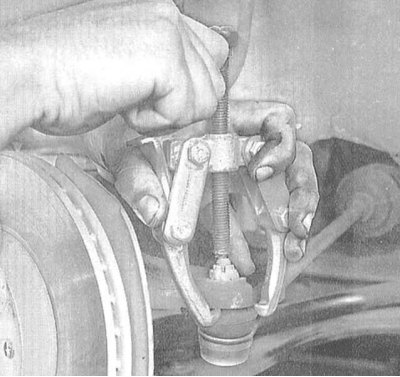
4. Using a 2-jaw puller, release the ball stud from the knuckle assembly arm. Remove the nut and separate the rod from the knuckle.
5. Unscrew and remove the tip from the rod.
Installation
1. Screw a new tip onto the rod (up to the seat mark on the rod threads made during dismantling). Place the ball pin of the tip into the steering knuckle lever. Do not tighten the lock nut of the tip yet.
2. Screw on the ball joint crown nut and tighten it to the required torque. Secure the nut with a new cotter pin.
3. Tighten the tip lock nut securely.
4. Install the wheel, lower the vehicle to the ground and tighten the wheel nuts to the required torque (see Specifications in Chapter Settings and ongoing maintenance).
5. Take the vehicle to a specialist workshop to have the front wheel alignment checked and adjusted.
The article was copied from the website: www.hondabook.ru